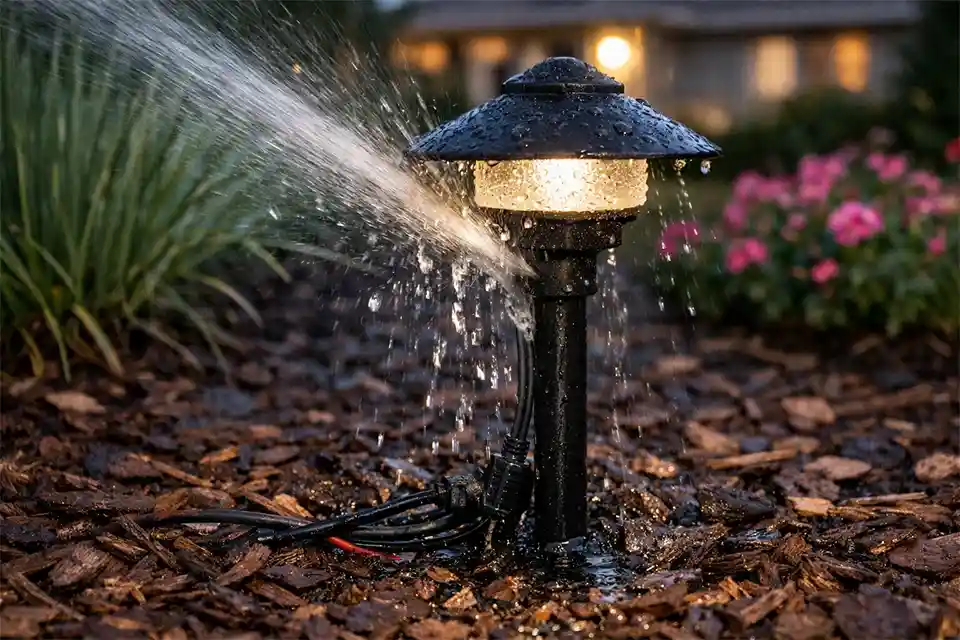
If an outdoor light starts flickering, dimming, or dropping out near a sprinkler zone, the most likely issue is not “outdoor wear” in the general sense. It is repeated spray hitting the same weak point over and over: the lens seal, the stem opening, the socket area, or the splice below grade.
That pattern matters more than people think. Rain usually wets broadly and then passes. A sprinkler can hit one fixture from the same angle for 10 to 20 minutes per cycle, often 3 to 5 times a week, and that repeated impact is what drives moisture inward.
The first checks that actually narrow the diagnosis are simple: is the light taking direct spray, does the soil at the base stay wet longer than 6 to 8 hours, and do symptoms show up within 1 to 24 hours after irrigation? If yes, this is usually a moisture-entry problem first, not a bulb problem first.
Why sprinkler exposure is harder on lights than it looks
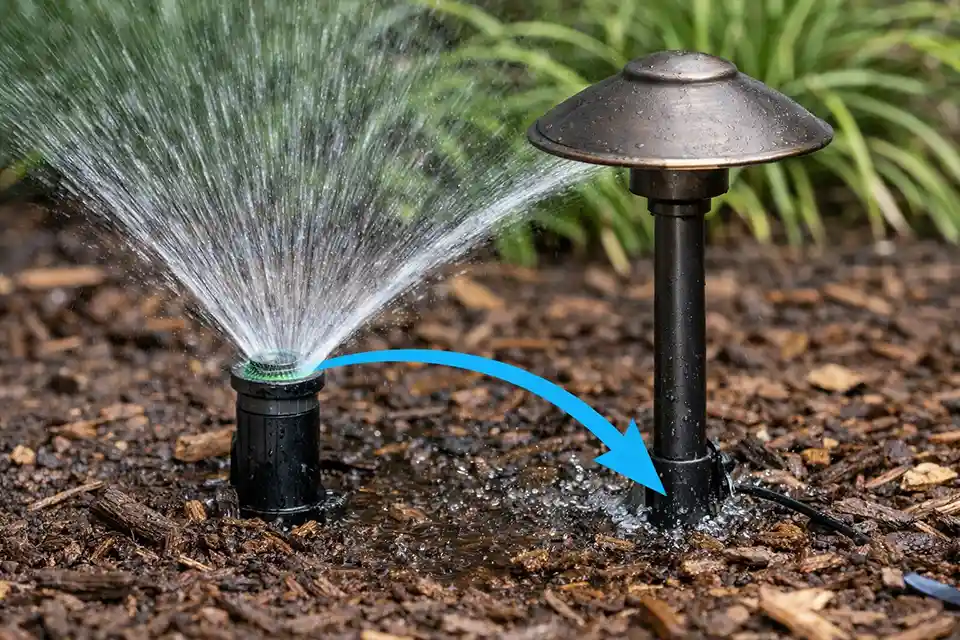
Sprinkler damage is often underestimated because the water does not look aggressive. But the force is not the main issue. Repetition is. A fixture that handles normal weather just fine can still fail when one spray head 2 to 4 feet away keeps wetting the same seam every week.
The problem is not just water on the lens
The visible spray pattern only tells part of the story. Once water lands on the housing, it can track downward along the stem, settle at the cable entry, or keep the soil around the splice wet long after the cycle ends. That is why the visible symptom and the true failure point are often not in the same place.
Layout problems often masquerade as fixture problems
This is where people lose time. They replace the lamp, suspect the photocell, or blame fixture age because the failure looks electrical. But sprinkler-adjacent lighting problems are usually layout failures first and fixture failures second. The water exposure pattern is what needs to be interrupted.
What usually fails first
The first part to go is often not the fixture body itself. It is the connection area. A splice that was only “weather resistant,” a cracked connector, a nicked cable jacket, or an imperfect cable-entry seal usually gives way before the metal housing does. Once moisture reaches contact surfaces, corrosion starts raising resistance. That is when the light becomes erratic rather than simply dead.
The bulb is commonly blamed too early
A bulb replacement can seem to fix the issue, but that result is often misleading. The fixture may simply have dried while you were working on it. If the same light misbehaves again after the next irrigation cycle, the lamp was never the real target.
Where irrigation keeps wetting the connection zone, corroded outdoor wire splices are usually a more likely cause than lamp failure alone.
Cable-entry points deserve more suspicion than surface seals
People naturally focus on the lens gasket because they can see it. In practice, the cable-entry route is often the more important weakness. Repeated spray or saturated soil around that point creates the slow, repeatable kind of moisture intrusion that keeps coming back even when the fixture exterior looks dry.
What people usually misread
Not every wet-looking fixture is a failed fixture. Some signs are cosmetic. Others actually change the repair decision.
Condensation is only meaningful when it lingers
A little fogging inside a fixture can happen in humid weather and clear on its own. The better threshold is persistence. If droplets remain inside for more than 24 to 48 hours after the surrounding area has dried, or if moisture returns after nearly every watering cycle, that is no longer normal ambient humidity.
Damp mulch is not the same as a wet failure zone
Freshly watered mulch is expected. A base area that stays saturated for 8 to 24 hours is not. In clay-heavy beds or low spots, the real problem may sit 12 to 24 inches away from the point where the spray visibly lands. The fixture gets blamed because it is easy to see, while the buried connection sits in wet soil and keeps causing the same symptom.
That same wet-zone behavior is often part of the broader drainage pattern described in water around landscape lights in garden beds, where saturation matters just as much as direct spray.
Splashback gets underestimated all the time
The sprinkler does not have to hit the light head-on. Water bouncing off edging, pavers, stone, or compacted soil can keep the lower stem and connector area wet enough to keep corrosion going. It looks minor in the moment, but over a full season it can do the same kind of damage as obvious overspray.
What to check before replacing anything
Good troubleshooting here is mostly about refusing to react to the wrong signal. A wet lens alone is not enough. A dead bulb by itself is not enough. The question is whether the irrigation pattern lines up with the failure pattern.
| Check | Healthier condition | Failing condition | What to do first |
|---|---|---|---|
| Spray contact | No direct hit during irrigation | Direct spray for 5+ minutes per cycle | Adjust nozzle or move fixture |
| Drying time | Base dries within 2 to 6 hours | Area remains wet beyond 8 hours | Improve drainage or raise connection |
| Lens condition | Fogging clears within 24 hours | Droplets persist 24 to 48 hours | Inspect for intrusion and internal corrosion |
| Connector surfaces | Clean brass or copper, no deposits | Green, white, or black corrosion | Rebuild the splice properly |
| System behavior | Stable after watering | Flicker, shutoff, or trip within 1 to 24 hours | Trace moisture path before replacing parts |
That order matters because it prevents a common mistake: treating a water-path problem like a bad-fixture problem. If part of the system starts dropping out specifically when irrigation runs, moisture exposure is usually a stronger lead than simple age. In broader failures, that pattern can overlap with outdoor lighting losing power when irrigation starts.
Pro Tip: Run one irrigation cycle in daylight and watch it from start to finish. Five minutes of direct observation usually beats an hour of nighttime guessing.
The failure mechanism that actually matters
The symptom may be flicker, dimming, a dead fixture, or a nuisance trip. The mechanism is usually more specific: water reaches a conductive point that should stay relatively dry, corrosion forms, resistance rises, and the system becomes unstable.
In low-voltage systems, small corrosion can cause big inconsistency
It does not take dramatic damage. Corrosion on a brass contact, a splice conductor, or a socket tab can be enough to create intermittent output. The light may still work, just not reliably.
In line-voltage fixtures, leakage can show up before full failure
Here the safety side matters more. A wet connection may start tripping protection devices before the fixture fully dies. That makes nuisance tripping an early warning, not just an annoyance.
“Outdoor rated” is one of the most overestimated phrases in this category
Outdoor-rated does not mean built for close-range directional spray from the same point every week. That is a different type of stress. A fixture can be appropriate for rain exposure and still be poorly positioned for irrigation exposure.
This also explains why some fixtures keep misbehaving for 12 to 72 hours after watering stops. Surface moisture may dry fast, but trapped moisture in a splice, cable-entry point, or lower cavity does not.
That same repeatable moisture path is closely related to why an outdoor light works fine until it rains, but sprinkler exposure is usually easier to trace because it follows a schedule.
What to fix first
The right order matters more than the exact repair method. If the sprinkler still reaches the fixture, everything else is secondary.
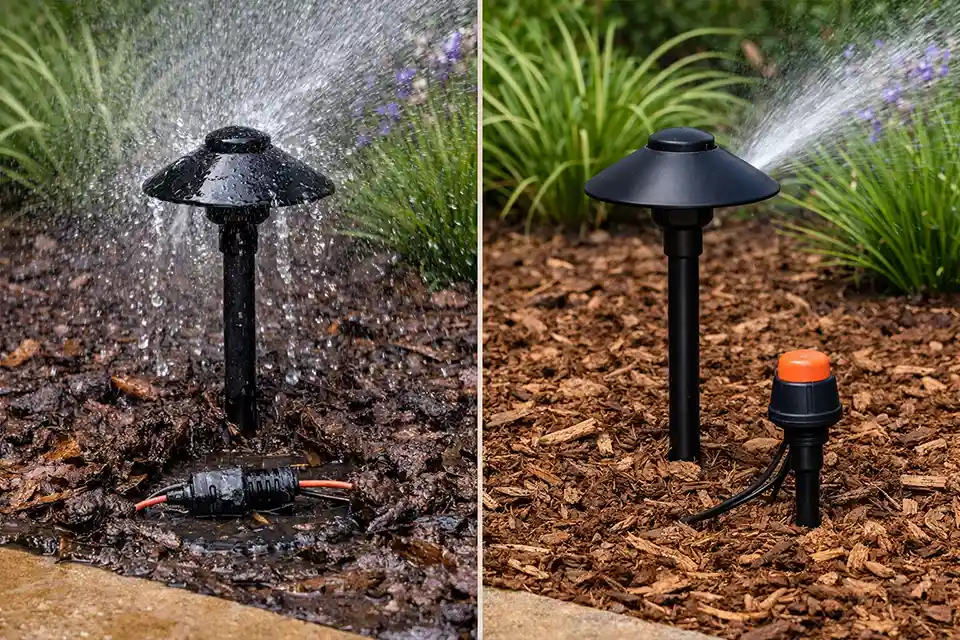
First stop the spray from reaching the weak point
In many yards, moving the fixture 6 to 12 inches or reducing the nozzle throw by 1 to 2 feet is enough to break the pattern. Those are not universal measurements, but they are a practical starting range in typical residential beds. If direct spray continues, resealing and reconnecting usually buy only temporary improvement.
Then deal with the connection zone
After the exposure pattern changes, inspect the splice and cable route. If corrosion is limited to the connector and the fixture body is still dry inside, a proper waterproof reconnection may be enough. If the area still ponds water after every cycle, the connection should be raised or the drainage corrected. A waterproof splice sitting in standing moisture is still a bad installation.
Do not confuse a neat-looking repair with a durable one
Random silicone on exterior seams is one of the most common time-wasting fixes in this category. It can make the fixture look addressed without changing the actual moisture path. If water is coming from below, along the stem, or through the cable entry, surface sealant does very little.
When repair stops making sense
There is a point where continued repair becomes the expensive option rather than the practical one. If you have already redirected the spray, rebuilt the splice correctly, and the fixture still shows internal moisture or unstable output within a week or two, the problem has probably moved beyond a simple connection issue.
Signs the fixture itself is already compromised
Repeated internal condensation, corrosion visible inside the housing, unstable output across multiple watering cycles, or obvious socket damage usually mean the fixture has crossed from exposure issue into component deterioration. Once that happens, replacement often makes more sense than patching.
Moisture entering through wiring routes tends to worsen over time, which is why water getting in through cable entry points is usually a more important diagnosis than surface sealing.
Sometimes the real fix is relocation, not replacement
In older yards, irrigation and lighting are often installed years apart with little coordination. That is how fixtures end up at the edge of spray zones or directly above shallow buried connections in wet beds. In that situation, replacing the light with the same model in the same spot often recreates the same failure. Relocation is sometimes the real repair.
The key distinction is simple: if changing parts does not change the moisture path, the failure pattern usually comes back.
For broader outdoor electrical safety guidance in wet areas, see the Electrical Safety Foundation International’s GFCI guide.