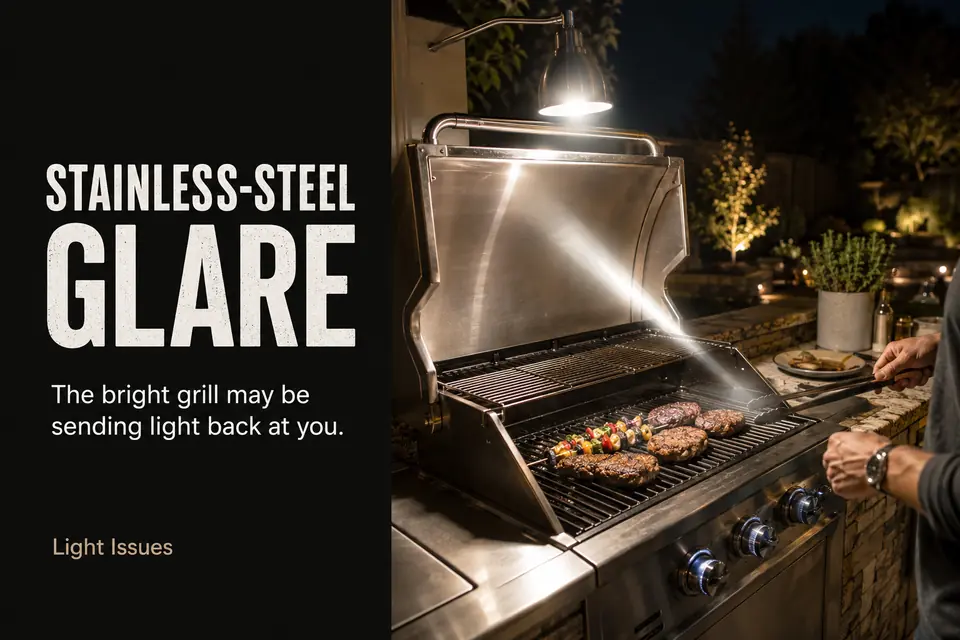
The first decision is not how bright the grill light should be. It is whether the cook sees the emitter directly, receives a concentrated reflection from the stainless steel, or experiences both at once.
A grill can look brilliantly illuminated from across the patio and still be uncomfortable to use. Smooth panels, polished trim, handles, and curved lids can complete a fixture-to-steel-to-eye path that becomes obvious only when someone stands close enough to cook.
Useful task light should reveal the food, grate, controls, and tools without placing the source or its strongest reflection in the normal eye line. Find that glare path before reducing output, changing color temperature, or committing to a mounting position. Otherwise, the grill may become dimmer without becoming more comfortable.
Stainless Reflection: Why the Grill Sends Light Back at You
Treat stainless-steel glare as a sightline problem, not as proof that the entire grill is receiving too much light. Stainless steel is not a perfect mirror, but its smoother surfaces can return a concentrated hotspot that is much more disruptive than the softer illumination surrounding it.
The hotspot may not appear from the patio table. It emerges when the cook steps into the particular sightline connecting the fixture, reflective surface, and eyes. Moving several inches left or right may cause it to intensify, travel across the lid, or disappear. That movement is the first useful diagnostic clue.
Curved components make the effect less predictable. A rounded handle or lid edge can redirect light differently as the cook leans forward, opens the grill, or reaches toward a side shelf. A flat control panel may create a more stable reflection, while polished trim can produce several smaller bright points.
Find the Bright Point, Not Just the Bright Grill
Stand where you normally cook and locate the exact surface sending light toward you. Check the lid, handle, control panel, side-shelf trim, and any stainless backsplash. If one surface produces the offending hotspot, lowering the output for the entire grill sacrifices visibility without addressing the responsible sightline.
A dark grate is a different symptom. If the grill exterior and controls are bright but the cooking surface remains difficult to read, the beam may be landing on the wrong plane. That is closer to a grill-light shadow and coverage problem than reflected glare, although the two failures can occur together.
The Floodlight Mistake Behind Most Grill Glare
Do not solve stainless-steel glare by automatically adding a wider or brighter floodlight. A floodlight is designed to cover an area, while a grill needs controlled light on a specific work plane.
A wide beam may strike the lid, grill face, backsplash, cook, and nearby surfaces simultaneously. From a distance, this reads as generous illumination. From the cooking position, it creates more reflective surfaces without guaranteeing that the usable grate is easy to see.
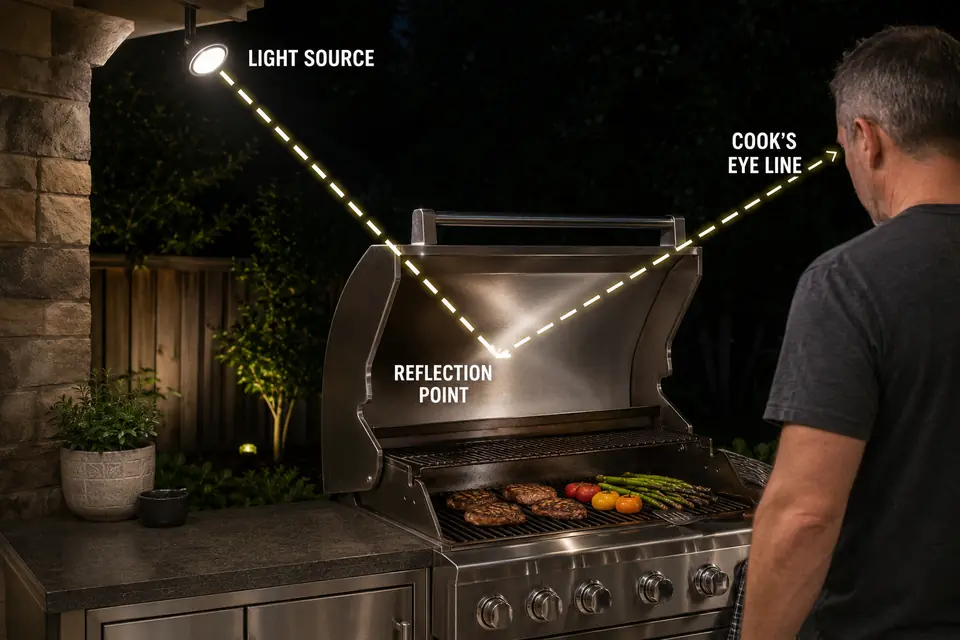
A high fixture behind the cook is especially vulnerable to this failure. Its beam can strike the polished grill face at an angle that returns a hotspot toward the cook. If the emitter also becomes visible when the cook turns or looks up, the setup produces two separate sources of discomfort: direct fixture glare and reflected glare.
Turning down the floodlight often gives a disappointing result. The hotspot weakens, but the grate and tools also become harder to see because the underlying alignment has not changed. Increasing the output does the opposite, reaching more stainless surfaces and creating additional reflection opportunities.
This follows the same mechanism seen with outdoor lights that create glare: light reaching the eye can reduce comfortable visibility even while the space appears brighter.
Area lighting should help someone approach and move around the grill. Grill task lighting should serve the cooking surface. One fixture may contribute to both jobs, but broad coverage should not be mistaken for controlled task visibility.

Trace Face Glare From the Cooking Position
The only useful diagnostic viewpoint is the one where the discomfort occurs. Stand at the normal center cooking position after the surrounding area has become dark rather than judging the light while crossing the patio or looking through a window.
Begin with the lid closed. Without staring into the light, look naturally across the control panel, handle, trim, and lid. Move slightly left and right. A bright patch that changes rapidly with your position usually indicates a reflection tied to a narrow sightline.
Then open the lid fully. This changes both the reflective surfaces in view and the route the light takes toward the grate. An existing hotspot may disappear, but the raised lid can expose polished edges or redirect light that was harmless while closed.
Separate Direct Glare From Reflected Glare
Temporarily block your view of the fixture with an opaque card or your hand, staying well away from hot surfaces and electrical components. If the discomfort disappears even though the stainless hotspot remains visible, direct view of the emitter is probably the dominant problem. Shielding or repositioning the source should receive priority.
If the emitter is hidden but the concentrated reflection remains uncomfortable, the stainless sightline is dominant. If both cause discomfort, the correction must control the beam and move the source out of normal view.
Check nearby seating separately from its actual seated height. This is a secondary boundary test, not an attempt to make the grill light serve the entire patio. Correcting the cook’s sightline should not leave an exposed emitter aimed toward someone sitting nearby.
Warm Task Light Helps, but It Cannot Fix a Bad Angle
Use light warmth as a finishing adjustment, not as a substitute for correcting the glare path. A warmer task light can look less stark against stainless steel and deep surrounding darkness, but it cannot hide a visible emitter or remove a concentrated reflection from the cook’s eye line.
A warm hotspot is still a hotspot. Correct the mounting relationship, beam direction, and shielding first. Then fine-tune warmth and output while confirming that food color, surface texture, and the front and rear grate remain readable.
There is no single color temperature that compensates for every grill finish, fixture design, or patio background. The relevant judgment is whether the controlled light feels comfortable without weakening recognition on the cooking surface.
This is also why brighter outdoor lighting can make visibility worse. Comfort depends on where the light lands and what reaches the eye, not merely on how much output the fixture produces.
The Side-Mount Advantage
Choose a side position to break the straight fixture-to-grill-to-cook axis. Controlled light arriving from an offset direction can reach the grate while directing the strongest stainless reflection away from the cook’s central sightline.
“Side mounted” does not describe one universal wall position. It describes the light’s relationship to the grill and its user. The better side may change with grill orientation, doors, walls, preparation surfaces, and the cook’s normal movement.
Keep the Source Controlled and Out of View
Moving a bare, exposed source to the side is not enough. The emitter should remain outside the cook’s normal forward view and ordinary side glance. Shielding or a defined cutoff should contain the beam so it reaches the work surface without spilling directly toward the face.
Test coverage with the lid fully open. A side light may reveal the front grate while leaving the rear grate behind the lid or inside a darker band. Perfectly uniform display lighting is unnecessary, but both usable grate areas should remain readable without recreating the glare path.
The cook’s body can also block a side beam. Stand naturally, use tongs, and reach toward both side shelves. If ordinary movement repeatedly throws the grate into shadow, test the opposite side or a different offset before finalizing the position.
Avoid choosing a universal mounting height, distance, or angle from a generic diagram. The successful relationship is the one that keeps the emitter and reflected hotspot away from the eyes while preserving usable grate visibility.
If the same light misses an adjacent preparation surface, treat that as a separate outdoor kitchen counter-lighting issue. Widening the grill beam until it covers everything can bring the original glare back.
Run a Comfort Test Before You Finalize the Light
Do not finalize the mounting position because the grill looks balanced from across the patio. The correction succeeds only when it remains comfortable during the movements required to cook.
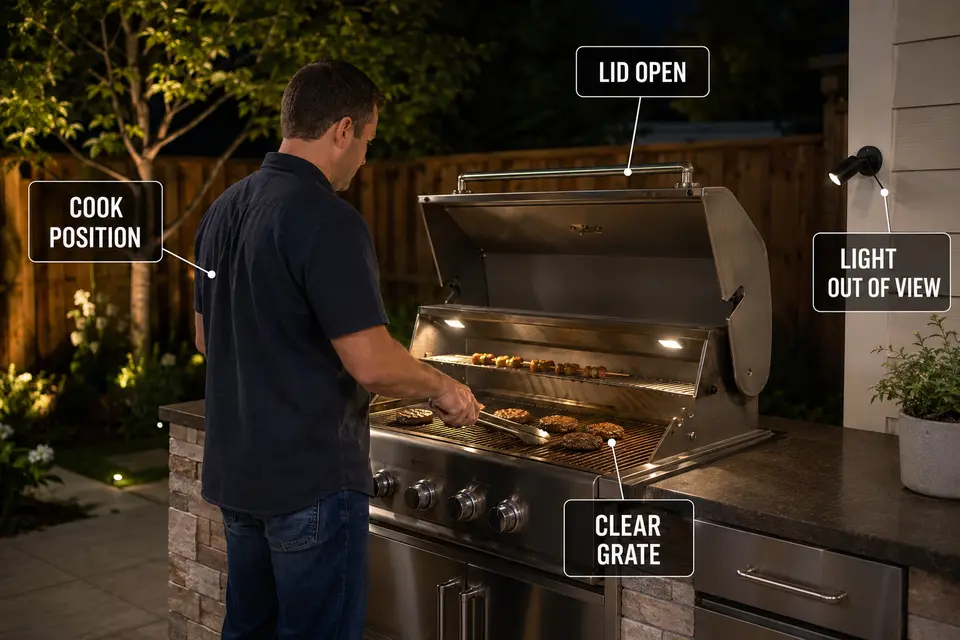
- Stand at the normal cooking position after the surrounding darkness has settled, then check separately for direct fixture glare and stainless reflections.
- View the grill with the lid closed and fully open, confirming that the front and rear usable grate areas remain readable.
- Turn naturally toward tools, preparation space, and nearby seating to see whether the emitter or a reflected hotspot enters an ordinary side glance.
- Adjust only one variable—aim, shielding, side position, or output—then repeat the same movements so the effect of that change remains clear.
- Repeat the test from any second position commonly used for turning food, reaching controls, or working from the opposite side.
Finalize the light only when it works from the cooking position. Placement and beam control should interrupt the fixture-to-steel-to-eye path first; brightness and warmth can then be adjusted without sacrificing comfortable grate visibility.
For broader guidance on limiting outdoor light to where it is needed and avoiding overlighting, see the Five Principles for Responsible Outdoor Lighting from the Illuminating Engineering Society.