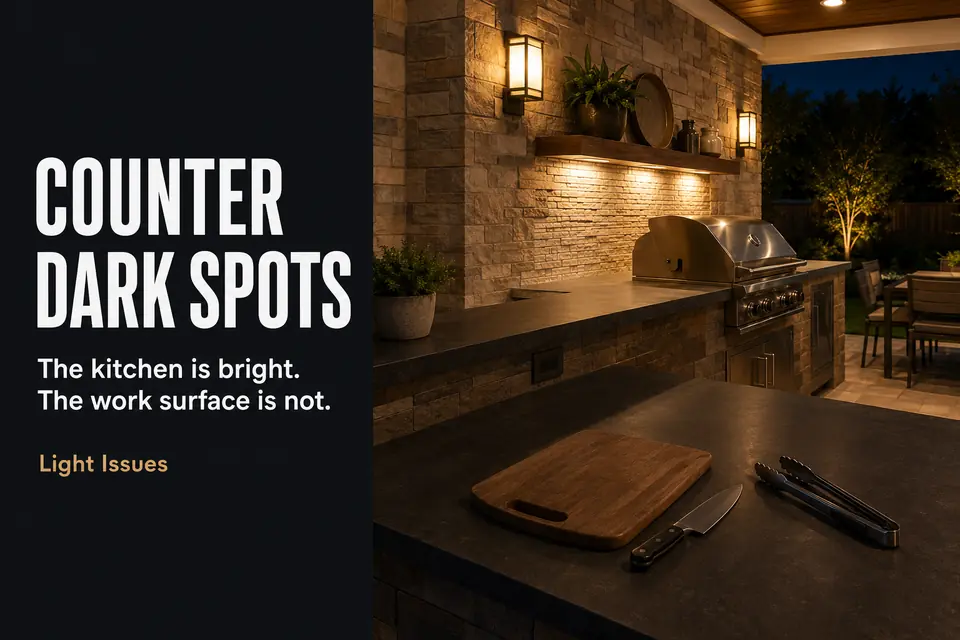
An outdoor kitchen can look fully illuminated from across the patio and still fail at the counter. The backsplash glows, cabinet faces remain visible, and light reaches the floor—but the cutting board, sink basin, and ingredients disappear when someone begins working.
The useful diagnosis is not “bright enough or not.” It is whether the dark area stays fixed, follows the person standing at the counter, or only appears dark because nearby metal and vertical surfaces reflect more light. Those three patterns point to different corrections.
A fixed patch usually means the beam misses part of the work plane or is clipped by an overhang. A shadow that moves with your shoulders or arms means your body interrupts the light. A bright faucet beside a dark sink basin means reflected highlights are disguising poor task coverage.
Place a cutting board, bowl, and several utensils in the normal prep position after dark. Then inspect them from where the work actually happens—not from across the patio. That occupied-counter test is more useful than judging fixture output or installing a brighter version of the same poorly positioned light.
Counter Dark Spots
First determine whether the counter has a true coverage gap or only becomes dark during use. A true gap remains in the same place when you step closer, move sideways, or reach across the surface.
Test the Counter, Not the Patio
Use ordinary objects rather than judging a bare countertop. Pale stone can reflect enough light to look acceptable while a dark cutting board, knife handle, food package, or bowl loses definition in the same location.
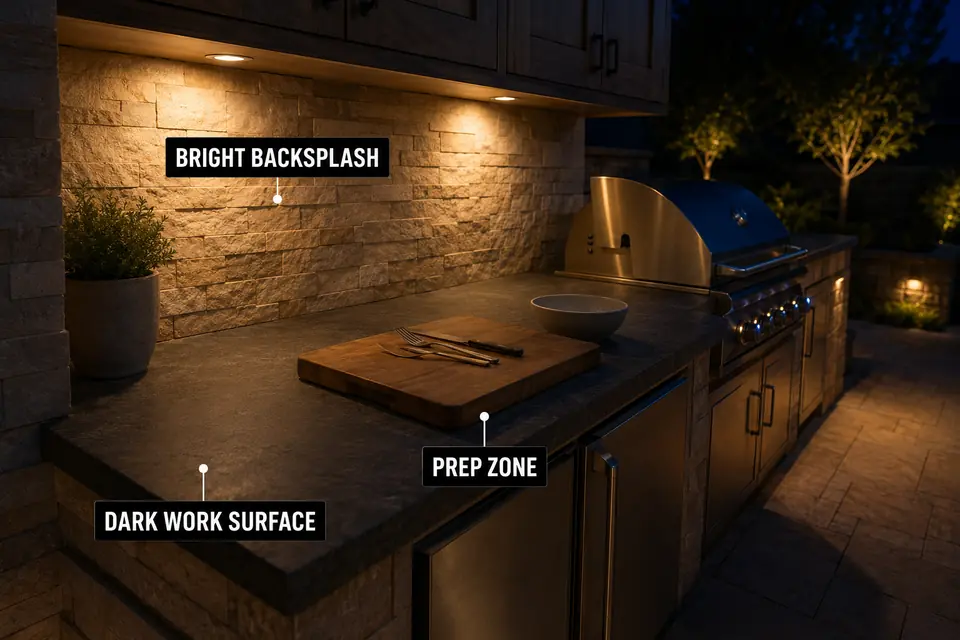
Step back for the broad view, then return to the normal working position. This separates an attractive lighting scene from useful task illumination. It is the same underlying failure seen with lights that illuminate the surroundings but miss their intended surface.
Now move sideways without changing the objects. If the dark patch stays pinned to the counter, look for incomplete beam coverage or a shelf, hood, cabinet edge, or structural member clipping the light. If the shadow moves with you, fixture-to-user placement is the stronger suspect.
The first fix should not be higher output. More light directed toward the wall, backsplash, or floor preserves the original gap and may increase glare around it, making the counter seem even harder to read.
Prep Zone
Define the real prep zone before adjusting anything. The important target is not the full counter outline; it is the concentrated area where ingredients are cut, measured, mixed, plated, and transferred.
Decorative counter ends and narrow strips beside appliances may be visible without supporting meaningful work. A fixture can spread light across most of the structure yet fail if the primary working area remains weak.
An empty surface can also produce a false pass. Place a bowl or cutting board in position, then move your hands and a utensil several inches above it. If your hands become dark while the surface remains visible, the activity itself is interrupting the beam.
Favor readable contrast across the working area rather than one intense center spot. A concentrated patch may illuminate the middle of a cutting board while leaving its near edge, surrounding tools, and ingredients difficult to distinguish.
This test gives the beam a precise target. Without it, a fixture may be redirected toward “the counter” while still landing between the real prep area and the backsplash.
Sink Area
Judge the sink by visibility inside the basin, not by the brightness of its faucet or rim. Reflective metal can make this zone look illuminated while the area where washing happens remains dark.
With the faucet off, place an ordinary item at the bottom of the basin and stand where cleanup normally occurs. Then move your hands through the rinsing position. If the item disappears only when you occupy the space, the fixture is likely behind you or too close to your shoulder line.
Strong reflections do not compensate for missing task light. A bright point on stainless steel can reduce visual comfort without revealing the basin interior. Useful coverage reaches into the basin while keeping the bare source and strongest reflections outside the normal viewing direction.
Water exposure creates a separate safety decision. A fixture that sends light in the correct direction still needs the correct outdoor and wet-location rating for where it is installed.
A small aiming adjustment may be suitable as a diagnostic test when the fixture is designed to move. Relocating hardwired equipment, extending a circuit, or changing equipment near the sink is permanent electrical work and should be handled by a qualified electrician.
Body Shadow
The strongest sign of body shadow is change: the counter looks acceptable while empty, then a broad dark area appears as soon as someone occupies the normal working position.
The Empty-Counter Test Can Mislead You
Observe the counter before stepping into place. Then stand naturally without leaning or reaching to avoid the beam. If the near half of the counter darkens beneath your torso or shoulders, you are positioned between the source and its target.
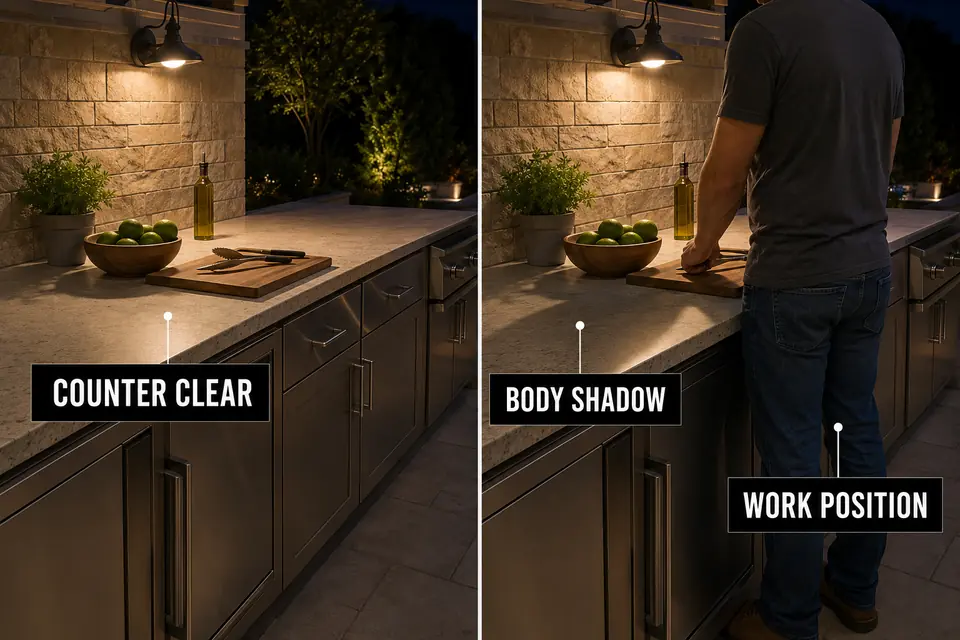
Move your hands and forearms through the normal work area. A body shadow shifts, grows, or breaks apart with those movements. A fixed coverage gap remains anchored to the same part of the counter.
A rear-high fixture is especially vulnerable because its beam approaches over the user’s shoulder. Raising it may soften the edge of the shadow, but height alone will not make the beam pass through or around a person.
A related obstruction occurs at the cooking station, where an open lid can block the beam in addition to the person using the grill. That distinct condition requires the separate diagnosis for grill-light shadows created by the cook and raised lid.
Do not approve a task-light position based on an empty-kitchen photograph. It passes only when the counter remains readable with a person standing naturally between the cabinets and patio.
Beam Angle
If the dark area remains fixed, follow where the beam actually lands. A working fixture can send most of its useful output onto the backsplash, cabinet face, counter edge, or floor while barely reaching the horizontal work plane.
Follow the Beam to the Working Plane
View the counter from the side when possible. A bright backsplash above a weak counter indicates that the beam lands too far back. A bright outer edge with darkness near the wall suggests a shallow beam or one cut off before it reaches the full counter depth.
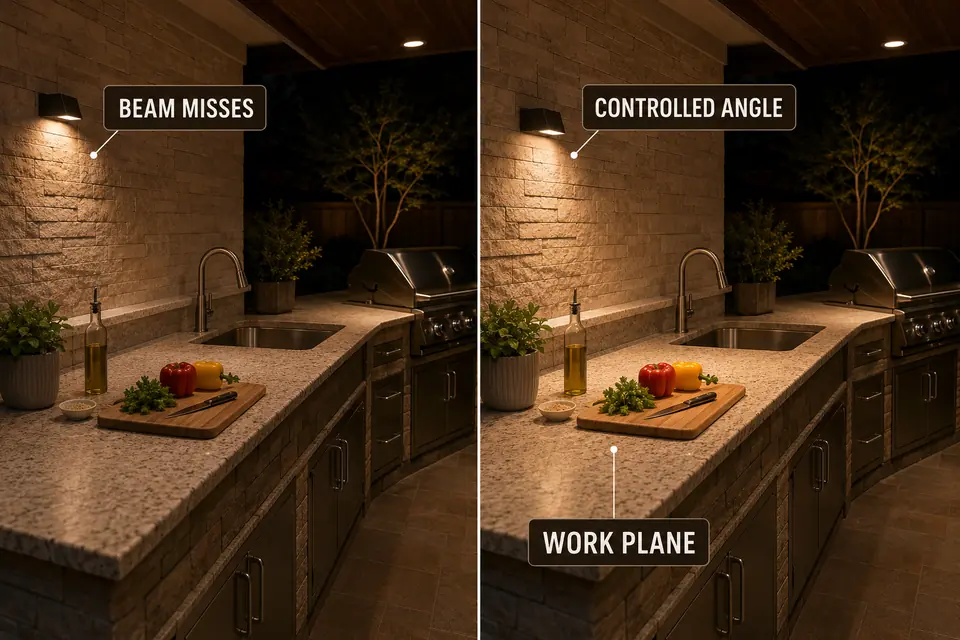
Check for physical cutoff before blaming fixture optics. Cabinet overhangs, shelves, vent hoods, and structural beams can remove the lower part of the beam even when the fixture appears to face the counter.
Direction then determines the trade-off. A steep rear beam is easy for the user to block. A shallow beam from across the kitchen may overshoot the surface or place the source directly in the user’s view. Correcting a poor outdoor light position requires checking obstruction, user position, and viewing angle together.
There is no universal mounting angle that resolves those relationships. Fixture shielding, counter depth, mounting height, surrounding cabinets, and the user’s position all change where the useful part of the beam lands.
Test small aiming changes after dark without changing output. If the dark patch moves predictably across the counter, beam direction is controlling the failure. If the surface looks clear until you step into position, placement relative to the user remains the stronger cause.
Task Light Placement
Choose a task-light position from the shadow path you diagnosed, not from whichever mounting surface is easiest to reach. The source must illuminate the work plane without placing the user directly between the two.
That may mean controlled light from above, slightly forward, or from an offset side rather than from directly behind the working position. The correct choice is the one that remains useful after someone occupies the counter.
The goal is not to eliminate every soft shadow. Some variation helps hands, tools, and food retain visible shape. The failure is a broad shadow that removes detail across the prep surface or inside the sink.
Moving a fixture forward can clear the user but expose the source to direct view. Keep the bare light outside the normal viewing line and control spill instead of accepting glare as the cost of brighter counter coverage.
Test prep and sink areas separately. One fixture should not be forced to cover separated work zones if doing so creates an intense center, weak edges, or bright reflections. When the counter is only one part of the failure, check for other outdoor lighting placement problems before committing to a permanent change.
Nighttime Counter Check
- Place a cutting board, bowl, and ordinary utensils in the real prep position.
- Stand naturally where the counter is used; do not test it only while empty.
- Move your hands and tools above the surface and watch whether the shadow follows you.
- Check the prep area, sink edge, and basin as separate working zones.
- Confirm that the corrected beam reaches the work plane without exposing the bare source to your eyes.
Use temporary aiming or a safely positioned test light to prove the direction before permanent work begins. Do not test with unsecured fixtures, loose cords near water, or indoor-only equipment.
The correction succeeds when the counter, hands, utensils, and sink remain readable from the occupied working position without direct glare. If achieving that requires relocating hardwired equipment or altering wiring near the sink, the permanent work belongs with a qualified electrician.
For guidance on shock protection where electricity may be near water, see the U.S. Consumer Product Safety Commission’s GFCI fact sheet.