When drilling is prohibited, the wrong move is to choose a light first and search for somewhere to attach it. Start with what the patio can support and what must remain open.
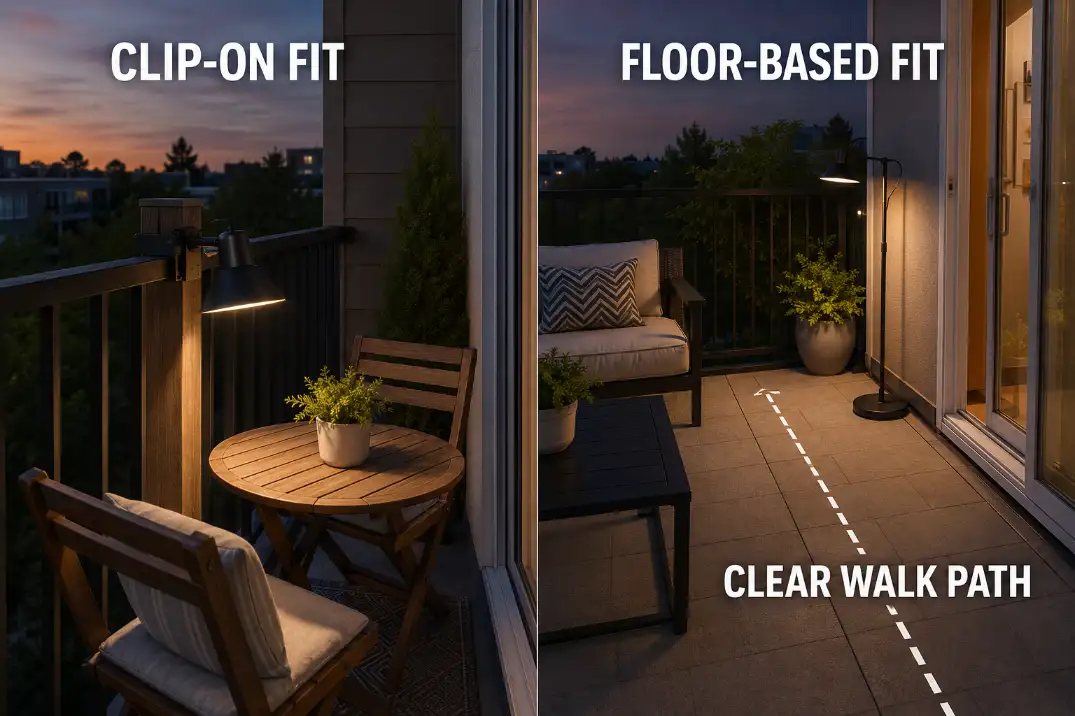
A dependable rail favors a clip-on light. Clear floor space may make a freestanding light safer. An existing approved hook can be simpler than either, but only when its location and capacity fit the job.
The real decision is not whether a fixture leaves screw holes. It is whether the complete setup passes five tests: permission, surface compatibility, stability, controlled aim, and clean removal. A temporary fixture that marks the finish, blocks a door, shifts in the wind, or shines toward another unit has merely traded one installation problem for another.
No-Hole Mounting
A no-hole setup passes only when the mount, supporting surface, beam direction, and removal method work together. Leaving the drill in the toolbox is not enough.
Use five filters before choosing the fixture
Start with permission. A reachable rail, fence, or existing hook may still be part of a shared structure or an exterior element restricted by the lease. Evidence that someone mounted something there previously is not proof that the new load or attachment method is acceptable.
If the attachment point is part of a divider between units, check the shared-fence lighting and privacy limits before treating it as an available mounting surface.
Next, inspect the surface. Powder-coated metal, painted wood, vinyl rails, textured masonry, and finished trim respond differently to pressure and adhesive. A clamp that grips unfinished wood may rotate on a rounded metal cap or mark soft vinyl.
Stability comes next. The mount should not rotate when the light is aimed, loosen during operation, or shift under a gentle hand nudge. This is a practical screening check, not a replacement for the mount’s stated installation and load requirements.
Then check the aim. A secure light that exposes the source at seated eye level or illuminates the wall instead of the step is attached successfully but positioned poorly.
Finally, plan the removal before installation. You should be able to release the clamp, strap, or approved removable fastener without prying against fragile trim or leaving compressed paint, residue, or torn finish behind.
Rental Check: No-hole is not automatically no-damage. Pressure, heat, moisture, and repeated movement can mark a surface even when no screw or nail is used.
Temporary mounting materials still have limits
Removable adhesive should not be treated as a universal outdoor mounting method. Heat, cold, humidity, rain, surface texture, finish condition, and fixture weight can change both its grip and its release behavior. An adhesive intended for a protected indoor wall does not become outdoor-safe because the fixture is small.
Straps and tension mounts avoid adhesive but can still rub paint, crush trim, loosen around tapered posts, or let the fixture swing. If a temporary mount needs excessive tightening to make a flexible surface behave like a structural one, reject the surface rather than adding more pressure.
An existing approved hook can be the simplest option when it is suitable for the load and already positioned near the target zone. It does not solve poor aiming or weather exposure, however. Mounting suitability and outdoor suitability remain separate decisions.
Clip-On Lights
Choose a clip-on light when a solid, permitted rail or post is more dependable than the available floor space. This approach is especially useful on compact patios, but it is only as reliable as the structure holding the clamp.
Measure the attachment point, not just the patio
Measure the rail or post where the clamp will actually sit, then compare that dimension with the mount’s stated opening range. A clamp may open wide enough while its contact pads still fail to land squarely.
Rounded metal rails can encourage rotation. Thin ornamental sections may provide too little contact. Vinyl can flex under concentrated pressure, while deteriorated wood may feel solid until the clamp begins to tighten. A compatible protective pad may help protect a finished surface, but it must not make the grip unstable.
The fixture should also leave the handrail graspable. Avoid positions where someone naturally reaches for support or where a sleeve, chair back, door, or gate can strike the clamp or light head.
Once attached, aim the light toward the walking surface, table, latch, or seating edge it is meant to serve. If the source remains directly visible from the usual chair, lowering the output may reduce discomfort, but it will not correct the exposed angle.
Avoid clip-on lights when the structure is questionable
A fixture adds leverage as well as weight. A long adjustable neck can twist a clamp that seems stable when empty. Wind adds more pressure, particularly on an upper-floor balcony or open patio corner.
Give the installed fixture a gentle nudge from more than one direction. Reject the location if the clamp rotates, the rail flexes, the head falls out of aim, or the fixture enters the movement zone.
Clip-on lighting is usually the simplest no-floor-space option when the support is solid. It is the weaker choice when the only available rail is decorative, shared, unstable, difficult to protect, or badly placed for useful aiming.
Freestanding Lights
Choose a freestanding light when a reliable floor footprint is easier to find than a reliable attachment point. The trade-off is that the base becomes part of the patio’s circulation plan.
A patio can appear large enough until the door opens, chairs slide back, and someone carries food through the space. Compare the base footprint with this active area—not with the patio’s total square footage. Where the layout allows it, roughly 36 inches for the primary walking route is a useful practical target, not a universal code requirement.
Keep the base outside the door swing, gate travel, chair pullback, and direct route between the interior door and seating. The switch and charging connection should remain accessible without dragging the lamp around furniture.
Uneven pavers, sloped decking, pets, children, and routine furniture movement make tall, narrow lamps a poor fit. Wind is another boundary: a portable lamp that performs well in a protected ground-floor corner may be unreliable on an exposed balcony.
Use only weighting or ballast methods intended for the fixture. A loose block, bag, or improvised weight around the base can create the trip hazard the floor-based option was supposed to avoid.
Portability helps only when the lamp has a safe, repeatable position. If it must be moved for every door opening or returned by guesswork after charging, a clip-on light on a suitable rail may be the simpler arrangement.
| Mounting path | Required patio condition | Main limit | Best-fit use |
|---|---|---|---|
| Clip-on light | Solid, permitted rail or post | Depends on secure contact and compatible rail shape | Small patio with little open floor space |
| Freestanding light | Stable floor footprint outside movement | Tipping, wind, and circulation pressure | Patio without a dependable attachment surface |
| Existing approved attachment | Suitable hook or support already in the right area | Location and load may not fit the intended light | Simple placement with minimal added hardware |
Rail and Fence Limits
Treat a rail or fence as a candidate location, not automatic permission. It must pass ownership, stability, normal-use, and light-direction checks before its convenience matters.
Determine whether the rail belongs to the rented patio, forms part of a common area, or serves as a required handrail. A fence between patios may be shared, landlord-controlled, or unsuitable for added loads even when it appears to be on your side.
Keep gates fully operable and handrails available for their intended use. Reject loose post caps, flexible vinyl panels, deteriorated wood, narrow ornamental sections, and unstable fence boards. If the clamp has to compensate for a weak support, the support—not the clamp size—is the controlling problem.
Fence placement also determines who sees the source. Check it from your usual seat and from standing eye level, then look along the fence toward the nearest neighboring patio or window. A low-output exposed LED can still feel harsh when it sits directly in the sightline.
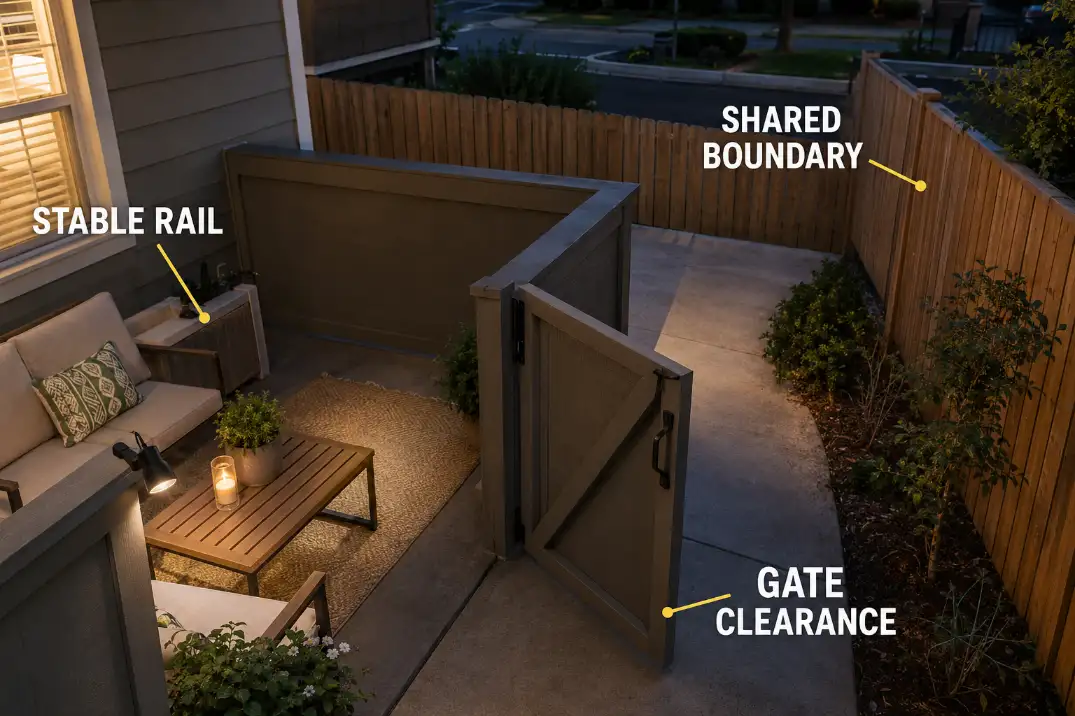
A permitted location can still be a poor lighting position. If the fence face glows more brightly than the step, latch, or seating edge, the fixture is spending its output on the boundary.
Re-aiming or relocating the source is stronger than merely reducing brightness. Lower output softens the same wrong beam path; it does not redirect it. When the mount is acceptable but source visibility remains unresolved, compare low-glare lighting options for a shared boundary by shielding and output control.
Cord-Free Layouts
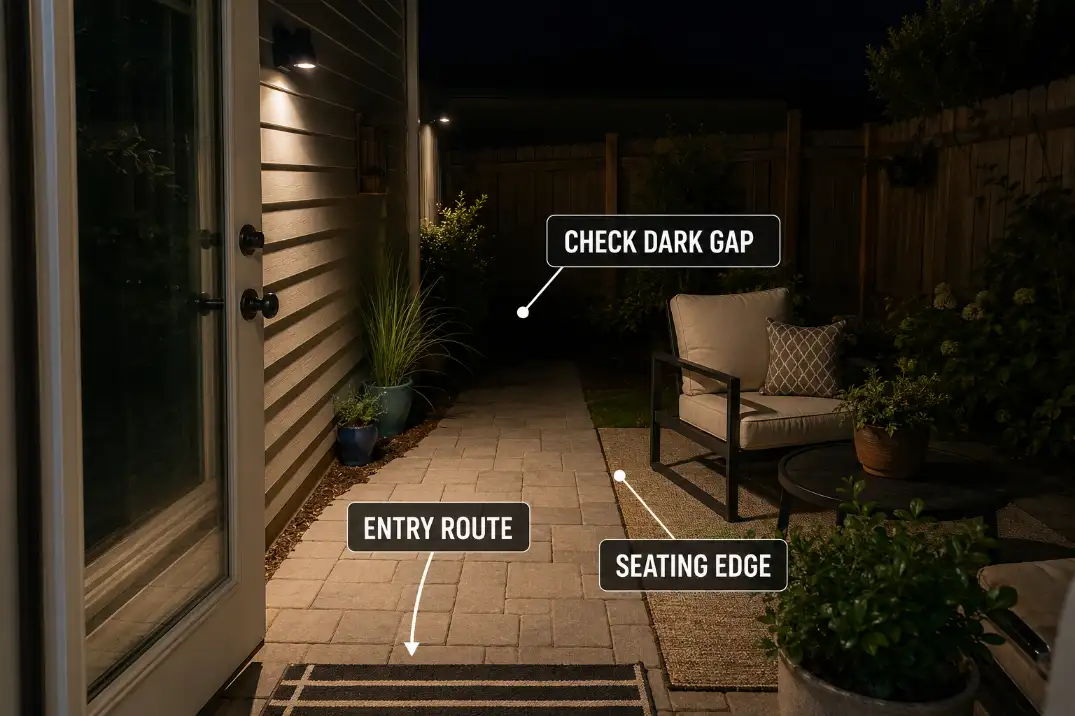
Do not arrange cord-free lights by fixture count. Start with the one patio transition or use point that needs to remain readable: the entry route, step, gate latch, seating edge, or table surface.
Place the light where it reveals that zone without entering the route itself. Several evenly spaced fixtures can make the patio look decorated while leaving the doorway transition or outer edge of a step difficult to read. One well-positioned light can be more useful than several that illuminate only furniture and railing surfaces.
Keep the battery compartment, charging port, switch, and sensor accessible. A fixture that must be unclamped or carried around furniture for every charge invites repeated placement and aiming errors. A stable return position helps keep the beam consistent.
Solar lighting creates a separate conflict: the panel needs useful daylight, while the light may be needed under a covered corner or beside a shaded entry. If those locations do not overlap, a combined panel-and-light unit provides less placement freedom than its lack of wiring suggests.
The broader battery, solar, and temporary plug-in decision belongs with the guide to battery and temporary plug-in lighting limits. Here, the deciding question is whether the cord-free position serves the real patio zone without sacrificing access or movement.
Renter Patio Test
Test normal patio use, not just whether the fixture turns on. A setup that looks acceptable while everything is still can fail as soon as the door opens or a chair moves.
Wait until full darkness and give your eyes about 10 minutes to adjust. Enter through the door or gate you normally use, open it completely, pull out the chairs, and walk the normal route.
A base that looked clear during installation may end up directly behind a chair. A rail-mounted fixture may interfere with a handhold when someone approaches from outside. Reposition the light if any ordinary movement makes the setup feel temporary or fragile.
Sit in the usual position and look toward the light. The intended step, edge, table, or latch should be easier to see, but the source should not dominate the view. Check the neighbor-facing angle and nearby windows as well.
Use a gentle nudge to identify obvious movement in the clamp, head, pole, or base. Reject or reposition the setup if it rotates, tips, flexes the support, or enters the route. Inspect contact surfaces for fresh marks, compressed finish, residue, or sliding.
Battery operation does not establish rain or splash protection. UL Solutions’ outdoor-lighting guidance confirms that outdoor luminaires are evaluated against applicable wet-location requirements.
Covered and uncovered patios create different exposure conditions, so verify the fixture rating for the patio’s actual exposure before leaving a temporary light outside.
Use this six-point acceptance check:
- Permission and surface pass: The location is allowed, and the mount is not marking or crushing the finish.
- Stability pass: The clamp, head, pole, and base remain steady during a gentle movement check.
- Clearance pass: The door, gate, handrail, chair movement, and walking route remain usable.
- Coverage pass: The intended step, edge, latch, route, or table is visibly clearer.
- Glare pass: The source is controlled from the usual seat and does not project toward a neighboring window.
- Exposure and access pass: The fixture suits the weather exposure and remains easy to remove, operate, or recharge.
The correct no-drill choice is the one that leaves no second problem behind. Accept it when the support condition and all six checks align, adjust it when only the aim or route is wrong, and reject it when permission, stability, surface protection, or weather suitability remains unresolved.