
A grill can look adequately lit from the patio and become difficult to use the moment you step up to it. The stainless-steel body reflects light, the raised lid catches a bright highlight, and the counter remains visible—but the food and rear half of the grate fall into shadow.
The wrong conclusion is that the grill needs more light. This is usually a beam-path problem: your body or the open lid is interrupting light before it reaches the cooking surface. A brighter lamp in the same position may illuminate your back and sharpen the shadow without revealing more of the grate.
Treat the setup as a four-part relationship: source, cook, lid, and grate. Open the grill, stand where you normally cook, and watch what changes as you move. A shadow that follows your torso indicates body blocking. A dark rear grate that appears as the lid rises points to lid blocking. Diagnose that movement before changing the fixture.
Body Blocking
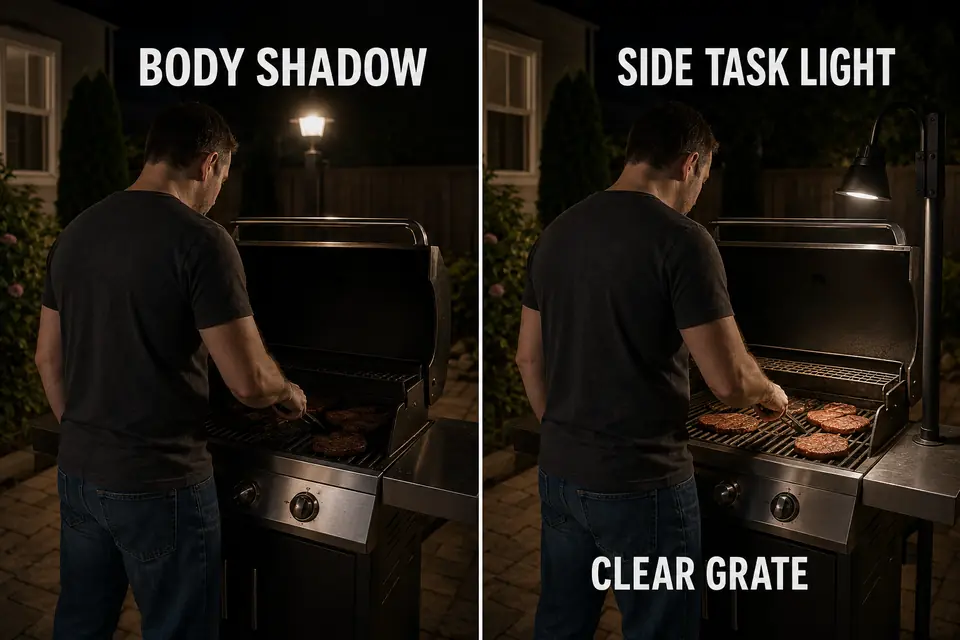
Start with the shadow that moves. A rear-high or centered overhead source can illuminate an unattended grill while placing your shoulders, head, and torso directly between the beam and grate once you begin cooking.
Stand at the center controls, then shift one step left and right. Reach toward the front, center, and rear grate zones as you would while turning food. A small shadow beneath your hand or tongs is expected. A broad shadow that covers several burners or follows your upper body identifies the useful problem.
Increasing output does not reopen the blocked path. It raises surrounding brightness while the same section of grate remains hidden. This is why brighter outdoor lights can produce worse visibility when contrast increases faster than usable task illumination.
The decisive comparison is cook absent versus cook in position. If the surface clears when you step away, do not judge the setup by the empty grill. Judge it from the working position where the interruption occurs.
Lid Shadow
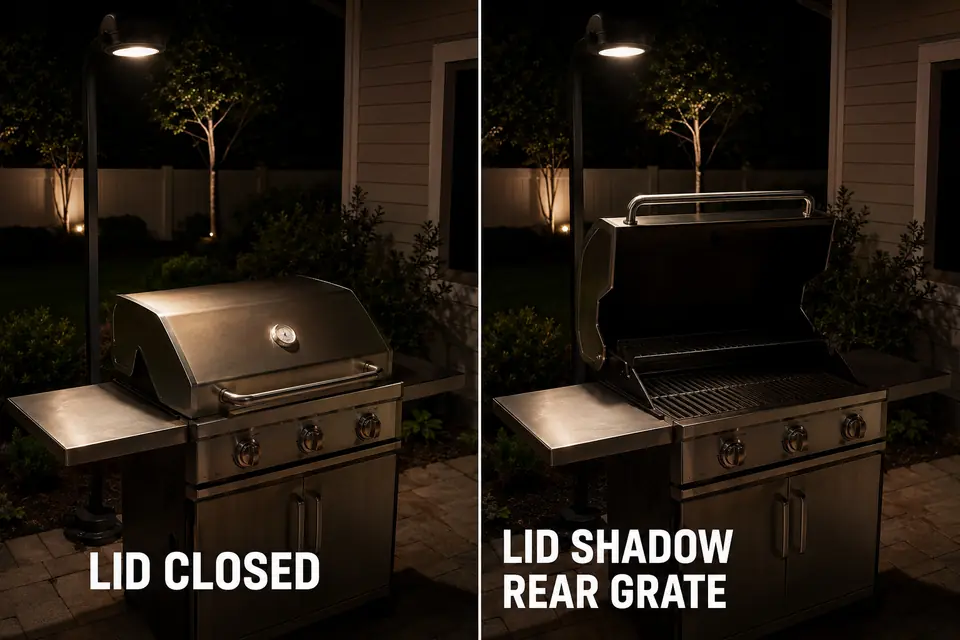
If the grate stays dark after you step aside, test the lid next. A tall open lid can rise directly into light arriving from a wall, roof overhang, or fixture behind the cooking station.
The rear grate usually exposes this failure first. With the lid closed, light may reach the top and front of the grill. As the lid rises, its upper edge interrupts that path and leaves food nearest the back in a restrained but important shadow.
A polished lid can disguise the failure. Its outer surface may reflect enough light to make the grill look bright while the cooking surface receives very little. Shine around the grill is not proof that the beam reaches the food.
Separate the lid from the cook
Open the lid to its normal cooking angle, then step completely aside. If the rear cooking zone remains dark without your body in the path, the lid is the main obstruction. If the grate clears when you step away, body blocking is still contributing.
Test with the lid fully open rather than holding it halfway for convenience. The final light position has to work with the grill in its real operating position.
Light Behind You
A source behind the cook should be treated as ambient light until it proves that it can reach the grate. It may brighten the patio, grill exterior, backsplash, drifting smoke, and your shoulders while leaving the food difficult to read.
Step away from the controls and inspect the surface, then return to the cooking position. If visibility improves when you leave and collapses when you return, the source is serving the background rather than the task. This is a focused version of broader outdoor-light placement problems: the light works, but its useful path ends at the wrong object.
Putting a stronger lamp in that position can deepen the practical failure. The patio grows brighter, the shadow edge becomes harder, and your eyes must move between a bright surrounding field and a comparatively dark grate.
The rear light can still support the doorway, patio, or route to the grill. It simply should not be assigned the close-range work that your body prevents it from doing.
Side Task Light
Move the useful beam outside the body-and-lid obstruction zone before adding output. A controlled front-side or working-side angle can reach the grate without passing directly through your torso or striking the back of the raised lid.
Simulate the proposed position before committing to it. Keep the lid fully open and stand at the controls while someone moves the source through plausible angles. The correct position is not the one that makes the grill look brightest; it is the one that keeps the front and rear grate readable with you in place.
Aim into the grate rather than outward across the patio. The source should also remain outside your direct view when you lean toward the the food. If a harsh lens becomes the brightest object in sight, first control the visible source and beam glare through shielding and aim.
Do not move too far to one side
An extreme side angle creates a new failure. Tongs, spatulas, food, and your hands can cast long shadows across the opposite half of the grill. The goal is enough offset to clear your torso, not a dramatic sideways beam.
If one controlled source cannot cover both ends without glare, modest overlapping illumination may perform better than one intense beam. Both sources should terminate within the work zone rather than sending unused light across the yard.
Any permanent fixture must also fit its exposure. Follow the grill and light manufacturers’ instructions for heat, grease, weather, and mounting location; there is no universal clearance that applies to every combination.
Grill Surface Visibility
Use the grate—not the reflective grill body—as the finishing standard. Successful task lighting keeps the actual work readable from the cook’s normal position.
You should be able to see the front, center, and rear cooking zones without leaning over the heat. Food edges, surface texture, grate lines, utensil position, and the location of a flare-up should remain visible when your hands enter the beam.
This separates surrounding illumination from light that reaches the actual target surface. One brilliant corner and one unreadable corner do not amount to usable coverage.
Field note: Make the final judgment from the cook’s eye position with the lid open. A grill that looks bright from the doorway can still fail at the exact point where the work happens.
Light color can change how food appears, but it is not a reliable doneness test. The practical question is whether boundaries and surface texture remain readable without a glaring source competing with the grate.
Cook Test
Do not approve the placement at dusk or with the grill empty. Test it after full dark with the same surrounding lights normally used during cooking, then allow about 10–15 minutes for your eyes to adapt.
Open the lid fully, stand at the center controls, and reach toward the front and rear zones. Move to both side positions and pass your usual tools over the grate. Adjust only one angle or position at a time so the result remains easy to judge.
Use these five checks before keeping the placement:
- Lid open: The front and rear grate zones remain visible.
- Cook centered: No broad torso shadow covers the food.
- Cook shifted: Both side working positions remain usable.
- Tools in hand: Small shadows do not hide the target area.
- Normal view: The light source does not create direct glare.
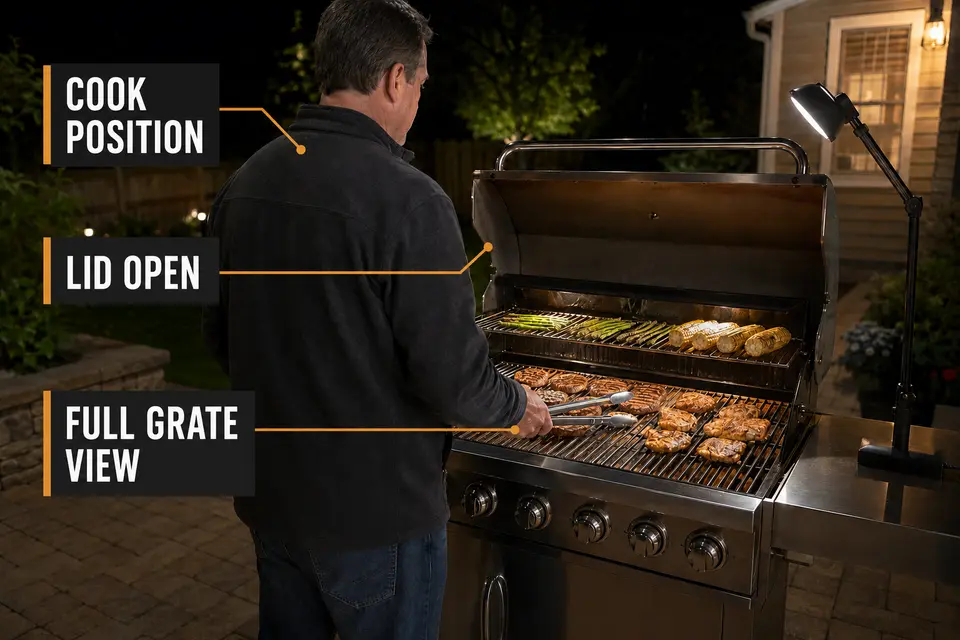
The placement works when the source, cook, raised lid, and grate can occupy their real positions without creating a broad work shadow. Correct the angle and control the beam before adding brightness. If the full grate stays readable without direct glare, the task light is doing its job.
For general fire, burn, and placement precautions while grilling, review the U.S. Consumer Product Safety Commission’s grill safety guidance.