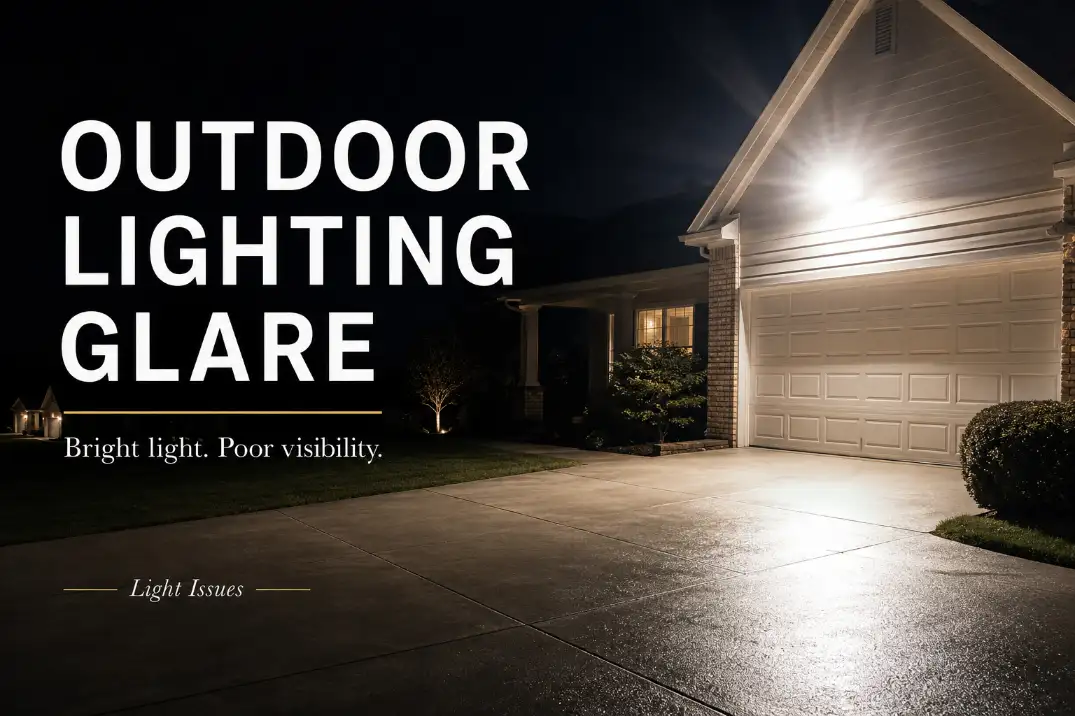
If your outdoor light feels harsh, the fixture is usually shining into your eyes before it lights the ground.
Start with three checks: can you see the bare LED face from 20–30 feet away, is the fixture aimed straight out or above horizontal, and does the beam create a hard hotspot within 3–8 feet of the wall?
If yes, the problem is glare, not simply “too much light.”
The repair order matters: hide the source → aim the beam down → reduce contrast → warm the color → dim or control runtime. A 1,500-lumen floodlight can feel harsher than a 3,000-lumen shielded fixture if the smaller exposed source points toward people.
That is different from a coverage problem, where the area remains dark even though the fixture itself is not painful to look at.
Why Outdoor Lights Feel Harsh
Brightness is not the same as glare
Brightness describes how much light a fixture produces. Glare describes how that light reaches your eyes. That difference matters because many homeowners replace the bulb before fixing the beam.
A harsh outdoor light may look powerful from the driveway, but it can make the yard harder to use. Your eyes adapt to the brightest object in view. When that object is an exposed LED panel, the steps, gate, walkway edge, or parked car beside it can look darker by comparison.
That is why a single intense garage floodlight often feels worse than several lower-output fixtures placed closer to the ground. The issue is not always too much light. More often, it is too much visible source and too much contrast.
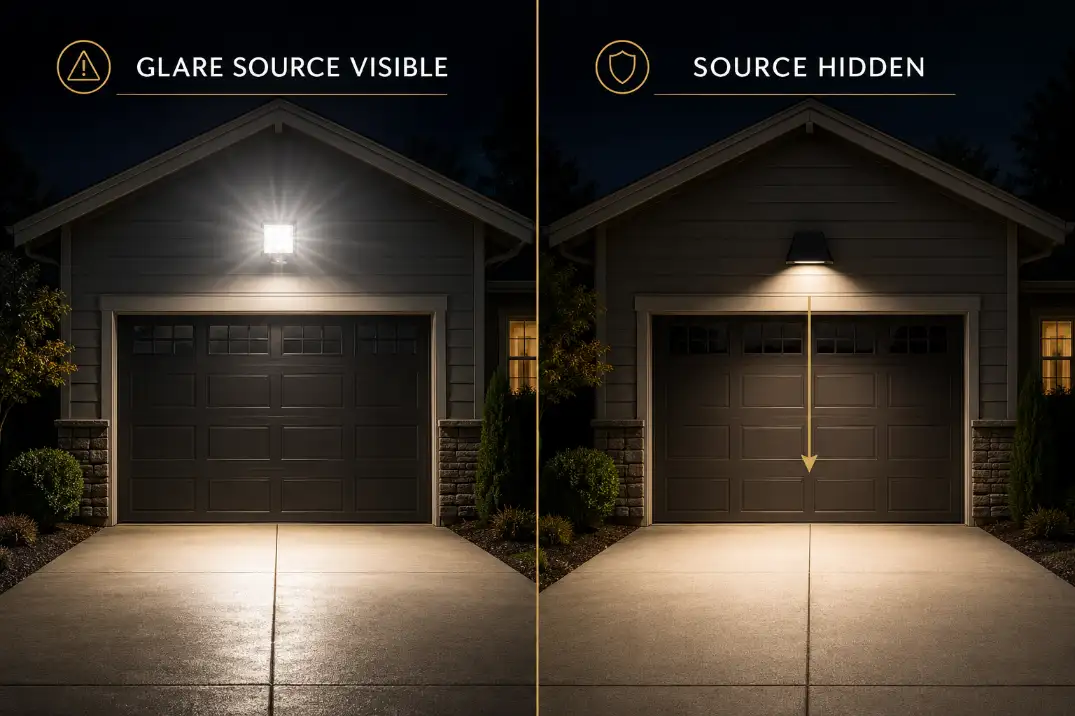
The visible LED face is the giveaway
The most useful test is whether you can see the bulb, diode board, or glowing lens from normal standing height. If the source is visible, your eyes receive direct light before they receive useful reflected light from the ground.
This is also why newer LED fixtures can feel sharper than older outdoor bulbs. LEDs often concentrate a lot of output into small, intense points.
If those points sit behind a clear lens or face outward from a wall pack, the fixture may produce high glare even at a moderate lumen rating.
If your outdoor lights also create bright islands with dead zones between them, the problem may be broader than glare alone.
That pattern is often closer to outdoor lights with bright spots and dark gaps, where beam spread and fixture spacing become just as important as comfort.
The Fast Fix Order for Outdoor Lighting Glare
1. Hide the source
If the bulb, LED board, or glowing lens is visible from the walkway, driveway, patio, or neighbor’s window, fix that first. A hidden source immediately reduces the most painful type of glare.
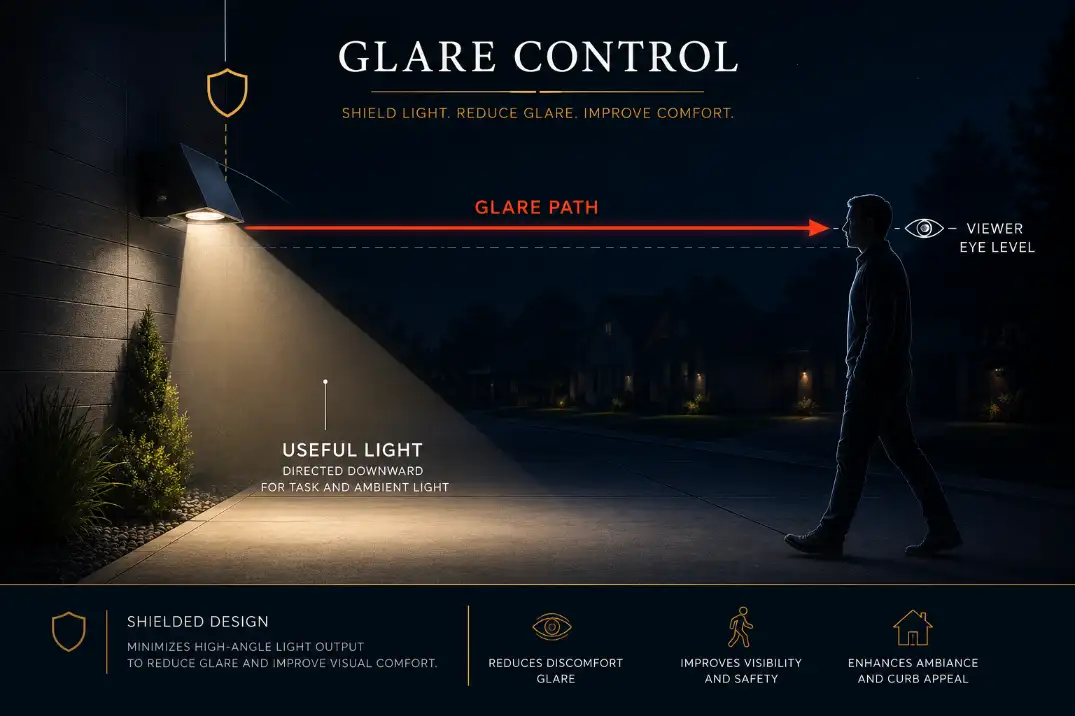
2. Aim the beam below eye level
Outdoor lights should usually aim below horizontal. Tilting a floodlight down by 10–15 degrees can move the hotspot from someone’s face to the pavement where it belongs.
3. Reduce contrast
A bright center surrounded by darkness feels harsher than a softer, wider spread. If one fixture is doing all the work, add lower-output lights closer to the task instead of increasing wattage.
4. Warm the color
For most residential spaces, 2700K–3000K feels more comfortable than 4000K–5000K. Warm color helps most after the beam is already controlled.
5. Dim or control runtime
Timers, motion settings, dimmers, and photocells help reduce exposure. They do not fix a fixture that is still aimed into people’s eyes.
Pro Tip: Adjust outdoor lights after full dark, not at dusk. Glare that seems acceptable at 7:30 p.m. can feel much harsher after your eyes adapt for 10–15 minutes.
Quick Diagnostic Checklist
Use this before replacing the fixture:
- You can see the bulb, LED chips, or glowing lens from 20–30 feet away.
- The beam points straight outward instead of downward.
- The light creates a bright hotspot within 3–8 feet of the fixture.
- People squint when approaching the garage, patio, gate, or entry.
- The fixture is 4000K–5000K and mounted near eye level.
- The area feels bright near the fixture but dark beyond the beam.
- The light looks better when you stand behind it than when you walk toward it.
If several of these are true, placement and optical control matter more than wattage.
What People Usually Misread First
“Too bright” is often only the symptom
The symptom is discomfort. The mechanism is uncontrolled direction and high contrast.
That distinction saves time. Lowering wattage may reduce the pain, but it will not fix a fixture that still shines into people’s eyes. A bare 800-lumen bulb in a clear porch lantern can feel worse than a shielded 1,500-lumen downlight because the smaller exposed source sits directly in your field of view.
When a light is both uncomfortable and failing to illuminate the intended surface, the issue may be poor aim rather than excessive output. In that case, fixing poor outdoor light placement usually creates a bigger improvement than switching bulbs.
Color temperature gets blamed too early
Cool color matters, but it is often overestimated. A 5000K fixture can make glare feel sharper, especially on white siding, pale concrete, snow, or glossy garage doors. But a poorly aimed 2700K light can still glare if the source is exposed.
The better sequence is aim first, shield second, then choose warmer color. Changing color temperature before controlling the source is like lowering the volume on a speaker pointed at your ear. It helps, but it does not solve the direction problem.
Security lighting is often overpowered
Many homeowners install harsh lights because they want better security. The problem is that a light that blinds visitors, washes out camera images, or creates deep shadows is not a security upgrade.
Good security lighting reveals faces, steps, vehicles, grade changes, and entry points. It does not need to make the entire yard look like a parking lot. Even, controlled light usually works better than one intense beam.
Practical Output Ranges That Reduce Glare
These are starting points, not rigid rules. Mounting height, surface color, beam angle, and fixture shielding can change the result.
| Outdoor area | Better starting range | What usually causes glare | Better correction |
|---|---|---|---|
| Porch or front entry | 400–800 lumens | Clear glass fixture with visible bulb | Use shielded or frosted downward light |
| Pathway | 100–200 lumens per fixture | Too many bright path lights close together | Increase spacing and reduce output |
| Steps | Low-output shielded light | Source visible from below | Recess or shield the step light |
| Driveway flood | 1,000–2,000 lumens per head | Head aimed outward or above horizontal | Aim down and use cutoff shielding |
| Patio seating | 200–600 lumens per zone | Overhead hotspot near faces | Use side, low, or indirect lighting |
| Camera area | Enough to light the subject evenly | Light aimed into camera or face | Cross-light softly from the side |
The failing condition is not just “high lumens.” A healthier setup hides the source and spreads light across the target. A failing setup creates a visible source, a hot center, and dark edges.
How to Reduce Glare From Outdoor Flood Lights
Re-aim before you replace
Start with aim because it is free and often decisive. Stand where people actually approach the light. If the fixture is mounted on a garage, porch, or side wall, the beam should land on the driveway, step, walkway, or gate area — not across the street or into someone’s eyes.
For floodlights, aim each head so the brightest part of the beam sits on the target surface. If the hotspot disappears into the distance, the light is probably aimed too high.
If the hotspot sits right under the fixture and everything beyond it is dark, the beam may be too narrow or too steep.
If the fixture keeps missing the area you care about, the issue may match outdoor lights missing the target area more than a simple glare problem.
Add the right shield, not just any cover
A hood, visor, louver, frosted lens, or full-cutoff fixture can reduce glare, but they do not all solve the same problem. The point is to block the light that travels toward eyes, windows, or cameras while keeping useful light on the ground.
Avoid improvised covers that trap heat or water. Tape, paint, and homemade shields can damage outdoor LED fixtures, especially in hot climates like Arizona or Southern California where housings already stay warm after sunset.
| Shield or fixture type | Best use | Avoid when |
|---|---|---|
| Hood or visor | Garage flood or wall light glare | The fixture already runs hot or traps water |
| Louver | Eye-level glare near patios or walkways | You need a very wide soft spread |
| Full-cutoff fixture | Permanent glare and light trespass control | You want a bare decorative bulb look |
| Frosted lens | Softening a visible bulb in an entry fixture | The beam direction is the main problem |
| Recessed downlight | Porch, soffit, or entry lighting | The ceiling location misses the target area |
Pro Tip: A shield should hide the source from normal viewing angles, not just make the fixture look darker from the front.
Layer lower-output light instead of forcing one fixture to do everything
One high-output fixture is often asked to handle security, walking visibility, patio comfort, and driveway coverage. That is where glare starts.
A better setup uses lower-output lights closer to the task: path lights for walking edges, shielded sconces for entries, step lights for stairs, and a controlled flood only where broad coverage is needed.
Even light usually feels safer than a bright center surrounded by darkness.
When Glare Becomes Light Trespass
The property-line test is more useful than guessing
Stand near the property line at night and look back toward your fixture from normal eye height. If you can see the LED face or the beam crosses above fence height, the light may be spilling into a neighbor’s view.
If the light source is visible from a neighbor’s bedroom window, the problem is not just brightness preference anymore. It is uncontrolled light trespass.
This matters even if the light is motion-activated. A motion light that blasts across a bedroom window for 2 minutes at a time is still poorly controlled. Motion settings limit runtime; they do not correct the beam.
Windows and cameras reveal the problem quickly
Glare often shows up as complaints about bedroom windows, washed-out camera footage, or bright reflections on parked cars. If a security camera shows white glare spots, blown-out faces, or deep black shadows behind people, the light is not helping the camera. It is overpowering it.
For cameras, the better setup is usually softer light aimed across the subject area, not directly into the lens or straight toward faces.
If frequent triggering makes the glare feel worse, especially near streets, trees, pets, or reflective surfaces, the issue may overlap with an outdoor motion sensor light that is too sensitive.
Timers help only after direction is corrected
A timer can reduce how long the glare lasts, but it cannot make a bad beam respectful. If the fixture points into a window, across a property line, or toward a sidewalk approach, the first repair is still aim and shielding.
Runtime control is the final polish. Direction control is the fix.
When Dimming Is Not Enough
Dimming works only after the beam is controlled
Dimming is useful when the fixture is basically right but slightly too intense. It is not a cure for a visible bulb, exposed LED board, or badly aimed floodlight.
If a light still hurts to look at when dimmed to 40–50%, the beam path is wrong. Fix the shield, angle, or fixture type first. Then fine-tune brightness.
Replacement makes sense when the fixture design is the problem
Some fixtures cannot be made comfortable. Clear glass lanterns with bare bulbs, flat LED wall packs, unshielded floodlights, and old dusk-to-dawn yard lights often lack the optical control needed for residential use.
A fixture replacement makes sense when the source is visible from normal approach angles, the beam cannot aim below horizontal, no shield can be added, or the light trespasses across the property line even at lower output.
This is also the point where a routine fix stops making sense. If you have already lowered the wattage, tried warmer color, and adjusted the head, but the source remains visible, the fixture itself is the limiting factor.
What to Buy Instead of Another Harsh Floodlight
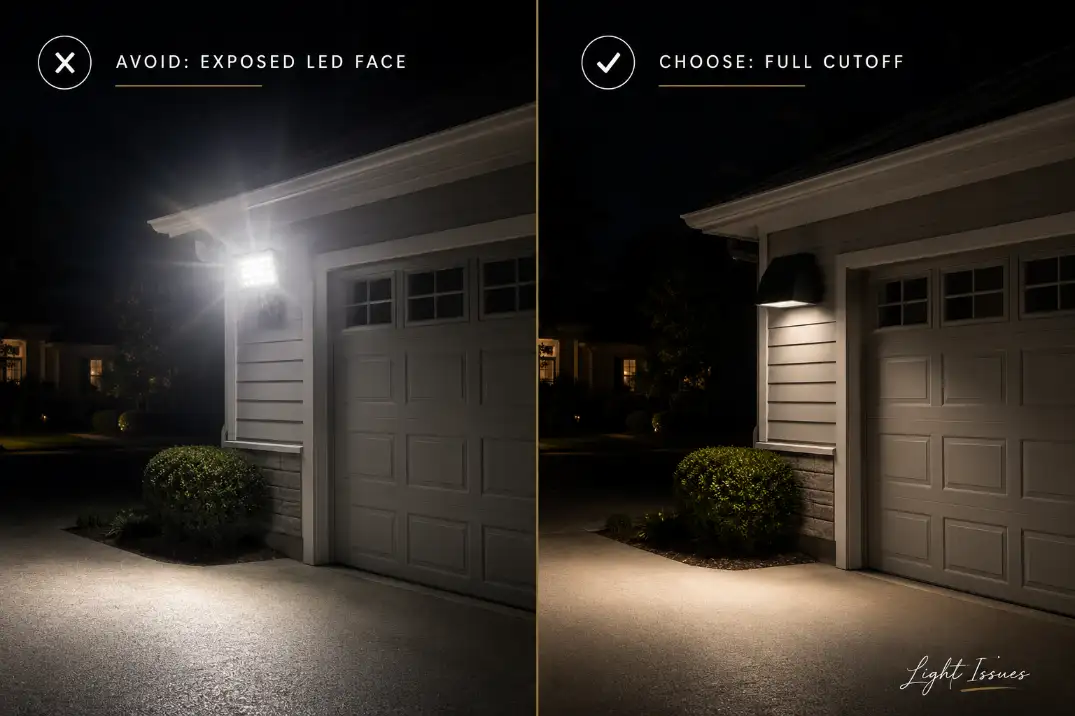
Choose optical control over raw output
Look for fixtures described as full-cutoff, shielded, recessed, hooded, or downward-facing. These terms matter more than the highest lumen number on the box.
For most residential glare problems, a good replacement has:
- a hidden or recessed light source
- warm 2700K–3000K color
- adjustable aim that locks firmly
- an opaque top or shielded sides
- a beam pattern wide enough for the target
- motion or timer control when needed
Avoid clear-lens fixtures with exposed bulbs, bare LED panels facing outward, and oversized “security” lights for small patios, side yards, and entries.
Match the fixture to the job
A garage may need a shielded flood or two controlled heads. A porch usually needs a downward sconce or frosted fixture. Steps need low, shielded light close to the tread. A patio seating area needs soft side light, not an overhead blast.
If your light feels harsh and still leaves parts of the yard unusable, the broader issue may be that the fixture is solving the wrong job. That pattern is close to outdoor lights that are too bright or too dark, where the same setup can overlight one area and underlight another.
What Changes Under Real Outdoor Conditions
Wet climates can turn lens haze into glare
In humid areas such as Florida or rainy Midwest regions, dirty or fogged lenses can scatter light outward. That scatter may make the whole fixture glow instead of producing a clean beam.
If haze remains inside the lens more than 24–48 hours after dry weather returns, the problem may be moisture intrusion rather than surface dirt.
Cleaning helps only when the grime is on the outside. If the inside of the lens is cloudy, brighter bulbs usually make the glare worse.
Snow and pale surfaces increase reflected glare
In northern states, snow cover can make a normally acceptable fixture feel harsh because light bounces upward. Pale concrete, white siding, light stone, and glossy garage doors can do the same thing year-round.
Direct glare hurts when you look toward the fixture. Reflected glare makes the whole scene feel washed out. Direct glare is fixed with shielding and aim. Reflected glare often needs lower output, warmer color, and a wider beam with fewer hotspots.
Dark desert landscapes increase contrast
In dry desert yards, the surrounding landscape may be very dark and matte. A single cool-white floodlight against that background can feel severe because there is little ambient light to soften the transition.
In those settings, warmer color, lower output, and layered lights often matter more than adding another high-output fixture.
Questions People Usually Ask
Are LED outdoor lights naturally more glaring?
Not automatically. LEDs feel harsh when a small, intense source is exposed or aimed outward. A shielded LED fixture with a recessed source can be comfortable and efficient.
Is 5000K too bright for outdoor lighting?
5000K is not brighter by itself, but it often feels sharper at night. For most homes, 2700K–3000K is more comfortable. Still, color temperature should be adjusted after aim and shielding.
Should security lights point outward?
Usually no. They should point toward the area you need to see, not toward faces, windows, streets, or cameras. A light aimed outward often creates glare, light trespass, and darker shadows behind the beam.
How do I know if glare is the real problem?
If the fixture itself grabs your eyes before the walkway, driveway, or entry does, glare is probably the main issue. If the fixture is comfortable to look near but the area remains dark, the problem is more likely coverage, spacing, or placement.
The Bottom Line
Outdoor lighting glare is not solved by buying the brightest replacement bulb. The better fix is to control the light: hide the source, aim the beam below eye level, reduce sharp contrast, choose warmer color, and use timers or motion settings only after the beam is right.
A good outdoor light should help you see the space, not force you to notice the fixture.
For broader official guidance on responsible outdoor lighting, see the Illuminating Engineering Society.