The motion light used to switch on before you reached the front steps. Now, on cold nights, you have to get much closer—even though the lamps illuminate normally once triggered. The useful question is what changed between those two approaches: the target, the sensor’s view, or the fixture’s ability to operate in that temperature.
For a passive infrared, or PIR, fixture, colder surroundings can actually improve detection conditions. Check the visible sensor lens, the cleared walking route, and anything now blocking its view before changing sensitivity. A repeatable loss under reasonably matched conditions is a stronger reason to investigate the fixture than one disappointing walk up a snowy driveway.
Temperature Contrast in PIR Detection
Cold air alone does not explain shorter PIR range. The sensor responds to changes in infrared radiation across its sensing zones. The surfaces facing it—including clothing—and their contrast with the background affect the signal it receives. It does not directly measure your core body temperature.
A colder background can increase that contrast. The reported range change may therefore be real while the assumed cause is wrong. “It started in winter” tells you when to look, but not yet what to fix.
There are also two different temperature questions. One concerns how clearly the moving target stands out from its surroundings. The other concerns whether the complete fixture is operating within its specified temperature limits. Favorable thermal contrast does not establish that a particular fixture will function properly below its operating minimum.
Keep those questions separate: first account for changes in the approach and sensor view, then assess any remaining temperature-linked pattern.
Heavy Clothing and Slow Movement
Treat clothing as a comparison variable, not a diagnosis. A heavy coat changes the surface presented to the sensor, and insulating layers can reduce the thermal signature visible from parts of the body. They do not make a person universally invisible to PIR; colder surroundings may still provide strong contrast.
Movement matters too. Short, cautious steps can produce a different response from an ordinary walk, particularly near the edge of useful coverage. If your remembered fall performance came from walking briskly across the driveway, comparing it with a slow winter approach toward the garage changes more than temperature.
Look at where the snow shovel has directed foot traffic. A cleared strip may now lead almost straight toward the fixture instead of carrying you across its view. If the light misses a straight-on approach but responds when you cross the same area, the route is contributing to the apparent seasonal loss.
Make that comparison only on secure footing. Do not walk faster on ice or remove needed winter clothing to challenge the sensor. Use a dry, clear area and your normal safe pace.
For the later mild-versus-cold comparison, keep the person, outerwear, direction, and pace reasonably consistent. During a separate same-night check, vary only one factor—such as approach direction—so an improved response has a useful explanation.
Snow and Winter Obstructions
Check both the PIR lens and its view toward the approach. Clear lamp faces tell you little about detection: on a dual-head floodlight, the sensor is usually a separate housing beneath or between the lamps.
Snow or ice covering that viewing surface is one possibility. An obstruction farther away is another: a snow-laden branch, covered patio furniture, seasonal decoration, or piled snow may interrupt the view toward part of the approach. The obstruction must actually sit between the sensor and the person. Snow beside an otherwise open walkway is not evidence that detection is blocked.
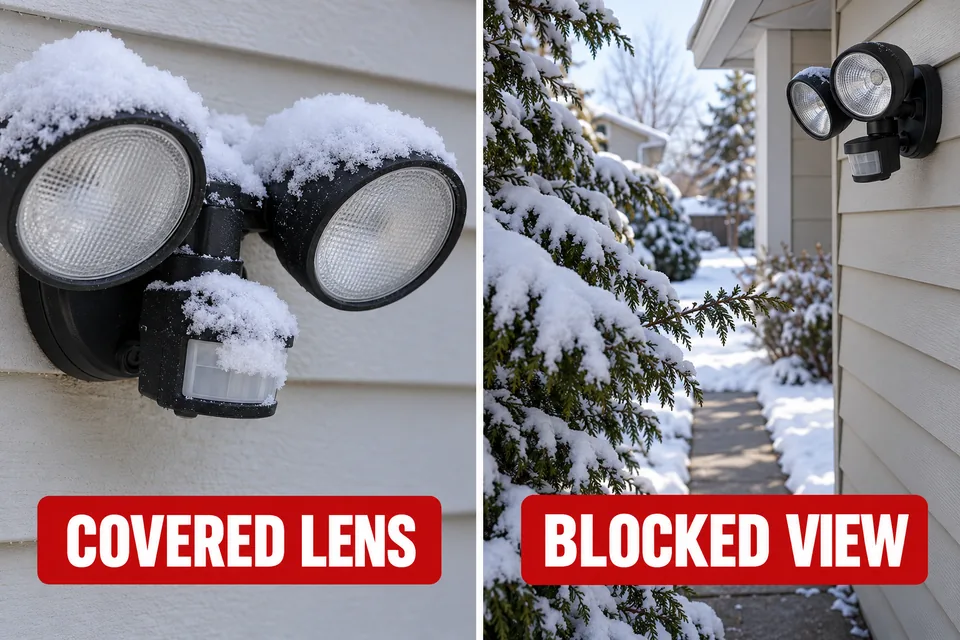
If a visible obstruction can be safely removed, repeat the same approach before touching the controls. Consistently earlier activation supports that obstruction as a contributor. Changing sensitivity at the same time would leave the cause uncertain.
Follow the fixture’s cleaning instructions. Do not scrape the lens, pour hot water over it, apply heat, or open the housing. If frozen material cannot be removed as directed, wait for suitable conditions or seek manufacturer guidance. An icy exterior does not prove internal damage.
Adjusting Range Without Catching the Street
Set the required activation point before adjusting the dial. The light needs to respond before you reach the step, turn, or gate that requires illumination. Photograph the original settings and sensor position so you can undo an unhelpful change.
Where the design permits, adjust the sensor head separately from the lamp heads. Make small changes allowed by the manual, one at a time, and repeat the approach after each change. Manufacturer-approved masking accessories may help exclude an unwanted side of the viewing area.
If restoring the approach means the light starts catching passing traffic, further increases are not a satisfactory correction. Observe that unwanted response from within your property; there is no reason to enter the road for a test.
Sensitivity is not a precise distance cutoff. It changes how readily the fixture responds, while aim and the scene determine what enters its view. Increasing TIME only keeps the lamps on longer after activation.
Stop when the needed approach works consistently without unacceptable extra triggers. If those goals cannot coexist, the placement or detection pattern may need attention beyond another turn of the dial.
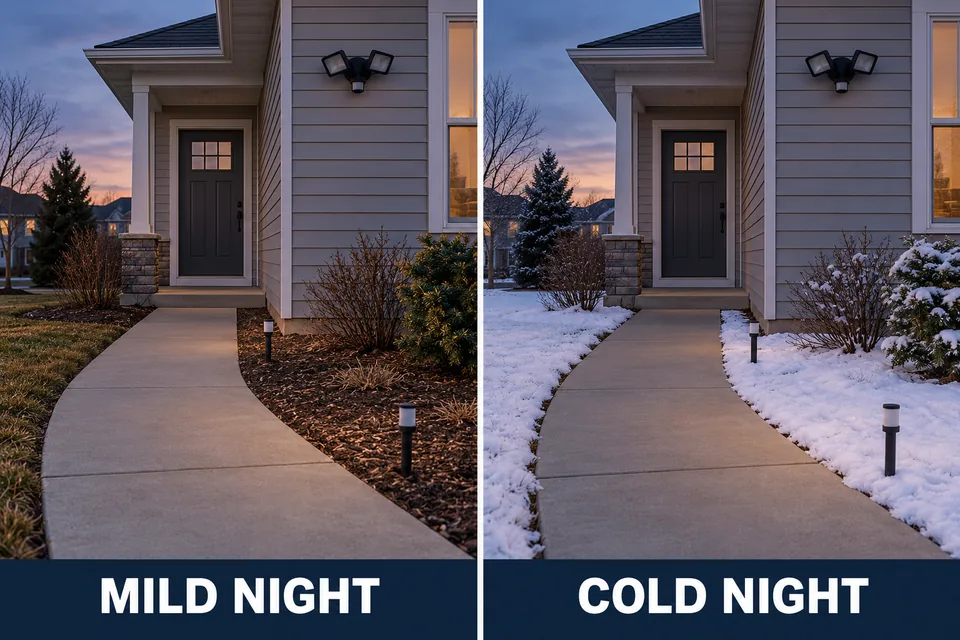
Comparing Mild and Cold Nights
Compare the activation points across repeated passes; the farthest successful trigger can overstate dependable coverage. Choose recognizable points along the walkway and measure their distance from the fixture in feet. Record outdoor temperature in °F and conditions that could explain a difference.
Keep the Comparison Consistent
- Select the same safe route and reference points. Record the sensor aim and settings, and leave them unchanged between comparison sessions.
- Use the same person, similar winter outerwear, approach direction, and ordinary walking pace. Note unavoidable differences.
- Test after dark with similar surrounding lighting and a clear sensor view. Record temperature, snow or ice, and any changed obstruction.
- Let the light complete its on-cycle and any manufacturer-specified rearm interval before each pass. Make three passes per condition to check repeatability.
- Note the first activation point on every pass, including any pass with no response. Repeat on a milder or colder night without changing the setup.
This is a household comparison, not a laboratory test isolating temperature. Three passes can reveal inconsistency, but they cannot certify performance or identify a failed internal component. If the results vary widely on the same night, that variability deserves attention before attributing a small difference between nights to temperature.
| Observed pattern | What it supports | Next action |
|---|---|---|
| Detection returns after removing a visible obstruction | The obstruction contributed | Preserve the clear view and retest the approach |
| Crosswise movement works while the usual approach remains unreliable | Route or detection geometry contributes | Address approach direction or sensor aim |
| Cold-night misses occur below the listed operating minimum | Conditions fall outside the specification | Seek a fixture specified for the actual exposure |
| Repeated cold-night loss persists within the rating under reasonably matched conditions | A temperature-linked problem remains unresolved | Share the record with manufacturer support or a qualified installer |
When the Temperature Rating Changes the Decision
Read the operating-temperature specification for the exact complete fixture. A storage-temperature range or a datasheet for an internal sensor is not an equivalent rating.
Likewise, “outdoor,” an IP rating, and an advertised detection distance answer different questions. None alone establishes suitability for the temperatures at your installation. A replacement must suit the actual cold exposure, mounting conditions, and outdoor location; there is no single minimum temperature appropriate for every U.S. home.
If the fixture no longer responds at any distance, or behaves similarly on mild nights, the problem has moved beyond winter-only range loss.
For a repeatable cold-night problem within the stated rating, provide support with the model number, settings, temperatures, and activation record. Operating within the rating does not promise identical detection distance in every scene, but persistent loss deserves investigation.
Judge the result at the point where you need illumination. If the light repeatedly catches you before the steps, that is useful coverage. If it still waits until you reach them after the view and test conditions are controlled, preserve the evidence and pursue the rating or service question instead of accepting an occasional distant trigger as a fix.
Panasonic’s PIR sensor FAQ explains how background temperature and clothing affect detection.