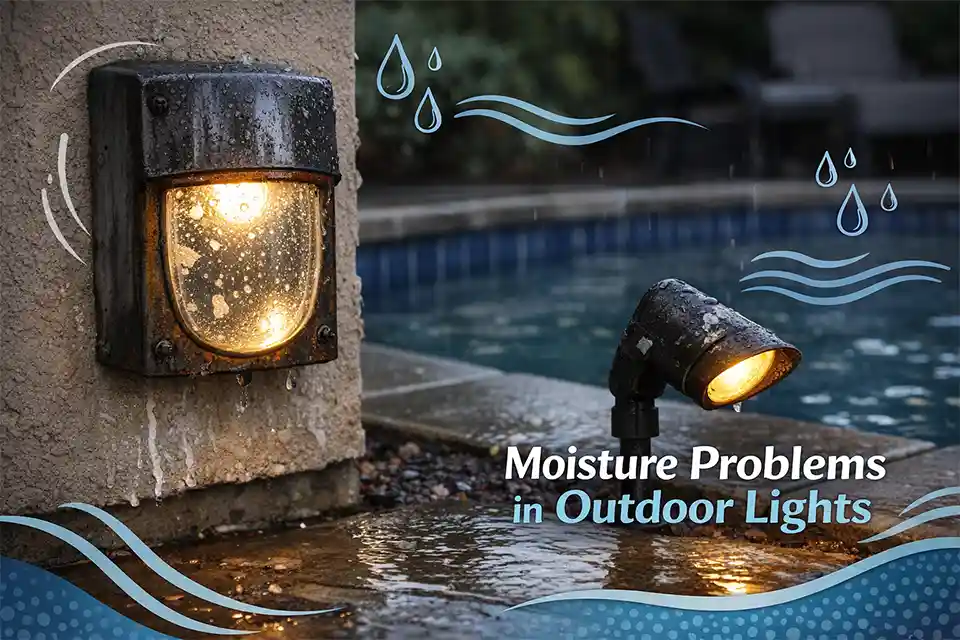
Most moisture problems in outdoor lights near a pool are not caused by “humid air” alone. They start when repeated splash, deck rinse water, or chemical residue gets past one weak point: the rear cable entry, a flattened gasket, or a cracked lampholder.
Check three things first. Does the fog clear within 30 to 60 minutes after the lamp warms up? Do droplets remain after 24 to 48 hours of dry weather? Does the light trip the GFCI immediately, or only after it has been on for 3 to 5 minutes? Those answers tell you far more than the presence of haze on the lens.
The important distinction is this: brief fogging is a symptom, while a leak path is the mechanism. Pool-adjacent fixtures fail faster than ordinary patio lights because the exposure is cyclical and dirty.
Splash carries chlorine byproducts, salt residue on saltwater pools, sunscreen, and fine dust. That mix dries, pulls moisture back in, and slowly turns a sealing problem into a corrosion problem.
In humid Florida, a sound fixture may fog lightly overnight. In the same setting, visible beads of water or residue lines the next afternoon are not normal.

Quick Diagnostic Checklist
- Lens haze that disappears within about 1 hour of operation is usually condensation, not a failed fixture.
- Water beads, streaks, or pooling that remain after 24 to 48 dry hours usually mean the housing is taking on water.
- A trip that happens within seconds to 5 minutes of startup points to electrical leakage, not a weak bulb.
- Green, white, or black deposits on metal parts mean moisture has already become a conductive corrosion issue.
- Fixtures mounted within about 6 to 10 feet of regular splash-out or deck wash typically age faster than the same model installed farther back.
- If the light head sits only a few inches above a frequently wet deck edge, replacement usually lasts longer than repeated resealing.
What People Usually Misread First
The most overestimated cause is humidity. Warm nights, cool lenses, and relative humidity above roughly 75% can create temporary internal fogging even when the fixture is still serviceable. That is annoying, but it is not the same thing as active water intrusion. A healthy fixture should clear as the air warms, or once lamp heat builds inside the housing.
That lighter pattern is much closer to what is explained in Why Is There Condensation Inside My Outdoor Light Fixture? than to a true leak. Once you can see beads moving across the lens, mineral streaks, or corrosion on the socket shell, the problem has already shifted categories.
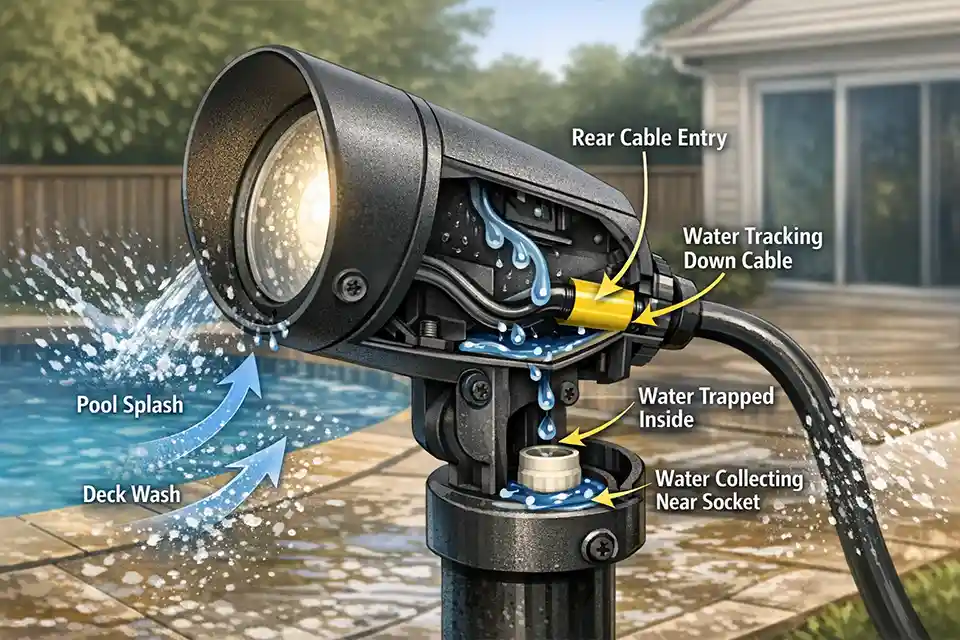
What people usually underestimate is how water gets there. Rain is often blamed first, but around pools the more likely sources are side splash, hose-down cleaning, irrigation overspray, and water tracking down the cable jacket. A fixture does not need to look soaked to go through 20 or 30 wet-dry cycles in a busy summer month.
That is also why a new bulb can seem to “fix” the issue for a week. The symptom improves because the socket dried during handling. The underlying mechanism has not changed.
Persistent fogging may be more than a cosmetic issue, so it is helpful to understand how to fix condensation inside outdoor light fixtures.
Why the Obvious Fix Often Wastes Time
The common time-waster is smearing exterior silicone around the front lens or upper seam without opening the fixture. It looks decisive, but poolside leaks often enter from the back side, not the face. If the cable entry is loose, if the mounting plate funnels water inward, or if the gasket has lost compression, front-edge caulk does very little. In some cases it makes drying worse by trapping what is already inside.
That rear-entry pattern matters more than most homeowners expect, especially on lights mounted where deck cleaning spray hits from below. The failure path is usually closer to what is described in Why Water Gets In Through Cable Entry Points than to a simple “seal the lens better” problem.
A second wasted fix is drilling a random drain hole. On a fixture designed to be sealed for wet locations, that can pull in more contamination than it releases. A third is replacing only the bulb after the socket has already started pitting. Once arc marks or corrosion show up, the bulb is no longer the main decision point.
Pro Tip: Test from the direction the fixture actually gets wet. A gentle hose spray for 2 to 3 minutes from splash height or washdown angle is more useful than blasting the lens seam with a hard jet.
What Chlorine and Saltwater Pools Change
Chlorinated pools shorten the timeline because residue left on the housing is not just moisture; it is moisture plus contamination. That residue makes small leaks more damaging.
A fixture that might survive plain rain exposure for years can start showing socket discoloration, terminal corrosion, or intermittent flicker within one or two swim seasons if it lives close to frequent splash.
Saltwater pools raise the stakes further, even though they are not the same thing as coastal salt air. The issue is chloride residue near the fixture, not ocean mist. Homeowners often overread the word “saltwater” and assume every nearby metal part must fail quickly.
That is not quite true. Distance and wash pattern matter more than the pool label alone. But when chloride residue combines with a weak seal, the metal usually does deteriorate faster. That is when the problem starts resembling Corrosion in Outdoor Light Connections more than simple fogging.
| Condition | What it usually means | Better-performing comparison | Best decision |
|---|---|---|---|
| Light fog only | Temporary condensation | Clears within 30 to 60 minutes or by the next day | Monitor and keep watching |
| Droplets or streaks inside lens | Active water intrusion | Interior stays visibly dry after 24 to 48 dry hours | Open, inspect gasket and entry point |
| White or green residue on metal | Chemical moisture corrosion | Bright, clean contacts with no buildup | Clean only if minor; replace damaged parts |
| GFCI trips after startup | Leakage under load | Fixture runs continuously when dry | Disconnect and repair or replace |
| Water pooling in housing | Structural sealing failure | No standing water at all | Replace the fixture |
When Repair Stops Making Sense
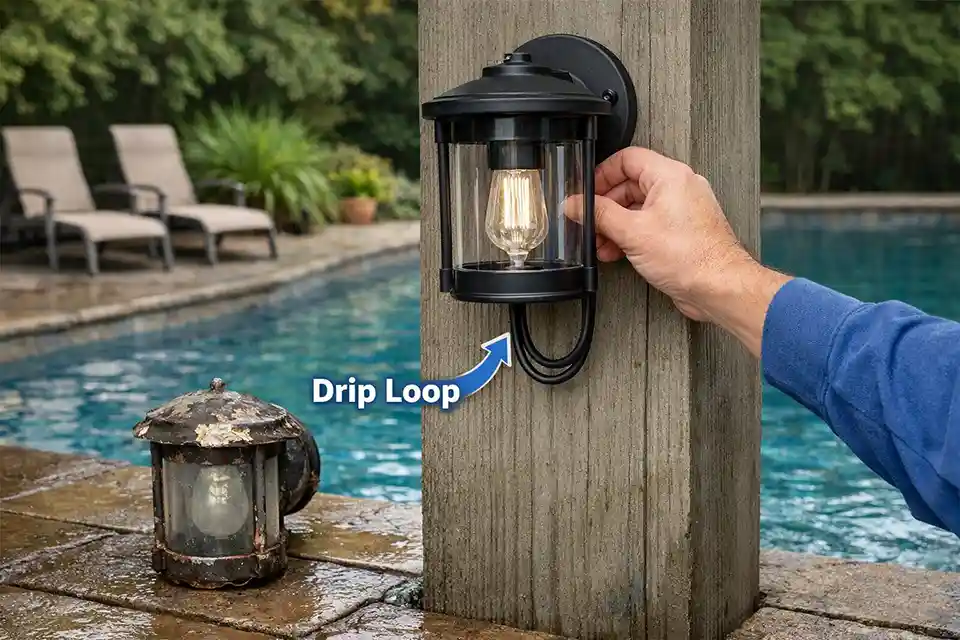
Repair is still reasonable when the housing is solid, the lens is intact, the threads still tighten cleanly, and you can identify one failed part: a flattened gasket, a loose compression fitting, a cracked ring, or a bad splice. In that case, dry the fixture fully for at least 24 hours indoors, replace the failed seal, clean only light corrosion, and reassemble with a proper drip loop so water cannot run straight toward the entry point.
The standard fix stops making sense when the socket is blackened, the terminal screws are crusted, the wire insulation has gone brittle, or the protective device trips more than once after a careful dry-out and reseal. At that point, this is no longer a moisture nuisance. It is an electrical leakage problem, and it belongs in the same decision category as Outdoor Lights Tripping GFCI Outlets.
For many pool-adjacent fixtures older than about 5 to 7 years in a true splash zone, replacement is the better use of money. The upgrade should not just be “a new light.” It should be a true wet-location fixture with corrosion-resistant hardware, a protected cable entry, and mounting that keeps the body at least 12 to 18 inches above the part of the deck that stays wet longest. That change usually matters more than adding more sealant.
One pattern that gets missed in the field: once a poolside fixture has taken on enough residue to trip protection intermittently, you can often spend two repair cycles chasing a problem that a better-positioned replacement would end the first time. That is the point where routine repair stops being careful and starts being expensive.
If the fixture only fogs briefly and dries predictably, watch it. If water remains visible after two dry days, or the GFCI starts opening under load, stop treating it like a cosmetic issue.
Around pools, the real question is not whether moisture is present. It is whether moisture has found a repeatable path into the electrical parts.
For broader electrical safety guidance around pools, see the U.S. Consumer Product Safety Commission guide.