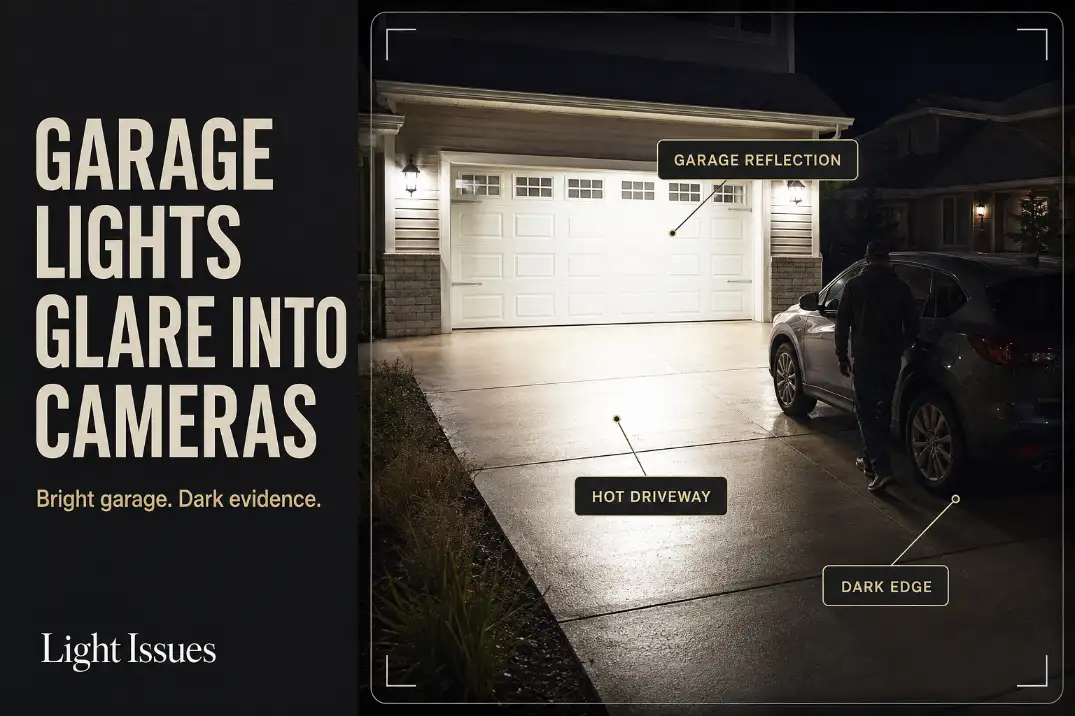
Garage lights usually glare into cameras because the camera is reacting to the brightest surface near the lens line, not because the driveway needs more light.
The first checks are the garage door, the driveway surface, and the vehicle-side route. If the pale door glows, the concrete has a bright patch within 10–25 feet of the camera, and the edge near the vehicle or gate looks dark, the light is controlling exposure in the wrong place.
A weak-light problem leaves the whole view dim. Garage glare creates a different pattern: one bright background wins, then useful detail disappears elsewhere.
If the image looks acceptable before the garage lights turn on but loses face, jacket, plate, or package detail 1–3 seconds after they activate, the issue is usually exposure shift. The fix is aim, shielding, and balance — not a stronger bulb.

Garage Door Reflection
The door may be the exposure target
A light-colored garage door can behave like a large reflector. White, beige, and light gray doors often fill so much of the camera frame that the camera protects the door instead of the person moving through the driveway.
This is especially common when coach lights or wall sconces sit around 6–8 feet high and throw light outward across the door panels.
The useful question is not whether the garage door looks bright. The useful question is whether the door becomes easier to read than the person, vehicle edge, or side walkway.
If someone standing 12–18 feet from the garage loses clothing or face detail while the door panels stay crisp, the door is acting like the dominant exposure surface.
This is the same basic failure pattern behind many cases where outdoor lights ruin security cameras, but garage doors make it more obvious because one reflective surface occupies so much of the frame.
Gloss, rain, and vehicle surfaces make it worse
A matte door spreads light more softly. A semi-gloss or glossy garage door can create sharper glare patches, especially around panel ridges or decorative windows.
After rain, the door, driveway, and vehicle hood may all bounce light at once. That is why footage can look acceptable on a dry night and suddenly become harsh after a storm.
In northern states, snow near the garage can create the same problem for several hours after sunset. The fixture has not changed, but the surface brightness around it has. In coastal or humid areas, damp pavement can keep the driveway reflective long after the light turns on.
Beam Test: Check the camera once on a dry night and once after rain. If the wet-night view loses detail first, reflection control matters more than bulb strength.
Driveway Hot Spots
The brightest pavement patch often tells the camera what to do
A driveway hot spot is not just an ugly glare mark. It is a high-brightness zone that can force the camera to reduce exposure across the whole image.
A small bright patch close to the garage apron can hurt the recording more than a softer pool of light farther down the driveway.
The closer that hot spot sits to the center of the camera view, the more it competes with the real target.
If the concrete directly under the garage lights is much brighter than the vehicle side, walkway, or person zone, the camera is probably reading the pavement before it reads movement.
This is why replacing the bulb with a higher-output LED often wastes time. More brightness usually makes the garage door and driveway more dominant while the side edges remain weak.
A 30-second walk test is better than guessing
Do not judge the setup from one still frame. Use a short movement test. Turn the garage lights on, wait 20–30 seconds for the camera to settle, then record someone walking from the sidewalk or side gate toward the garage, pausing near the vehicle, and crossing the darker edge.
Review the clip for detail, not just brightness. Can you read the person’s face direction, jacket color, hand movement, and the edge near the car?
If those details disappear while the driveway surface stays bright, the camera is not underlit. It is over-controlled by the wrong surface.
For fixture-level glare control, outdoor security lights without glare is a better next step than simply increasing wattage.
| Camera symptom | More likely mechanism | Less useful first fix | Better first check |
|---|---|---|---|
| Pale garage door glows | Door reflection controls exposure | Brighter bulb | Aim light below door panels |
| Driveway has a white patch | Beam lands too hard near camera view | Camera brightness setting | Lower and soften beam aim |
| Person near vehicle looks dark | Background wins exposure | Add another bright fixture | Move light toward the face zone |
| Side walkway disappears | Center driveway is overlit | Increase motion sensitivity | Add softer edge visibility |
| View worsens after rain | Wet surface bounce | Replace camera first | Compare dry and wet footage |
Dark Side Edges
The security value is often at the edge, not the center
Garage lighting can make homeowners overestimate driveway coverage. The center looks bright, so the setup feels secure. But the camera does not only need a bright center. It needs readable edges where someone actually enters the frame.
A common failing pattern is a bright garage face, a bright vehicle hood, and a dark strip along the side yard, fence gate, trash-bin route, or walkway beside the parked car. That strip may only be 4–8 feet wide, but it can be the most important route in the footage.
The goal is not to make the entire driveway equally bright. The goal is to preserve useful detail across the approach path. A slightly less dramatic garage face with a readable side edge is usually better security footage than a bright, polished-looking garage center.
Motion alerts do not prove the footage is useful
Motion detection can still work while the recorded image fails. A camera may detect movement from contrast, headlights, or body shape while still losing the details that matter afterward. That is a symptom, not a solution.
If alerts work but the clip cannot show face direction, clothing contrast, or what happened near the vehicle, the motion system is not the weak point.
The light-camera relationship is. Similar logic applies when floodlights wash out camera footage: detection can succeed while evidence quality fails.
Camera Height
A higher view is not automatically a better view
Garage cameras are often mounted high under the eave because that feels safer and gives a wider view. The tradeoff is detail. Around 7–9 feet is often more useful for residential driveway footage than pushing the camera high above the garage door.
Once the camera gets above about 10 feet, the view may widen, but faces, hands, packages, and license plates can become harder to read.
Height alone is not the problem. The problem is high angle plus bright foreground. A camera looking down over a glowing driveway may expose for pavement, door panels, or a vehicle roof before it exposes for the person moving through the scene. A wide garage view is not useful if it turns faces and plates into dark shapes.
Keep the light source out of the lens line
Garage lights placed close to the camera create a tougher problem than lights placed wider or lower. When the fixture, camera lens, pale door, and driveway hot spot all sit in the same visual corridor, even small glare can flatten the image.
Use the live preview from the camera location. If you can see the exposed bulb, clear glass, or bright lens haze in the frame, the camera can see it too. Adjusting camera angle may help, but only after the visible source and major reflection have been controlled.
Dual-Light Balance
Matching fixtures can still produce unbalanced footage
Two garage lights look balanced on the wall, but they may not balance the camera view. If both fixtures aim outward and overlap on the same driveway patch, they create one strong center glare zone.
The garage looks evenly lit to the eye while the camera records a bright middle and weak edges.
A better setup may look slightly less symmetrical. One fixture may need a lower aim. Another may need shielding. The useful target is not identical brightness on both sides of the garage door; it is readable footage across the first 15–20 feet of movement.
Warm, shielded light usually records better
Very cool LEDs can feel sharp to the eye, but they often create harsh contrast on pale doors, light siding, and pale concrete.
Around 2700K–3000K is usually easier to manage near cameras than cold blue-white light, especially where the garage door already reflects strongly.
That does not mean bulb color fixes the whole problem. Aim and shielding still matter more. If the fixture has exposed clear glass, no cutoff, and no way to keep the source out of the camera view, a bulb swap is only a partial fix.
If the lamp is visible in the frame and the door still glows after you lower the aim, the fixture may be the wrong shape for camera use.
At that point, it makes more sense to compare camera-friendly coverage through best outdoor lights for security cameras than to keep choosing by lumen count alone.

View Test
Test the recording, not just the preview
The final decision should come from recorded motion footage, not a live preview. Many cameras adjust exposure differently after motion begins, after night mode switches, or after the garage light turns on. A still preview may look fine while a moving person becomes hard to read in the saved clip.
Record a 30–60 second test. Have someone walk from the sidewalk, side gate, or edge of the driveway toward the garage.
They should pause near the vehicle, cross the side route, and move through the brightest driveway zone. Wait at least 20–30 seconds after the garage lights turn on before judging the result.
Use this quick diagnostic checklist
- The garage door is the brightest object in the frame.
- The driveway has a white hot spot within 10–25 feet of the camera.
- A person is detected but clothing or face detail is weak.
- The vehicle edge or side walkway is darker than the driveway center.
- Wet pavement or snow makes the footage noticeably worse.
- Lowering the light improves detail more than changing camera settings.
When adjustment stops making sense
Start with aim. Then add shielding. Then recheck the camera angle. But do not keep fine-tuning a fixture that is fundamentally wrong for the camera position.
The standard fix stops working when the bulb remains visible in the frame, the garage door still glows after lowering the aim, or the side approach stays dark after the driveway hot spot is reduced.
At that point, the fixture is not just misadjusted. It is producing the wrong light pattern for camera use.
A good final view is not bright everywhere. It is readable where the evidence matters: the garage door, walking route, vehicle edge, side approach, and person zone should all hold detail in the same clip.
For fine-tuning the actual beam direction, aim outdoor security lights is usually more useful than another camera setting menu.
For broader official guidance on shielded, downward-directed lighting, see the National Park Service outdoor lighting principles.