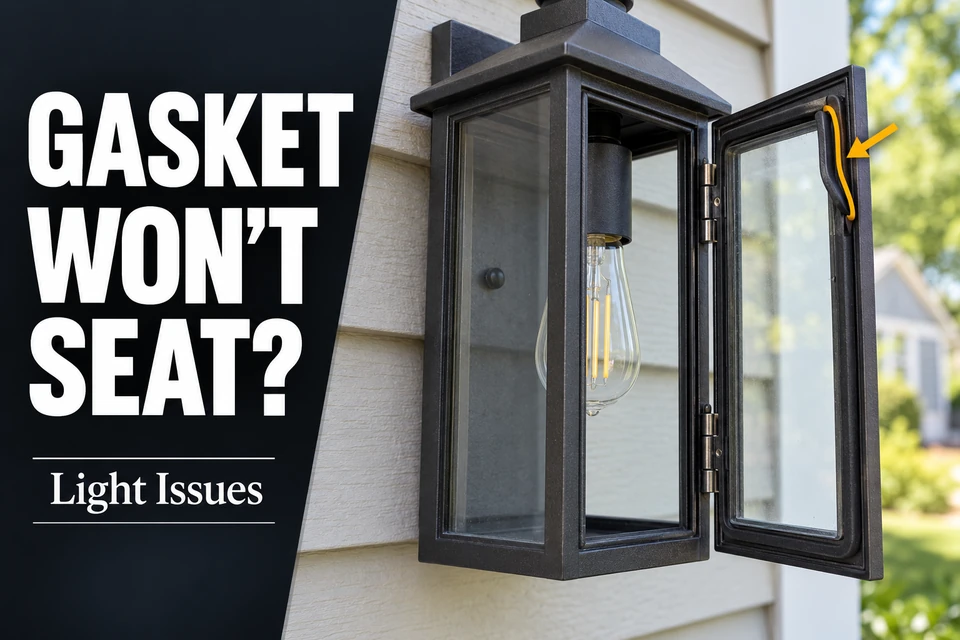
The bulb is back in place, but part of the gasket rises out of its groove whenever you return the cover. Or the gasket now seems too long, leaving a loose loop that was not visible before. The useful decision is whether the gasket needs repositioning or has lost the shape needed to seal. Tightening the cover cannot settle that question.
Switch off the fixture’s supply at the breaker before handling the assembly; a motion sensor or wall control is not a substitute for isolation. Let the bulb and cover cool, and work in dry conditions. These checks apply to a cover designed to open for bulb replacement. If access requires disturbing wiring or opening a sealed, nonserviceable assembly, stop at the manufacturer’s instructions.
Identifying the Gasket’s Original Position
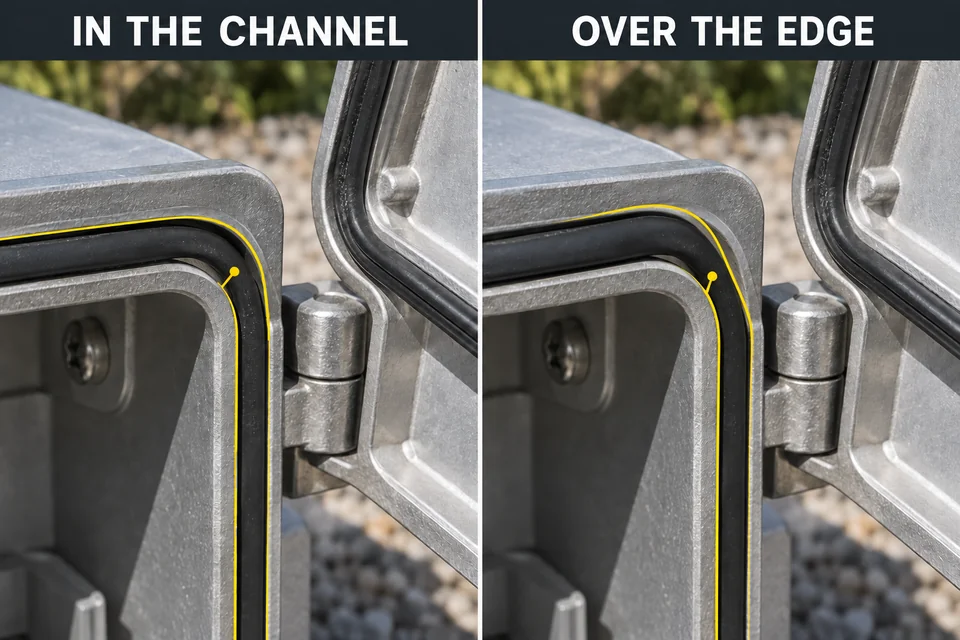
Confirm the gasket’s intended seat before judging its size. It may sit in a channel in the housing, fit into a groove on the cover, or wrap around the glass edge. Putting a lens-edge gasket into a nearby housing recess can make the correct part appear oversized. The fixture’s assembly diagram is the best starting point.
Look for a section that remained undisturbed, a molded corner, or a locating tab. A photograph taken before opening can help establish orientation. Old compression marks offer clues, but they do not prove the gasket was installed correctly before.
Support the cover while inspecting it; do not let it hang from wiring. If access is still obstructed because the glass cover will not come off, resolve that separate problem before pulling on the gasket through a narrow opening.
Once the intended position is clear, identify both the receiving seat and the mating surface that presses against the gasket. Trace that relationship around the accessible perimeter. Do not peel away an attached gasket simply to see underneath it: some designs use a bonded seal that is serviced with the cover assembly.
Stretching, Twisting, and Debris Problems
Use the location of the misfit to choose the next check. One raised corner calls for inspecting that spot for a twist or obstruction. Persistent bunching around an otherwise clear, correctly identified seat calls for checking whether the gasket still matches its intended shape.
When a Local Lift Comes from Twist or Debris
Inspect the raised section under good light. A gasket with a shaped profile may have rolled onto its side, leaving a ridge where the cover expects a flatter surface. Pressing harder at that ridge can move the twist elsewhere without correcting it.
For a gasket designed to be removable, gently release the affected section and return it in its intended orientation without pulling it lengthwise. If it is bonded or captured by another component, follow the service instructions rather than prying it free.
Check the channel and mating face for grit, loose residue, or material caught at a corner. Remove accessible loose debris with a soft brush or lint-free cloth. Avoid sharp scraping, aggressive solvents, and unapproved lubricants. Damage to the groove or a change in the rubber’s condition can create a new seating problem.
Watch whether the same spot rises again after the obstruction or twist is corrected. If it does, inspect that location for a damaged channel edge or persistent gasket distortion. Repeatedly pressing it down does not explain why it keeps lifting.
When Excess Length or Lost Shape Persists
A loose loop does not automatically mean permanent stretching. Slack may have collected at the last corner because the gasket was pulled around the first three sides. Confirm the route and distribute a removable gasket gently around its intended seat without stretching it.
If it still bunches, possible explanations include lasting deformation, swelling, or an incorrect replacement part. Do not cut away the apparent excess or try to shrink the gasket with heat. Either approach changes a component whose dimensions and profile control its fit.
Compression set is another issue: the material retains deformation after the closing pressure is removed. That can reduce its ability to make the intended contact when reassembled. However, a flat appearance alone proves little; some gaskets start with a flat profile.
A gasket may therefore fit into the channel yet remain unsuitable for reuse. Compare its condition with the intended profile and manufacturer guidance. A gentle touch check can reveal obvious hardening or poor recovery, but it cannot certify that an aged seal will perform properly.
Why Closing the Fixture by Force Breaks the Seal
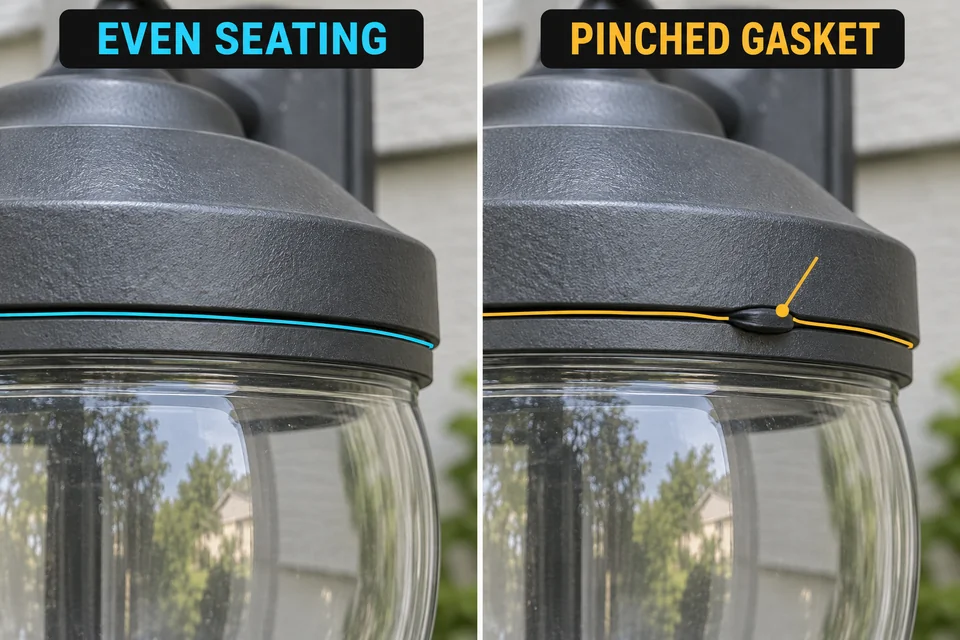
Closing pressure belongs on a correctly positioned gasket. The cover normally compresses it, but a segment trapped across the channel edge receives pressure in the wrong place. That can pinch, roll, cut, or push the material out of position.
Extra screw tension may pull the cover closer while leaving the seal uneven underneath. It can also damage glass, retainers, threads, or the cover itself. Force does not inevitably break every gasket, but it can turn a correctable positioning fault into damage.
Fastener resistance can also obscure what is happening at the joint. If the fixture screws are rusted and will not turn, address that limitation separately; screw stiffness is not reliable feedback about gasket compression.
Stop if the cover rocks, one side remains unexpectedly proud, or unusual resistance appears before alignment. Use only the specified closure method and any manufacturer-provided torque. Do not use the fasteners to draw a visibly misaligned cover into place.
Reusing vs Replacing the Gasket
Reuse requires both correct fit and serviceable material. The gasket must remain intact, return to its intended position without persistent distortion, and be reusable under the manufacturer’s instructions. Staying in the groove satisfies only the positioning check.
Tears, cracking, brittleness, persistent swelling, or loss of the intended profile favor replacement. So does excess length that remains after correct routing. Where the instructions require a new gasket whenever the cover is opened, that requirement takes priority over appearance.
Identify the fixture model and the gasket or cover-assembly part number. The replacement must match the specified profile, dimensions, material, and application. A similar-looking ring—or a wall mounting gasket—is not automatically suitable for sealing the service cover.
Some manufacturers supply the gasket only with a replacement cover. If the correct component is unavailable, or the receiving channel is damaged, consider whether to repair or replace the outdoor light rather than adapting an unrelated seal.
Inspect the mating face and glass edge before installing the replacement. A new gasket cannot compensate for a bent cover, broken retaining feature, or chipped sealing surface. Keep the fixture out of service until the assembly can be completed correctly; neither omitting the gasket nor bonding it in place with silicone resolves the fit problem.
The Dry Reassembly Test
The final fit check is whether the gasket stays correctly located as the cover closes. Keep the supply isolated throughout. “Dry” means no hose test, spraying, or powered inspection; it does not override preparation explicitly required by the fixture manufacturer.
Return the cover in its intended orientation while keeping the gasket located. Normal compression may begin before the cover reaches its final position. Follow the designed closure and watch for displacement or abnormal resistance.
Use this compact check:
- Position: The intended gasket location and orientation are confirmed.
- Condition: The gasket and accessible mating surfaces are clean and serviceable.
- Seating: No persistent twist, bunching, or displaced segment remains.
- Alignment: The cover has the expected joint pattern without abnormal rocking or resistance.
- Closure: The specified fastening is complete, with no visible extrusion or unresolved misfit.
Inspect only what is accessible; concealed sections cannot be declared correct from appearance alone. If the gasket slips during closure, stop and revisit its position instead of completing the fastening.
Passing this check establishes that no obvious seating fault remains; it does not certify weather resistance or restore an IP rating. If correct closure still requires forcing a displaced gasket into place, the repair is unfinished. Keep the fixture out of service until the correct replacement or further assessment resolves the misfit.
For the material behavior behind lasting deformation, see Parker’s explanation of compression set.