Water inside a fence post light is usually a leak-path problem, not a weather problem. The most likely causes are a failed base gasket, water tracking up through the wire entry, or a housing that no longer seals tightly after sun, rain, and seasonal movement.
The first checks that matter are simple: whether droplets stay inside for more than 24 to 48 dry hours, whether the light fails during rain or within 6 to 12 hours after it, and whether you can already see white, green, or rusty buildup around screws or terminals.
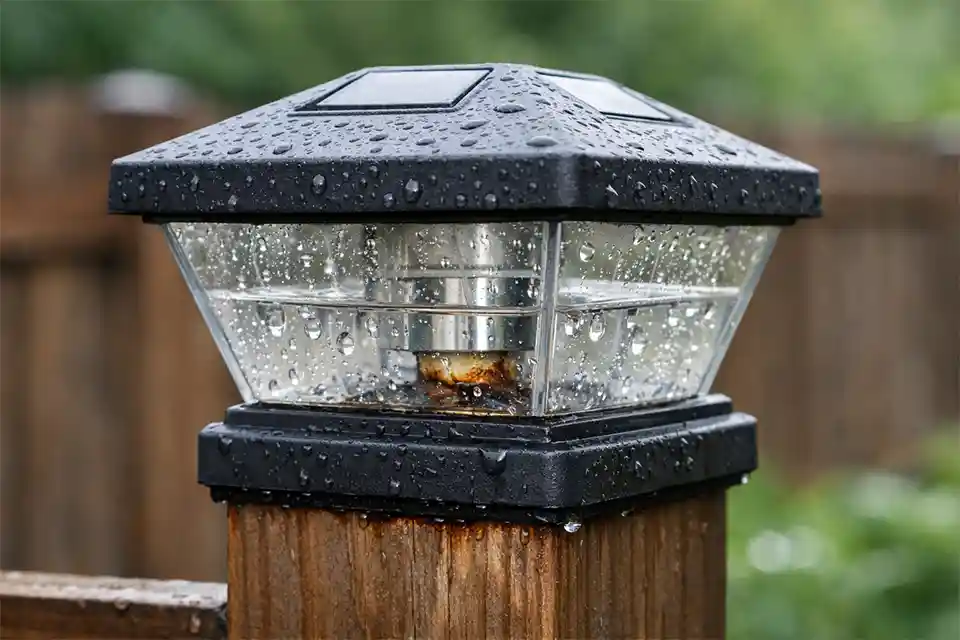
That is also what separates true intrusion from ordinary condensation. A light haze that clears after 30 to 60 minutes of lamp heat can be normal. Beads, streaks, or pooled water at the bottom of the lens are not. The symptom is visible moisture. The underlying mechanism is repeated water entry followed by corrosion and leakage current.
What is most likely going wrong
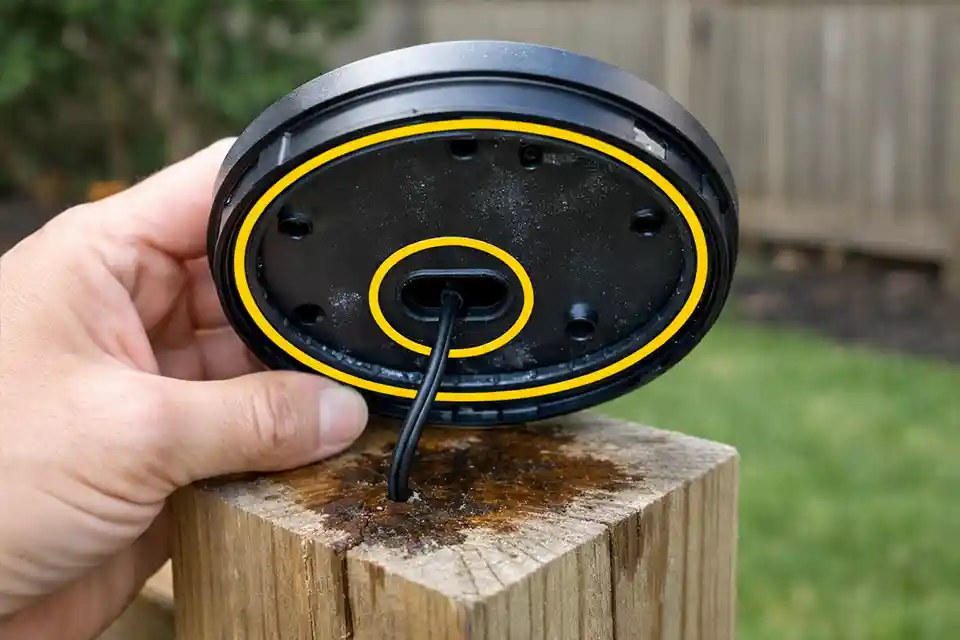
On fence posts, the base is usually a bigger suspect than the lens. People tend to overestimate top-down rain entry and underestimate how often water comes in from below or from the wire path. If the wire rises straight up through the post into the fixture, water can follow that route surprisingly well, especially after irrigation or wind-driven rain.
That is why the more relevant inspection point is the underside of the light and the post top itself. If the mounting surface is slightly uneven, the gasket does not need a dramatic tear to fail. A gap of roughly 1/32 to 1/16 inch is often enough to start letting moisture in over repeated wet cycles.
On wood posts, seasonal swelling and shrinkage loosen compression. On vinyl posts, trapped moisture and poor drainage tend to matter more than obvious cracking.
This pattern overlaps with Why Water Gets In Through Cable Entry Points, where the visible face of the fixture looks innocent but the leak path is underneath.
What people usually misread first
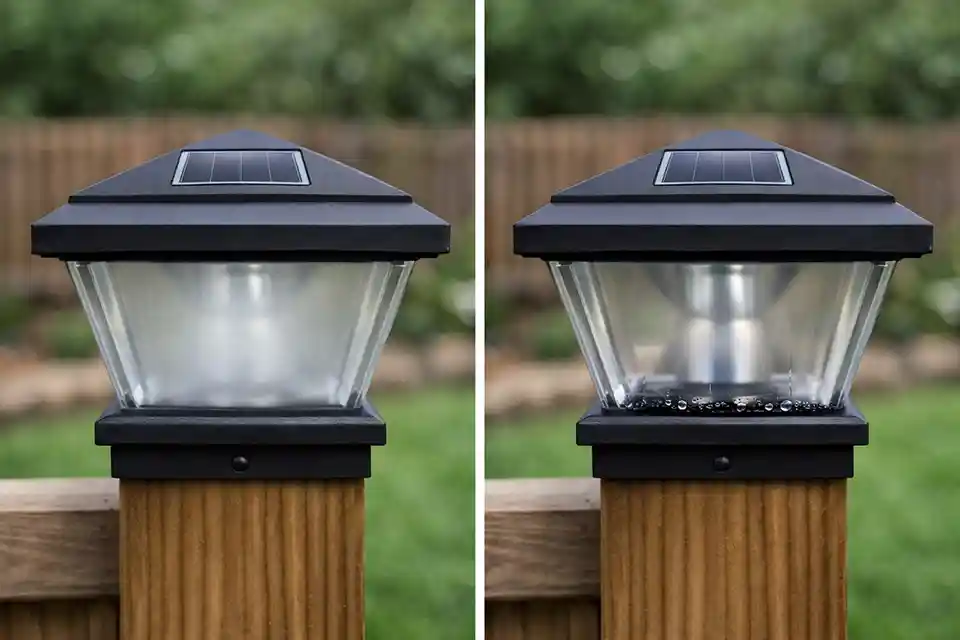
The first misread is condensation versus intrusion. Brief fogging during a sharp overnight temperature swing is not unusual, especially when humid air cools fast. But healthy fixtures usually recover quickly once the sun hits them or the lamp runs. A leaking fixture behaves differently. It keeps visible droplets, leaves streaks on the inside of the lens, or shows moisture concentrated near the base.
A practical threshold helps here. If the inside still shows distinct droplets after a full dry day, or after 24 to 48 hours without rain, treat that as a leak until you prove otherwise. Another useful comparison is performance. A healthy fixture may look hazy at 60°F with high humidity and still operate normally. A failing one often flickers, dims, or shuts off after the next storm because the real problem is no longer just moisture presence. It is corrosion and electrical leakage.
That is also why Why Is There Condensation Inside My Outdoor Light Fixture is related but not identical. Fence post lights deserve a stricter diagnosis because their wire route and mounting geometry are more exposed.
Quick diagnostic checklist
-
Droplets or streaks remain inside longer than 24–48 dry hours
-
The light cuts out during rain or within 6–12 hours afterward
-
The fixture starts working again only after 1–2 days of drying
-
Corrosion is visible on screws, socket parts, or wire ends
-
Moisture appears heavier near the base than near the top of the lens
-
Replacing the bulb helps briefly, then the same failure returns after the next storm
If three or more of these are true, stop treating it like a bulb problem.
Why the obvious fix wastes time
The most common time-waster is drying the housing, changing the bulb, and running a bead of caulk around whatever seam looks suspicious. That can buy a little time, but it often fails because it addresses the symptom instead of the entry path.
If the leak is at the underside wire opening, surface caulk around the lens changes nothing. If the gasket has already flattened, adding too much sealant around the perimeter can even make things worse by trapping moisture instead of controlling it. Once corrosion has started on the socket or internal connectors, reliability keeps dropping even after the fixture looks dry again.
A similar progression shows up in Water Inside Outdoor Light Fixtures and Corrosion in Outdoor Light Connections: water is the trigger, but corrosion is what makes the light keep failing.
| What you see | What it usually means | What it does not reliably mean | Best next step |
|---|---|---|---|
| Brief uniform haze | Mild condensation possible | Fixture is fully healthy | Recheck after a dry day |
| Distinct droplets | Active water intrusion | Harmless humidity effect | Remove fixture and inspect base |
| Rust or green deposits | Ongoing internal wetting | One-time exposure | Replace damaged internal parts |
| Works until it rains | Leak path or wet connection | Bulb alone is bad | Inspect wire entry first |
| Repeated GFCI trips | Leakage current in wet conditions | Random nuisance trip | Isolate fixture and test circuit dry |
The repair order that actually matters
Turn power off and remove the fixture completely. Do not start with the lens. Start underneath. Check the post top, the wire entry, and the gasket surface first. If the post cap or mounting area rocks even slightly, the seal is already compromised. If the wire comes straight up with no controlled path, fix that before resealing anything else.
Then inspect the internals. If the socket shows corrosion, the wires are brittle, or the metal inside is pitted, drying is no longer a real repair. At that point you are dealing with a damaged electrical assembly, not just trapped moisture.
The practical order is usually:
-
Correct the mounting surface if it is uneven
-
Replace the flattened or damaged gasket
-
Improve the wire entry so water cannot track upward as easily
-
Replace corroded internal parts or the fixture itself
-
Test through at least one full rain event, not just 10 minutes on a dry evening
Pro Tip: If a fence post light has leaked through two wet seasons, replacement is usually the smarter move. By then, the seal issue and corrosion issue are often both established.
When repair stops making sense
There is a point where resealing stops being a sensible fix. If the fixture trips a GFCI repeatedly, shows heavy corrosion, has a warped housing, or is not clearly rated for wet-location exposure, replacement is usually the better decision. That is especially true in high-humidity climates, coastal areas, or places with freeze-thaw movement where the same weak points keep reopening.
People often underestimate how quickly reliability drops once corrosion starts. A fixture may look “mostly okay” from the outside and still be on borrowed time inside. They also overestimate how much fresh caulk can undo. Caulk can support a good assembly. It does not turn a compromised wet-location fixture back into a durable one.
A nearby pattern appears in Why Your Outdoor Light Works Fine Until It Rains, but fence post lights usually reach that replacement boundary sooner because the installation geometry gives water more chances to enter from below.
For broader safety guidance, see the U.S. Consumer Product Safety Commission.