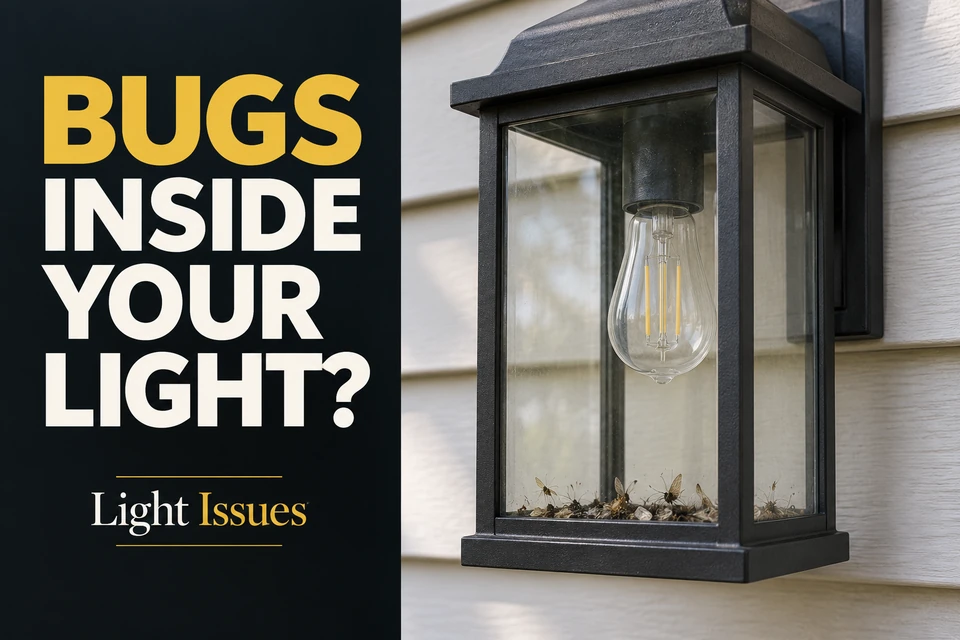
Dead insects return inside the light even after you empty the cover and fasten it again. The useful first check is whether the affected chamber is designed to close completely. An intentional opening calls for a different response than a displaced gasket or loose cover.
A lantern can look enclosed from the front while remaining open underneath its decorative housing. Before adding sealant, compare its construction with the service instructions. Cleaning removes the accumulation; lasting improvement depends on correcting a genuine closure defect while preserving required drainage and ventilation.
How Insects Enter a Fixture That Looks Closed
Look underneath the fixture before concentrating on its glass seams. A roof and four glass panels may surround the bulb without closing the bottom. Other fixtures have overlapping trim that conceals an opening from a normal viewing angle. In those designs, tightening the visible fasteners will not eliminate access.
Where the optical compartment is intended to close, inspect the accessible perimeter for an uneven cover, damaged retainer, or gasket protruding from its seat. Isolate the electrical supply before handling or opening the assembly. If accumulation began after a bulb change, the recently disturbed closure deserves attention first, although the timing alone does not prove incorrect reassembly.
Rear openings need more careful interpretation. A cable-entry defect matters only if it communicates with the compartment containing the insects. A gap behind a decorative backplate does not automatically provide a route into a separately enclosed lens chamber. Do not remove the fixture from its electrical mount merely to investigate this possibility.
The pile itself can also mislead. Insects often settle at the lowest ledge after entering elsewhere, so the heaviest accumulation does not locate the entrance. Light may attract insects to the area, but their presence inside is an access question. Compare visible openings with the model’s assembly diagram before deciding what needs correction.
Drain and Vent Openings vs Failed Seals
Identify the intended opening first
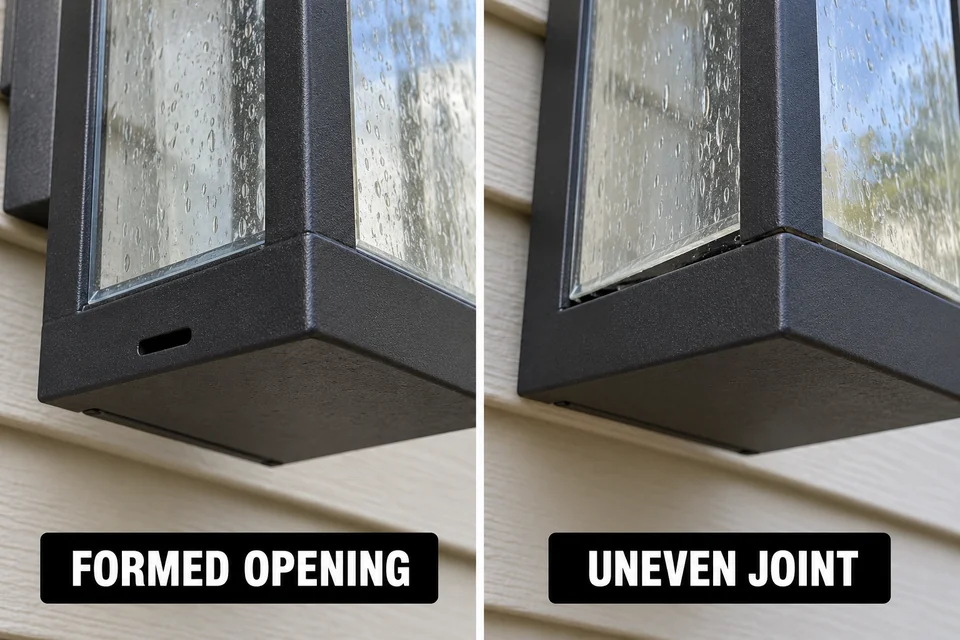
Confirm an opening’s function before trying to close it. A documented drain or vent may release incidental moisture or provide ventilation, and that function must remain available after maintenance. Some fixtures have no openly vented optical chamber, so advice for one lantern may be wrong for another.
A neat hole or molded notch suggests deliberate construction, but appearance cannot confirm its purpose. Check the model instructions or ask the manufacturer to identify it. An unidentified opening is a reason to pause modification, even when it looks large enough to admit insects.
| Observation | What to establish | Response |
|---|---|---|
| Suspected vent or drain | The instructions identify its function | Preserve its intended operation |
| Uneven cover or gasket gap | The intended fit and condition of the parts | Restore the approved assembly |
| Damaged housing or entry fitting | Whether supported repair is available | Arrange approved service or replacement |
| Unidentified opening | Its model-specific purpose | Obtain guidance before modification |
Restore a failed closure correctly
An unintended gap needs a different response. A displaced gasket, bent cover, or damaged retaining clip may prevent the joint from closing as designed. If the gasket will not seat correctly, resolve its fit and condition before applying more closing pressure.
Inspect both sides of the joint. A replacement gasket cannot compensate for a warped mating surface, and tighter screws can damage glass or push a misplaced seal farther out of position. Use the specified replacement part and closure method.
Do not cover required openings with improvised mesh, tape, foam, or caulk. Even a seemingly breathable screen can change drainage or become clogged. Use a screen or sealing accessory only when the manufacturer approves it for that fixture and location. Insect entry alone does not establish water intrusion or electrical damage.
Why Dead Insects Reduce Output and Trap Debris
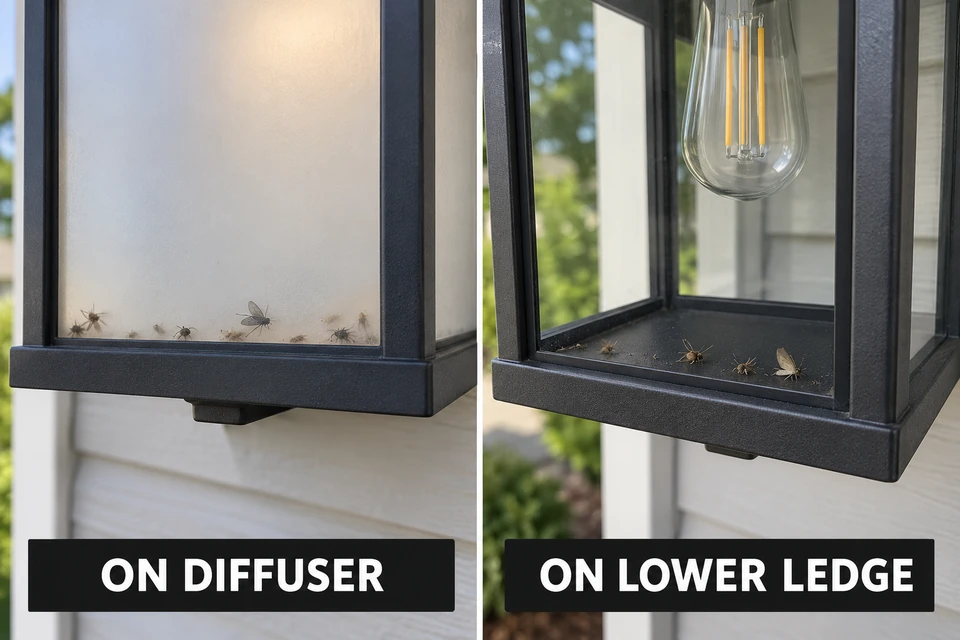
Judge the obstruction by where the debris rests. Insect remains against a translucent diffuser can block portions of its transmitting surface. A few insects on an opaque ledge below clear glass may have little noticeable effect on the illumination reaching the walkway.
Dust and other loose material can collect with the remains in corners and channels. If that mixture visibly obstructs an identified drain, clearing the accessible obstruction becomes part of maintenance. Do not assume every dirty corner is a drainage channel or push material into an opening to find out.
Cleaning can remove an optical obstruction, but it cannot establish the condition of the lamp or electronics. If the light remains unusually dim after permitted cleaning and correct reassembly, investigate that as a separate symptom. Increasing bulb wattage is not a remedy for debris accumulation.
Safe Cleaning and Reassembly
The cleaning boundary is the compartment the manufacturer permits you to open. A removable decorative cover does not make the wiring compartment or LED assembly user-serviceable. If the glass cover will not come off, identify its documented release mechanism before attempting removal.
Moisture at electrical parts, damaged insulation, scorch marks, broken glass, or compromised supports ends the routine-cleaning approach. Leave the fixture off and arrange appropriate service. Dry-looking surfaces alone cannot establish electrical safety.
- Isolate the supply and let everything cool. For a hardwired fixture, turn off the supplying breaker and verify that the fixture is de-energized before opening it. A wall switch, motion setting, timer, or app command is insufficient. If you cannot safely establish isolation, have a qualified electrician handle the work.
- Confirm and support the intended access. Follow the model’s instructions and work from stable access in dry conditions. Support removable glass before releasing its retainers. Do not let a cover hang from wiring or pry apart a sealed LED assembly.
- Record the arrangement and remove loose debris. Photograph the cover and gasket orientation before disturbing them. Empty a removable cover onto a suitable surface, then use a soft brush or lint-free cloth on accessible surfaces permitted by the instructions. Avoid brushing debris toward sockets or electronics.
- Clean only compatible surfaces. Follow the instructions for the actual lens material and coating. Where allowed, clean the detached lens separately and keep liquid away from sockets, wiring, drivers, and LED boards. Do not spray pesticide, lubricant, or experimental solvents inside. Avoid pressure washing and compressed-air blasting.
- Inspect the closure components. Check the accessible gasket, mating faces, retainers, and documented openings. Remove loose material from the sealing surfaces without scraping or stretching the gasket. Replace damaged parts with the specified components; do not substitute household weatherstripping.
- Dry and reassemble as directed. Allow cleaned parts to dry fully, then restore their documented orientation. Seat the cover evenly and use the specified fastening method without forcing misaligned parts together. Confirm that the assembly is secure and required openings remain unobstructed before restoring power.
When the Fixture Design Guarantees Repeat Entry
An intentional opening leaves an access route available; actual recurrence depends on insect activity and exposure. An open-bottom lantern or openly vented decorative chamber can collect insects again even when every part is correctly installed. Repeated cleaning in that situation does not establish a repairable defect.
If the affected chamber opens easily and cleaning is infrequent enough to be manageable, keeping the fixture may be reasonable. Record the cleaning date and observe recurrence during ordinary use. That establishes your maintenance burden, although the interval alone cannot identify the entrance.
Repair makes sense when a specified replacement component can restore the intended closure and the surrounding housing remains sound. Replacement becomes more reasonable when the enclosure is warped, required parts are unavailable, or debris accumulates inside a compartment you cannot service. Manufacturer service may still be available for some assemblies.
For a replacement, examine how the affected chamber closes, how it can be cleaned, and whether approved service parts are available. Also check the outdoor fixture weatherproof ratings against the installation’s actual exposure. Wet-location suitability addresses environmental use; it is not a promise of insect exclusion.
Replace the fixture when acceptable maintenance would require altering its intended construction or repeatedly opening an inaccessible chamber. Where a correct replacement gasket or retainer can restore the closure, repair that specific defect. Neither decision requires plugging a necessary drain or vent.
For a model-specific example of power isolation, lens cleaning, and gasket closure requirements, see RAB Lighting’s lens maintenance instructions; follow your own fixture’s instructions for the actual procedure.