
An outdoor light still turns on, but the planting bed or walkway it illuminates looks weaker than before. In daylight, the lens has pale spots or a chalky film. Sprinkler deposits may be obstructing and scattering light before it reaches the intended surface.
The useful test is whether compatible cleaning improves both the dry lens and the illumination beyond it. A clearer-looking wet surface is not enough to judge the result. Locate the film, check whether sprinkler water reaches it, and assess what remains after cleaning and drying. Before touching the fixture, isolate its power supply and let it cool.
Lens Film vs Actual LED Output Loss
Inspect the Lens While It Is Dry
Locate the haze before choosing a cleaning method. Look across the dry lens at an angle in daylight. Dried droplet outlines, overlapping rings, and uneven streaks suggest surface residue, but white appearance alone does not identify minerals; dust and other contamination can look similar.
Determine whether the marks are outside the glass or appear beneath it. Reflections and textured lenses can make that difficult. Change your viewing angle without opening the housing, and retain the uncertainty if you cannot locate the haze confidently.
A glowing fixture face is a poor measure of useful illumination. Surface contamination can scatter light toward your eyes while reducing the light reaching the path or planting. Visible deposits can also coexist with another problem.
If the lens is clear but illumination remains weak, the broader causes of outdoor LED dimming become relevant. That observation does not identify an electrical fault; it means exterior film is no longer an adequate explanation.
What a Wet/Dry Comparison Can Tell You
Before touching the lens: Isolate the lighting supply at its source and let the fixture cool. Do not rely on a timer or sensor. If the enclosure is damaged, water appears inside, or protective devices trip, leave the light off and arrange assessment.
Where the manufacturer permits damp wiping, lightly moisten a small exterior area with a clean, barely damp soft cloth. Avoid rubbing loose grit across the surface, and keep moisture away from seams and openings. Do not spray or soak the fixture to create a comparison.
The patch may look clearer while damp. Moisture can temporarily disguise surface irregularities as well as alter the visibility of deposits. That change does not prove that the film is mineral scale or that the lens is undamaged.
Let the patch dry before judging it. If the same marks return, wetting has not demonstrated removal. Reserve the cleaning decision for the approved method and its dry result.
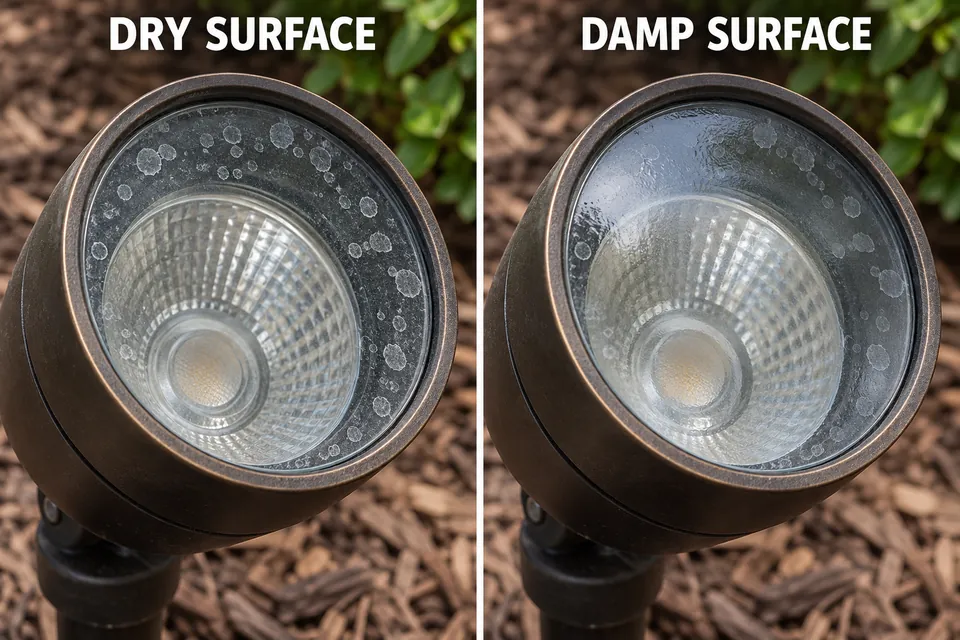
The Spray Pattern That Confirms the Cause
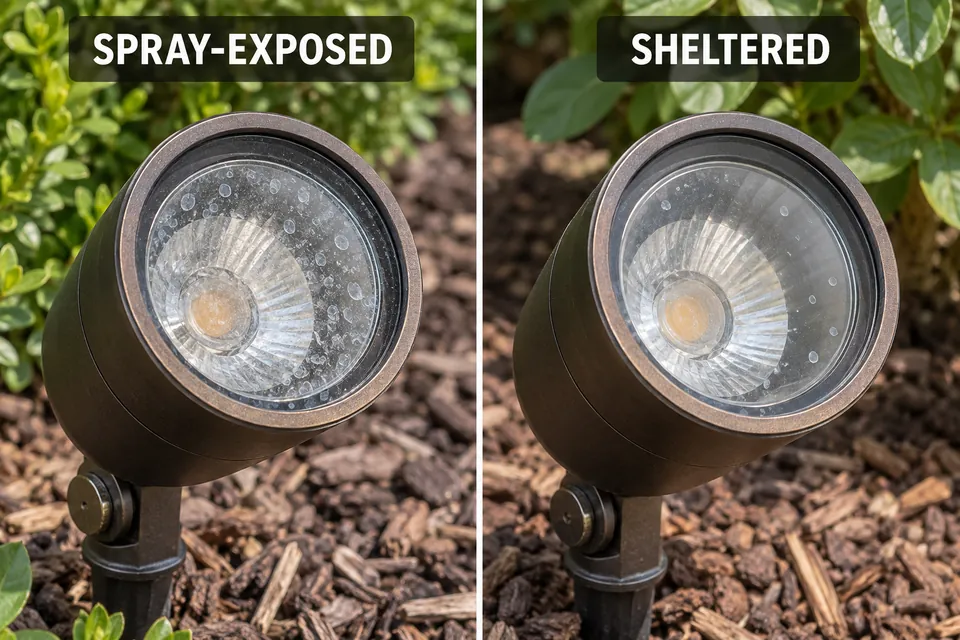
Match the deposit pattern to actual water contact before blaming a nearby sprinkler. Heavier spotting on the sprinkler-facing area, with less on comparable sheltered surfaces, supports that connection. Similar dried marks on nearby edging can add context, but a sprinkler’s proximity alone proves little.
Watch a normal irrigation cycle from a dry position with the lighting supply off. Follow the full sprinkler sweep rather than one moment. A stream may miss the fixture initially but reach it later, or wind may carry fine spray across the lens.
Seeing water strike the marked area confirms exposure. It does not chemically identify the residue or prove that all lost illumination comes from it. The stronger pattern combines direct contact, removable surface deposits, and less renewed spotting after the spray is redirected.
If haze appears beneath the glass, follow the separate diagnosis for in-ground lights that fog after irrigation. Exterior cleaning cannot resolve moisture on the inner surface.
Use ordinary irrigation observations to identify unwanted contact. Deliberately soaking the light adds exposure without establishing whether the existing film caused the dim appearance.
Cleaning Coated Glass Without Scratching It
Let the lens material and coating determine the cleaner. A clear cover may be coated glass or plastic, while the surrounding finish and gasket may have different chemical restrictions. A product labeled safe for glass is not automatically suitable for the complete fixture.
Use this sequence:
- Find the model-specific care instructions. Confirm the lens material, permitted cleaners, and whether any cover removal is intended. Do not open a sealed assembly simply to clean its exterior.
- Remove loose contamination gently. With power isolated and the fixture cool, use the permitted soft brush or cloth to lift loose material. Avoid dragging dry grit across the lens under pressure.
- Start with the allowed mild cleaning method. Where approved, use a soft cloth with mild soap and water. Control the moisture instead of spraying the housing, and keep it away from openings and electrical parts. Soap may remove ordinary dirt without dissolving mineral scale.
- Escalate only with confirmed compatibility. If deposits remain, use a mineral-removal product only when approved for the lens, coating, adjacent finish, and seals. Follow its specified application and removal instructions. Unknown compatibility is a reason to stop, not to experiment with stronger mixtures.
- Remove residue and assess the dry result. Finish as directed and inspect after drying. Restore power only when any permitted reassembly is complete and the fixture is ready for service under its instructions.
Do not use razors, scouring pads, abrasive powders, polishing compounds, or melamine sponges. Avoid treating vinegar, household glass cleaner, or a water-repellent coating as a universal solution. Removing a deposit while damaging the optical surface creates a different problem.
For the nighttime comparison, keep the fixture aim, control settings, viewing position, and surrounding lighting as similar as practical. Use the same patch of walkway or planting as your reference. Moving the light during cleaning makes it harder to tell whether the improvement came from a clearer lens or a different beam direction.
Judge that illuminated surface directly. Phone cameras can automatically brighten a scene and conceal the difference. Improvement after cleaning supports an optical contribution to the original symptom, but does not establish recovery of the fixture’s rated output.
Redirecting Water Before Repeated Cleaning
Fresh spotting on a cleaned lens is a reason to revisit spray exposure before repeating the cleaning process. Adjust the sprinkler’s direction or permitted arc setting so its normal sweep avoids the fixture, then observe the result. Account for wind drift where that contributes to the recurring pattern.
Preserve the intended watering coverage. If avoiding the light leaves plants unwatered, or requires changes beyond a simple approved adjustment, have the irrigation arrangement assessed rather than improvising plumbing changes.
Moving the light may be another option, but only where its mounting, available cable allowance, and intended illumination permit it. Do not pull against a short lead or move the beam away from the area it needs to serve.
Changing the irrigation hour does not prevent mineral deposits when water still lands on the lens. Check later normal cycles for fresh spotting. Reduced recurrence is more useful feedback than a fixed cleaning calendar.
When the Lens Is Permanently Etched
Stop escalating cleaning once the approved method no longer changes the dry surface. Persistent haze may reflect etching, scratches, coating deterioration, or deposits that remain. Failure of mild soap alone is not enough to declare the lens permanently damaged.
Inspect the fully dry surface for dull patches that persist through the permitted cleaning process. Wetting can temporarily disguise surface defects, so a lens that looks clear only while damp has not demonstrated a lasting recovery.
Ask the manufacturer or a suitable service provider whether the remaining appearance is consistent with damage and whether a replacement lens is available. More rubbing pressure or a stronger chemical can destroy a coating that was still serviceable.
For a serviceable fixture, use the specified lens or cover assembly and any required gasket. Matching diameter alone is insufficient: optical properties, edge shape, retention, and sealing geometry also matter. If a replacement cover’s gasket will not seat correctly, resolve that fit problem before returning the fixture to service.
Do not pry apart a sealed integrated light to substitute generic glass. When the damaged optical assembly is nonserviceable or correct parts are unavailable, fixture replacement may be the practical next decision.
Let the dry result set the stopping point. A clear lens with persistent weak illumination needs a different diagnosis. A damaged lens needs the correct replacement assessment. When cleaning restores useful light, correcting the spray exposure is what prevents the same work from becoming routine.
For guidance on gentle cleaning and coating precautions, see Kichler’s lighting cleaning and maintenance instructions.