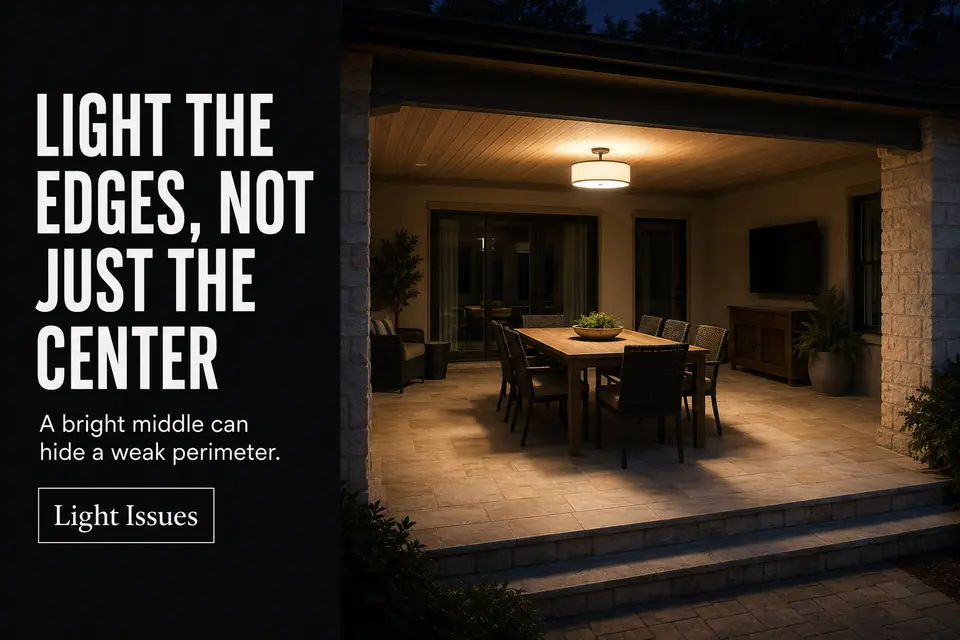
A covered patio should not be judged by its brightest surface. The useful question is where continuous visibility first breaks as you move from the house toward the wall, seats, and yard.
One central fixture can make the table and open floor look adequately lit from the doorway. That bright middle dominates the view while wall boundaries, chair-side circulation space, and the patio step remain difficult to read. Increasing the lamp output may intensify this contrast without reaching any of those failed surfaces.
The stronger diagnostic move is to trace the light outward after full darkness. Ignore the bright center temporarily and locate the first useful edge that disappears. That break reveals whether the problem is limited beam reach, a fixed obstruction, furniture interference, or a transition the overhead light cannot describe.
Center Fixture Problem
Judge the center fixture by where its useful coverage ends, not by how bright it appears. A ceiling-mounted source can illuminate the table or an open patch of floor effectively while losing useful strength before reaching the patio perimeter.
This happens partly because downward light favors horizontal surfaces. The table and central floor reflect light toward the viewer, while walls, furniture edges, and step faces receive less illumination. The covered ceiling also encourages one-source thinking: because the fixture occupies the visual center, it is easy to assume it should control the entire space.
A brighter lamp can make the central reflection more dominant while leaving the original coverage boundary almost unchanged. Your eyes adapt to that brighter middle, making the remaining edge appear darker by comparison. This is why greater brightness can reduce useful visibility instead of solving the failure.
Stand at the house doorway and look beyond the illuminated center. If coverage fades at roughly the same distance across several sides, the likely problem is beam reach and center-to-edge contrast. If the darkness begins abruptly behind one object, continue the diagnosis before changing the lamp.

Wall Edge Shadows
A continuous dim strip along one boundary usually points to direction or obstruction, not a shortage of total light. Center-mounted fixtures favor the floor, while roof posts, projecting trim, cabinets, and structural beams can block what little light continues toward the wall.
Vertical boundaries need enough definition to show where the active patio ends. Comfortable darkness beyond an unused open side is not automatically a failure. A wall line that conceals stored objects, chair legs, or a route people use has become an unreadable part of the patio.
Check both the house wall and the open perimeter. Follow the dim edge until it becomes readable again. If the dark area begins behind a post or cabinet and preserves that object’s shape, the obstruction is the stronger clue. Raising overall output will usually preserve the same shadow.
Seating Corners
Test the furnished patio, not the empty floor. Chairs, sofas, side tables, and planters can intercept the remaining overhead light before it reaches the circulation space beside or behind the seats.
Sit in each main position and inspect the nearby floor, the route behind the chair, and the closest boundary. This separates harmless background darkness from patio corners that remain dark after the main light is on.
Seated eye level also changes the correction. A supporting light that appears shielded while standing may become a direct bright point from a chair. Making the corner visible is not an improvement if the source now dominates the view.
Move one chair or table temporarily before adding another light. If the floor becomes readable, the existing coverage is being blocked. The better response may be light from a different direction or a minor furniture adjustment rather than more central output.
Step Transition
Treat the step as a vertical edge, not merely another part of the illuminated floor. The upper tread may receive plenty of overhead light while the riser remains dark, causing two different levels to appear almost continuous from the approach line.
Walk toward the transition from both the house and the yard. From above, check whether the tread edge separates from the lower landing. From below, look for the vertical face and the covered floor above it. Some lights that make a step harder to distinguish illuminate the upper surface strongly while leaving the height change visually flat.
Posts, furniture, and the patio roof can interrupt coverage exactly where the step begins. A brighter center fixture may still miss the riser because the direction of light has not changed. If the same vertical face remains dark, placement is controlling the result.
Any supporting source should stay outside the normal approach sightline. The goal is not to turn the step into the patio’s brightest feature, but to restore enough tread-to-riser separation for the change in height to remain readable from both directions.
Side Layers
Place the correction at the first failed boundary rather than spreading more light across the center. A restrained side layer can reach behind furniture, reveal a wall line, or cross a step face that the overhead fixture misses.
Match the direction to the diagnosed break. A shielded wall light can support a continuous dim boundary. A low guide light can define a short circulation edge or transition. A restrained perimeter wash can reconnect a seating corner when furniture blocks the central source. These are situational responses, not a list of fixtures the patio needs.
Overlap the added coverage only far enough to meet the existing center layer. If the perimeter becomes as bright as the middle, the correction has probably exceeded its purpose. Address one weak edge, then repeat the doorway and seated-view checks before adding anything else.
Quick judgment: A successful side layer may barely change the patio’s overall brightness. Its value is that the wall, chair-side floor, or step stops disappearing.

Edge Test
Verify the correction from the positions that exposed the failure. Wait until full darkness, allow your eyes a brief adjustment period, and begin at the house doorway. Walk the normal route, sit in each primary seat, and approach the step from both directions.
Switch the side layer off and on without changing position. The visible improvement should occur at the diagnosed wall, seating corner, or transition—not primarily in the already bright center. This is the practical standard for checking whether outdoor lights reach the surfaces they are meant to reveal.
Use five final checks:
- The wall or open perimeter remains readable from the doorway.
- The floor beside and behind the main seats does not disappear.
- No supporting fixture creates direct glare at seated eye level.
- The step tread and riser separate clearly from both directions.
- Switching off the side layer makes the intended edge noticeably weaker.
Complete coverage does not require equal brightness everywhere. Stop when the doorway-to-seat-to-step route remains connected and the weakest useful boundary is readable. Inactive background areas can—and usually should—remain comfortably dim.