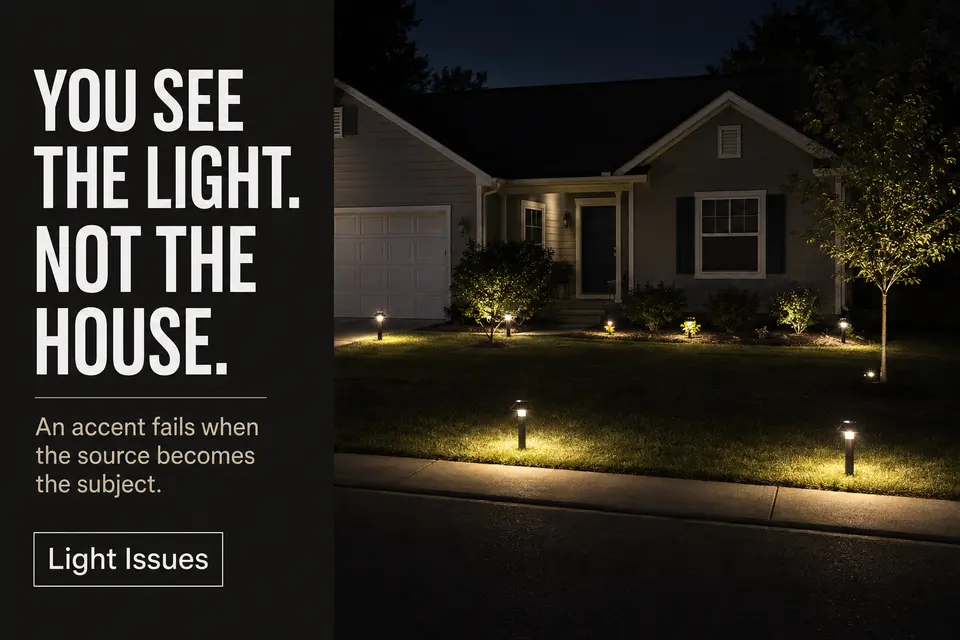
A front-yard accent light can operate exactly as installed and still produce the wrong view. Instead of noticing the masonry, porch column, tree, or planting bed, you notice a glowing lens near the ground. The fixture becomes the subject while the house recedes behind it.
This is not primarily an insufficient-light problem. It is a visual-order problem involving three competing elements: the emitting source, the bright area around it, and the intended target. The element your eye reaches first controls the diagnosis.
The first check should therefore happen from the normal arrival view, not beside the fixture. Stand where someone would approach from the sidewalk or driveway. If a small glowing point is easier to locate than the feature it illuminates, deal with source visibility before reconsidering output.
Visible Fixture Source
The important distinction is not whether you can see the fixture body. It is whether you can see its bright emitting surface. A dark housing may remain visible in a planting bed without becoming distracting, but a direct view of the lamp, lens, or open face can overpower the intended accent.
A compact source can appear more intense than a much larger, softly illuminated wall or tree. The target may technically receive light, yet the eye stops at the fixture before reading the effect. This is one reason a small visible outdoor source can create disproportionate glare.
Check More Than One Approach
Source concealment is viewpoint-specific. A fixture that appears properly shielded from the front door may be completely exposed from the sidewalk or the opposite side of the driveway.
Walk through the important approach angles after full darkness and observe the fixture from ordinary standing height. If its glowing face repeatedly appears and disappears as you move, the problem is a broken sightline rather than a general shortage of illumination.

Accent Light Dominance
When the source is only partly visible, compare visual weight rather than asking whether the fixture is technically concealed. A concentrated bright point and its surrounding pool can still dominate a much larger architectural surface.
Read the scene as three layers: fixture, immediate spill zone, and target. If the first two merge into one bright object while the wall or planting receives only a weak fragment of the beam, the accent has no convincing destination. It announces where the light originates without showing why the light is there.
The common mistake is to increase output. Unless visibility or aim changes first, more output strengthens the source and nearby spill. As with other situations in which brighter outdoor lighting reduces visual clarity, the eye adapts to the strongest element and quieter details become harder to read.
The fixture does not need to vanish from every angle. It needs to become visually secondary. Useful contrast reveals a recognizable part of the house or landscape; an unsuccessful accent leaves a disconnected bright object in front of a weak background.
Walkway Reflection
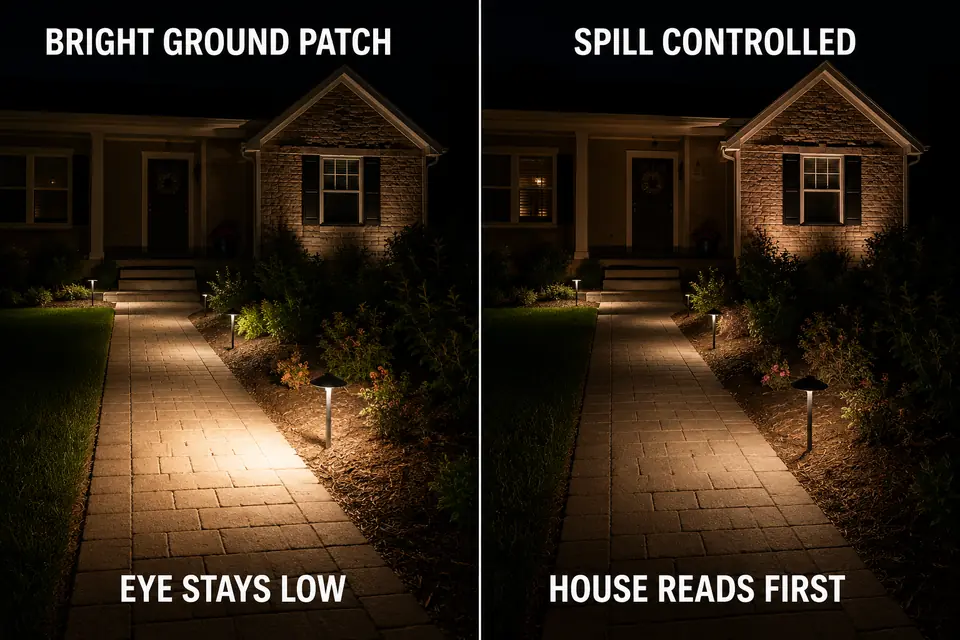
A fixture’s visual footprint may be larger than the fixture itself. Pale concrete, smooth pavers, glossy edging, light gravel, and wet surfaces can catch downward spill and turn a small source into a broad bright patch.
That patch keeps attention near the ground. The walkway may remain usable, but the area beside the fixture becomes the strongest plane in the view. This differs from walkway lighting that provides guidance without glare, where the route stays readable without overpowering its surroundings.
Judge the reflection from the normal approach and under the conditions that expose the problem. A surface that looks restrained when dry can respond very differently after rain. If fixture visibility remains similar but the distracting patch changes with surface conditions, reflection—not the source alone—is enlarging the problem.
Low Aim Mistake
Low mounting is not the mistake; a beam that ends too low is. A compact fixture near the ground can still create a controlled accent, but not when most of its useful light terminates around the base of the target.
Look for a bright lower wall, trunk flare, or planting edge with little readable form above it. Instead of carrying attention toward the house, the beam concentrates visual weight beside the fixture. The same directional error may also send unused light across the lawn or walkway.
Follow the Beam to a Meaningful Feature
Light hitting the house is not enough. The beam should reveal something recognizable: masonry texture, a column edge, the form of a small tree, or separation between planting and facade. If its brightest area has no architectural or landscape meaning, the beam is merely landing rather than accenting.
Correct the directional relationship before adding output. Broader outdoor-light placement corrections may be needed when the current position cannot reach its target without exposing the source, spilling beyond the property, or shining into a window.
There is no useful universal aiming angle. Fixture optics, setback, mounting height, target size, and viewing position all affect the result. The field standard is simpler: the source should recede, the beam should reveal a meaningful feature, and the correction should not create window spill or theatrical brightness.
Hidden Source Check
The useful test is to remove direct source brightness from the view without changing the lighting itself. After full darkness, stand where the fixture looks most distracting. Use your hand or a small opaque card at arm’s length to block only the source, or shift behind an existing shield or planting edge.
The change tells you where to work:
- If the target immediately becomes clearer, direct source visibility is leading the problem.
- If little changes, the aim or target illumination is probably weak.
- If the bright pavement patch remains dominant, spill or reflection still controls the view.
This is an observation test, not an instruction to cover an operating fixture or place material against a hot housing. Permanent repositioning, shielding, or electrical work must follow the fixture instructions and remain within the homeowner’s competence.
Hiding the source is only successful when its target remains readable. If the fixture disappears but the house does not become clearer, the diagnosis has moved from source visibility to aim, reach, or broader front-elevation structure.
Street View Test
The final decision belongs at the viewpoint that controls curb appeal. Move to a safe, legal position along the sidewalk, driveway approach, or street edge. After leaving a brighter interior or porch, give your eyes roughly 20–30 seconds to settle before judging the composition.
Notice the viewing order instead of inspecting individual fixtures. What appears first? What comes second? Does the eye move from the approach toward the house, or stop at a row of bright ground-level points?
Repeat the observation from another likely approach because shielding changes with viewing angle. A phone photo can record the difference, but automatic exposure and night processing may exaggerate bright sources or lift dark surfaces. Treat the photograph as secondary evidence.
If the sources have receded but the property still lacks a clear subject, the problem has expanded into the broader front-lighting hierarchy. That requires judging the relationship among the entry, garage, facade, planting, and approach—not continuing to adjust one accent in isolation.
Use the diagnosis in this order: conceal direct source visibility, control excessive ground spill or reflection, correct the aim, and only then reconsider output. Keep the walkway readable, but let the house regain visual priority. A successful accent is noticed through what it reveals, not because its glowing source demands attention.
DarkSky’s Five Principles for Responsible Outdoor Lighting likewise recommend careful aiming, shielding, and using no more light than necessary.