Underground lighting cable damage usually reveals itself through dim fixtures, sections that stop working, or lights that behave differently after rain. In most residential systems, the root cause is not the transformer or the bulb but resistance building inside compromised wiring below the soil line. Once insulation fails or copper begins corroding, voltage delivery becomes unstable and performance declines gradually rather than all at once.
Low-voltage landscape lighting typically runs on 12 volts using 12/2 or 14/2 direct-burial cable. While that voltage is safer than line voltage, the cable still operates in wet soil under mechanical stress from tools, roots, and foot traffic. If the wire was buried too shallow—less than 6 inches in many installations—it becomes vulnerable to everyday yard activity and seasonal ground movement.
When pets regularly dig near fixtures or along fence lines, cables can be exposed or flexed repeatedly. That repeated disturbance weakens insulation and splice integrity over time, creating the conditions for moisture intrusion and conductor oxidation.
What “Cable Damage” Actually Means Electrically
Cable damage is not just a visible cut; it is any condition that increases resistance or interrupts current flow. A tiny nick in insulation allows moisture to enter and travel along copper strands, a process known as capillary migration. Once oxidation begins inside the conductor, resistance rises, reducing usable voltage at the fixture head.
That voltage loss often appears as uneven brightness, especially farther from the transformer. The mechanics of this are similar to what is explained in Voltage Drop in Outdoor Lighting Systems, but with a key distinction: damaged cable creates localized resistance spikes instead of uniform distance-related loss. A partially severed conductor may still pass limited current during daytime testing but fail once multiple fixtures draw load at night. This mismatch between unloaded and loaded voltage readings is why superficial checks often miss the true failure.
Wire Gauge & Distance Stability Reference
| Cable Type | Typical Use | Max Recommended Run (Low Voltage 12V)* | Voltage Drop Risk |
|---|---|---|---|
| 14/2 Direct Burial | Short pathway runs | ~50–75 ft | Moderate beyond 75 ft |
| 12/2 Direct Burial | Medium yard layouts | ~100–150 ft | Lower drop risk |
| 10/2 Direct Burial | Large properties | 150+ ft | Minimal drop when properly loaded |
*Exact performance depends on total wattage load and transformer capacity.
The Most Common Causes in Residential Yards
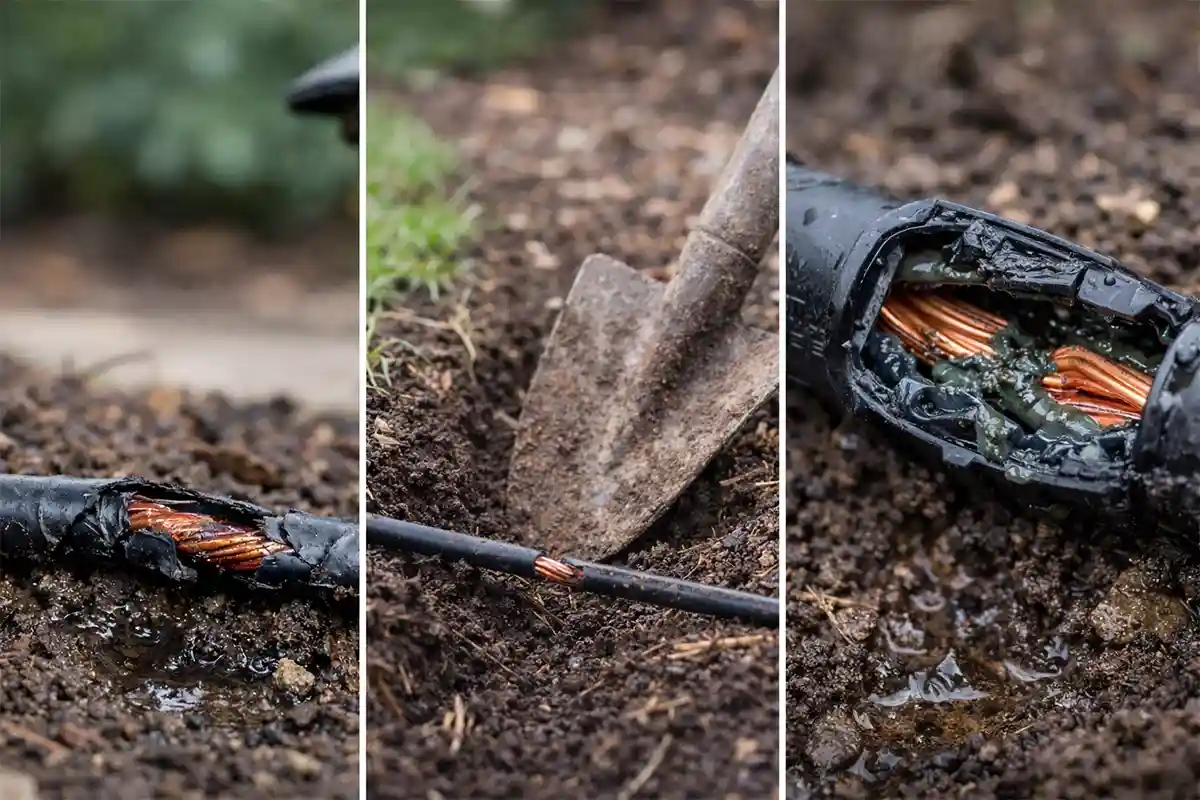
Mechanical damage is the primary cause of underground lighting cable failure. Edging tools, aerators, irrigation repairs, and post installations frequently cut or crush wire that was installed only a few inches below grade. Even gravel walkways can grind insulation if the base shifts seasonally.
Improper burial depth is another major factor. Direct-burial low-voltage cable should typically be placed 6 to 12 inches deep depending on local conditions, yet many DIY installs sit barely beneath the sod. In colder regions, freeze-thaw expansion pulls tightly stretched runs until insulation seams begin separating. In heavy clay soil, prolonged moisture contact accelerates insulation breakdown and splice corrosion.
Pet activity adds a predictable stress pattern. Dogs tend to dig in repeated locations, and if a cable runs through that zone without conduit or deeper burial, long-term structural fatigue becomes likely.
Early Warning Signs That Point to Wiring
One of the earliest clues is inconsistent brightness between fixtures on the same circuit. If swapping bulbs does not transfer the problem, resistance upstream may be the cause. Another warning sign is moisture-dependent malfunction, where lights flicker or shut off after rainfall but improve during dry weather.
A simple multimeter check at the transformer and again at the farthest fixture can reveal discrepancies. If voltage drops significantly under load compared to transformer output, wiring resistance is likely present. Gradual system decline over months—rather than sudden blackout—also suggests internal conductor corrosion rather than transformer failure.
These patterns often overlap with general aging described in Why Outdoor Lights Stop Working Over Time, but cable damage produces location-specific instability rather than universal wear.
Quick Diagnostic Framework Before Digging
Before excavating the yard, narrowing the failure zone saves time and disruption. A practical evaluation sequence helps isolate the problem:
• Test voltage at the transformer with all lights on.
• Measure voltage at the first and last fixture on the run.
• Inspect visible splice points for corrosion or loose connectors.
• Check burial depth in recently disturbed areas.
If voltage at the transformer is stable but drops sharply beyond a certain fixture, the issue is likely between that point and the next connection. If voltage is stable throughout yet lights still flicker during rain, moisture intrusion at a splice is probable. These targeted checks prevent unnecessary trenching and reduce guesswork.
When Aging Crosses Into Structural Failure
There is a meaningful difference between cosmetic aging and structural compromise. Faded lenses and old bulbs reduce brightness uniformly, but damaged cable produces uneven performance and intermittent zones. Once moisture migrates inside insulation, corrosion does not stop on its own; it spreads gradually along the conductor.
A single shallow cut may function temporarily but deteriorate rapidly after heavy rain or irrigation cycles. In older installations, small nicks and stressed splices compound over time until resistance accumulation reaches a tipping point. Recognizing this transition from surface wear to internal conductor failure is essential before deciding how to approach repair.
The next phase involves comparing localized splice repair against full cable replacement, weighing long-term reliability against immediate effort, and determining which approach creates lasting stability for your landscape lighting system.
Comparing Repair Options: Splice vs Full Replacement
When underground cable damage is confirmed, the real decision is not whether to fix it, but how far to go. A sealed underground-rated splice can restore continuity quickly if the damage is isolated to a clean mechanical cut and the surrounding insulation remains flexible and dry. If the compromised section is short, recently damaged, and shows no signs of internal moisture migration, then a properly installed gel-filled splice kit can perform reliably for years.
However, if voltage readings fluctuate along multiple fixtures or insulation shows cracking in more than one location, then replacing the affected run becomes the more stable long-term solution. The trade-off is straightforward: a splice is faster and less disruptive to landscaping, but it preserves aging cable that may fail again; full replacement requires trenching and more labor, yet it resets structural integrity and reduces future troubleshooting. For most homeowners seeking long-term stability, minimizing repeated excavation usually outweighs short-term convenience.
Understanding Load Behavior and Hidden Resistance
Cable damage affects performance most noticeably under load. A conductor that appears functional during a quick daytime voltage check may drop significantly once all fixtures activate at night. This is because partial strand breakage or corrosion increases resistance, and resistance amplifies voltage drop as current demand rises.
Uneven brightness patterns often overlap with symptoms described in Flickering Outdoor Lights: Common Causes, but wiring-related flicker tends to affect fixtures in sequence along a single run. If flickering worsens with moisture or heavy irrigation, resistance spikes within a compromised section are likely interacting with environmental conductivity. In these cases, surface-level fixes rarely provide durable correction.
When Moisture and Safety Devices Signal Deeper Issues
Ground fault interruptions or unexplained shutdowns often indicate more than simple wire fatigue. If a GFCI outlet trips repeatedly after rainfall, then moisture may be bridging conductors or leaking through compromised insulation. Situations similar to those outlined in Outdoor Lights Tripping GFCI Outlets show how hidden water pathways can trigger protection devices even when fixtures appear intact.
This is where patching becomes risky. Twisting wires together and sealing with standard electrical tape traps moisture instead of blocking it, accelerating corrosion beneath the surface. Likewise, reburying shallow cable without increasing depth or protection simply resets the countdown to the next failure. Moisture intrusion is progressive, not static, and partial intervention often delays rather than eliminates instability.
Establishing the Strongest Default Solution
For most residential installations in the US and Canada, the strongest general default solution is replacing the damaged cable section entirely with new direct-burial rated 12/2 or 14/2 landscape lighting wire, installed at appropriate depth with sealed, waterproof connectors. This approach addresses both visible mechanical damage and unseen internal oxidation. It also improves long-term voltage stability, protecting transformers and LED drivers from irregular load stress.
The main exception applies when damage is clearly isolated to a recent, clean cut caused by a single landscaping event. If insulation surrounding the cut remains pliable and dry, and voltage readings are stable beyond that location, then a sealed underground splice is reasonable. The key boundary condition is moisture migration; once water has traveled along conductor strands, localized repair becomes less predictable.
Evaluating Effort Versus Long-Term Payoff
A splice repair may take under an hour and disturb only a small patch of soil, making it attractive for minor, isolated damage. Full cable replacement may require trenching 10 to 30 feet, repositioning fixtures, and restoring sod or mulch. Yet the long-term payoff often favors replacement, especially in climates with freeze-thaw cycles or in yards where pets repeatedly disturb the same areas.
If multiple zones show dimming or flickering after storms, then systemic resistance is likely present and broader replacement is justified. If only one fixture is affected and all other voltage readings remain consistent, then a targeted repair may be sufficient. This conditional framework prevents overcorrection while avoiding repeated patch cycles.
Underground Lighting Cable Evaluation & Repair Decision Table
| Scenario | Observable Symptoms | Likely Cause | Recommended Action | Long-Term Stability |
|---|---|---|---|---|
| Single fixture not working | Only one light out, others normal voltage | Localized cut or loose splice | Inspect and install sealed underground splice kit | High if moisture has not migrated |
| Section dimmer than others | Gradual brightness drop along run | Resistance buildup from partial conductor damage | Test voltage under load; consider replacing affected section | Medium to High depending on cable age |
| Flickering after rain | Works when dry, unstable when wet | Moisture intrusion into splice or cracked insulation | Replace damaged section and install waterproof gel connectors | High if full section replaced |
| Multiple fixtures unstable | Random dimming or intermittent outages | Internal corrosion spreading along conductor | Replace entire affected cable run | Very High |
| GFCI trips during storms | System shuts off after rainfall | Moisture bridging conductors | Identify intrusion point; replace compromised section | High if moisture path eliminated |
| Repeated failures in same yard area | Same spot dug up multiple times | Shallow burial or pet digging stress | Re-route cable deeper (6–12 in) or add conduit protection | Very High |
| Older installation (7–10+ years) | Progressive dimming across zones | Insulation fatigue + cumulative resistance | Strategic partial or full run replacement | Very High |
Long-Term Stability and Forward Planning
✔️ The ultimate goal is not simply restoring light tonight but stabilizing the system for the next several seasons. Proper burial depth, slack loops to accommodate soil movement, and watertight connectors reduce the likelihood of recurring faults. In high-traffic or pet-heavy zones, adding protective conduit for vulnerable sections can further extend cable lifespan.
By choosing structural integrity over temporary fixes in most cases, homeowners reduce nuisance flicker, voltage imbalance, and moisture-triggered shutdowns. Over time, stable wiring also lowers the risk of protection device trips and transformer strain.
Recommended Burial Depth Guide
| Yard Condition | Suggested Burial Depth | Notes |
|---|---|---|
| Standard lawn | 6–8 inches | Acceptable for low-traffic areas |
| High foot traffic | 8–12 inches | Reduces crush risk |
| Pet-heavy zones | 10–12 inches | Prevents repeat digging exposure |
| Freeze-thaw climates | 8–12 inches with slack loop | Allows soil movement without tension |
| Gravel or edging zones | 12 inches or conduit | Prevents abrasion damage |
For broader electrical safety practices around outdoor installations, guidance from the Electrical Safety Foundation International provides additional perspective on moisture protection and outdoor wiring safety.