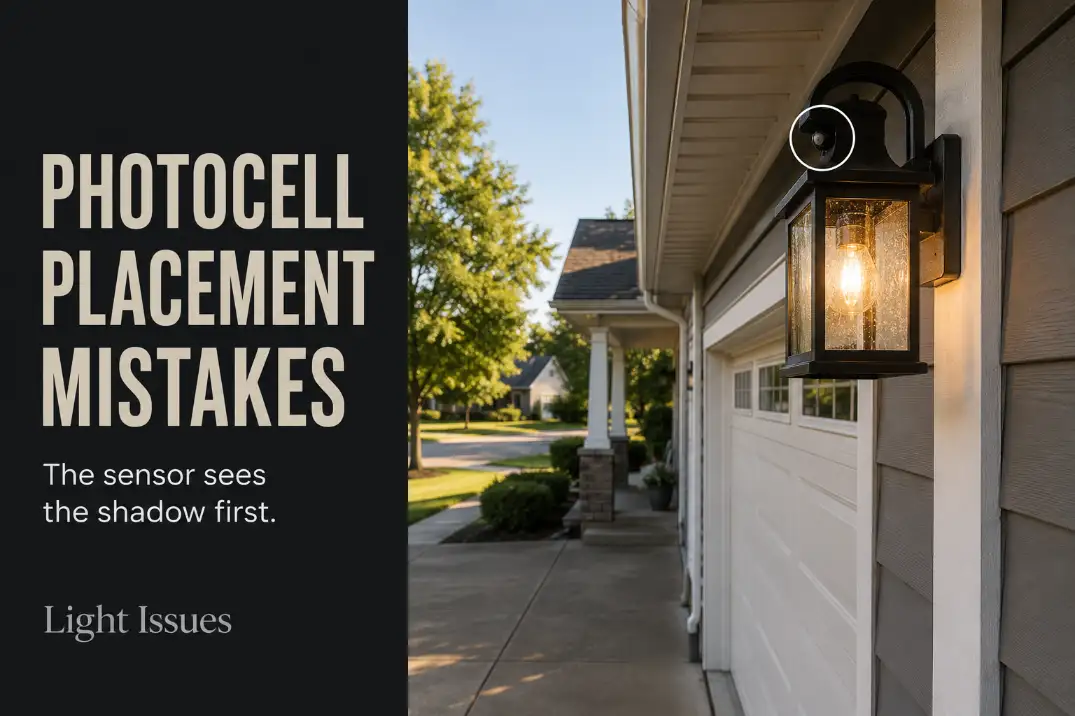
An outdoor light that clicks on while the driveway still looks bright usually feels like a bad sensor. Sometimes it is. More often, the photocell is doing exactly what it was built to do: reading the small patch of light around its own eye.
That distinction matters. The yard can still have usable daylight while the photocell sits under trim shadow, roof shadow, fixture glare, or a north-side wall that goes dim early.
Before replacing the fixture, the better first move is to compare the sensor’s actual exposure with open daylight in late afternoon and again during the dusk transition.
Why Photocells Turn Lights On Before It Looks Dark
A photocell does not judge the whole front yard. It reacts to the light that reaches the sensor lens. If that lens sits in a darker spot than the surrounding driveway, porch, or walkway, the fixture may turn on before the space actually needs light.
This is why the problem often appears inconsistent. One side of the house may still look bright, but the sensor is tucked beside a column, under a roof edge, behind the fixture body, or on a wall that loses daylight early. The homeowner sees “too early.” The photocell sees a darker local condition.
A normal dusk-to-dawn light can also have a short response delay. That is different from a placement mistake. If the fixture turns on close to dusk and stays consistent night after night, the sensor may be behaving normally.
If it turns on while the driveway, porch steps, or garage apron are still clearly usable without lighting, placement deserves attention before hardware replacement.
Quick diagnosis
A photocell problem is not only about time of day. It is about contrast. If the sensor area looks noticeably dimmer than the open yard beside it, the light may be responding to a local shadow instead of true dusk. Test that exposure before assuming the fixture is defective.
For broader timing issues where the light does not respond correctly to a timer or photocell at all, this related guide on outdoor lights not turning on after timer or photocell changes covers the wider control-side problem.
Shaded Sensor Location
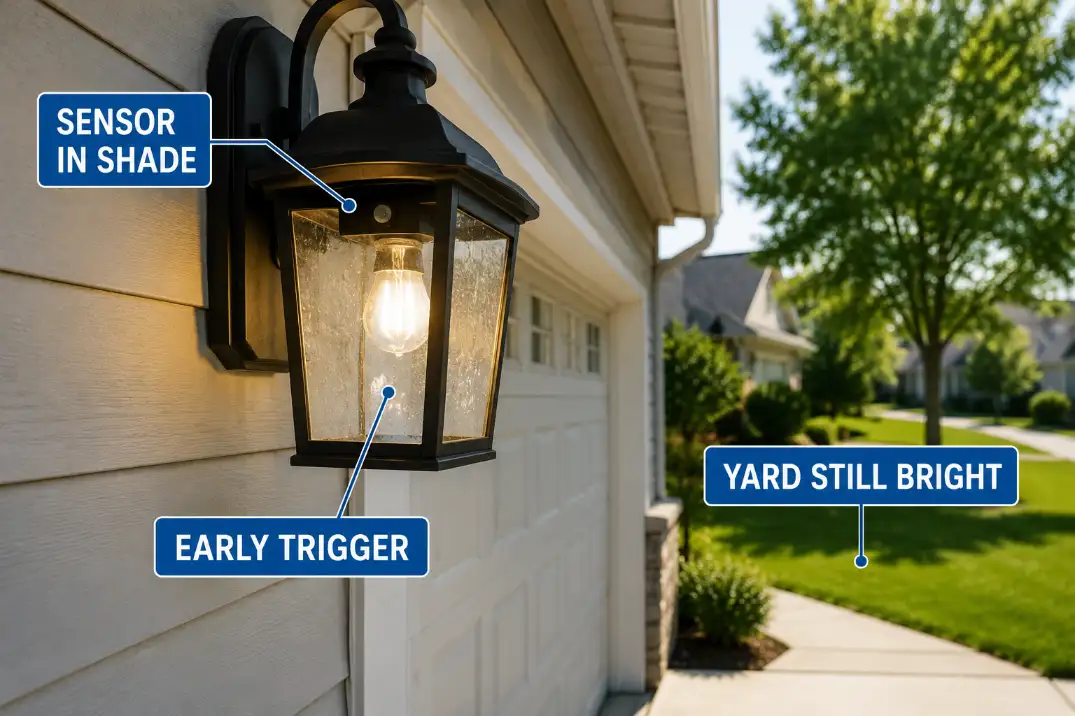
The easiest placement mistake to miss is a photocell shaded by the fixture or the materials around it. The light may be mounted in a normal-looking place, but the sensor eye sits behind a trim lip, beside the fixture housing, under a deep eave, behind a porch column, or partly hidden by seasonal plant growth.
The clue is simple: look directly at the sensor in late afternoon. If the lens area is already dull while nearby siding, walkway, or driveway surfaces still have open daylight, the photocell is not getting a clean reading.
Small Shadows That Matter
Small shadows matter more than homeowners expect because the sensor is tiny. A trim edge that seems harmless from the sidewalk may shade the photocell for the last part of the day. A climbing plant may not block the whole fixture, but it can block just enough daylight around the sensor lens to trigger the light early.
Do not jump straight to replacing the photocell here. First, remove obvious obstructions, clean the lens, and check whether the sensor can read a brighter part of the surrounding daylight from its normal mounted position.
If the fixture itself blocks the sensor, the correction may require a different mounting angle or a separate sensor location, but the diagnosis starts with the shadow.
Porch Roof Shadow
A covered porch can make a photocell turn on early even when the sensor is not hidden by plants or trim. The roofline, soffit, and porch ceiling create a darker outdoor room. That area can fall into shadow well before the open driveway or front walk does.
This is especially common when the photocell is mounted high under a porch roof or close to the back wall of a deep entry. From the street, the house may still look bright. Under the porch roof, the sensor may already be reading low light.
The decision here is not “covered porch lights are bad.” It is whether the photocell is trying to judge dusk from inside a covered pocket.
If the porch ceiling goes dim early every day, the sensor may need a cleaner view of ambient daylight or a fixture position that is less trapped under the roof shadow.
This is where placement problems overlap with general exterior lighting layout.
A porch light can be technically working but still placed poorly for how the entry reads at night, which is why a separate guide on porch lights that hide steps can be useful when the issue is both timing and step visibility.
Fixture Feedback Loop
A photocell can also be confused by the light it controls. This usually shows up as cycling, delayed shutoff, or unpredictable switching rather than a simple “too early every day” pattern.
The common setup is a sensor mounted too close to the lamp output, glossy trim, glass, light-colored siding, or another reflective surface. When the fixture turns on, some of that light bounces back toward the photocell.
The sensor may then read the area as bright and shut the light off, only to turn back on again after the sensor area darkens.
What Makes Feedback Different
Feedback is different from plain shade because the behavior changes after the light turns on. A shaded photocell usually triggers early and stays on.
A feedback loop may pulse, hesitate, shut off unexpectedly, or behave differently depending on wet siding, reflective glass, a white garage door, or a nearby fixture.
If the light is also creating harsh glare or reflected brightness around the mounting area, the problem may not be the photocell alone. The article on why outdoor lights create glare is a better supporting read for reflection and brightness patterns that make fixtures harder to control.
Streetlight Interference
Streetlights, neighbor security lights, garage lights, and even reflected light from the street can change how a photocell behaves.
This does not always make the fixture turn on too early. Sometimes it delays the light, keeps it off, or creates odd timing that changes when nearby lights switch on.
The practical clue is timing. If your outdoor light behaves one way before the streetlight comes on and another way afterward, the photocell may be reading external light rather than clean ambient dusk. A neighbor’s floodlight across a driveway can have the same effect if it points toward the sensor side of the fixture.
False shade and external light interference are easy to confuse because both create wrong timing. The difference is the direction of the influence. False shade blocks daylight from the photocell. External light adds light into the photocell’s view after natural daylight is already fading.
A similar effect happens with small solar fixtures near public lighting; the guide on solar lights not turning on near streetlights covers that interference pattern more directly.
North-Side Mounting
A photocell on the north side of a house, garage, fence line, or narrow side yard may never receive strong, clean daylight. That does not automatically make the placement wrong, but it raises the chance that the sensor reads the day as dimmer than the rest of the property.
The clue is not compass direction alone. It is the combination of wall orientation and surrounding shade. A north-facing garage wall beside evergreen shrubs, a narrow side passage, or a neighboring structure can stay dull most of the afternoon. The photocell may then trigger before the front walk, driveway, or open yard feels dark.
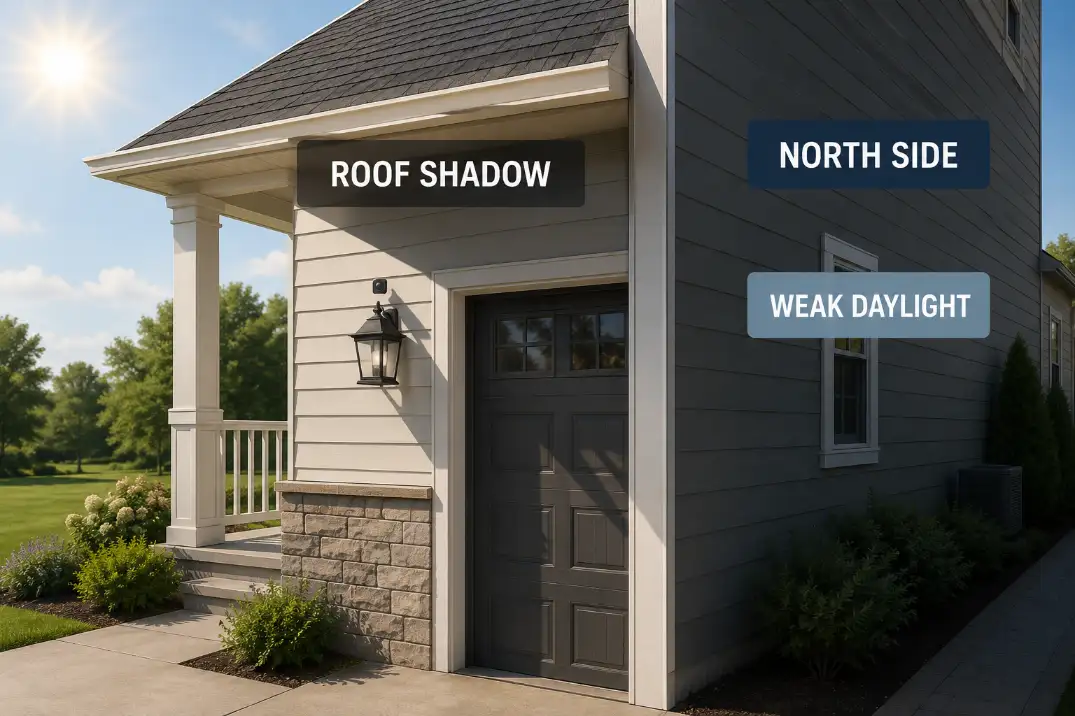
The fix is not always to chase direct sun. A photocell does not need to bake in full sun all day. It needs a stable reading of ambient daylight that is not trapped in a shaded pocket. If the whole mounting area stays dim long before dusk, the sensor may need a different orientation or a less enclosed location.
Daylight Placement Test
The best test is not complicated. The goal is to compare the photocell’s real mounted environment with nearby open daylight, then see whether the fixture responds differently after the sensor lens gets a cleaner reading.
Step 1: Look at the Sensor in Late Afternoon
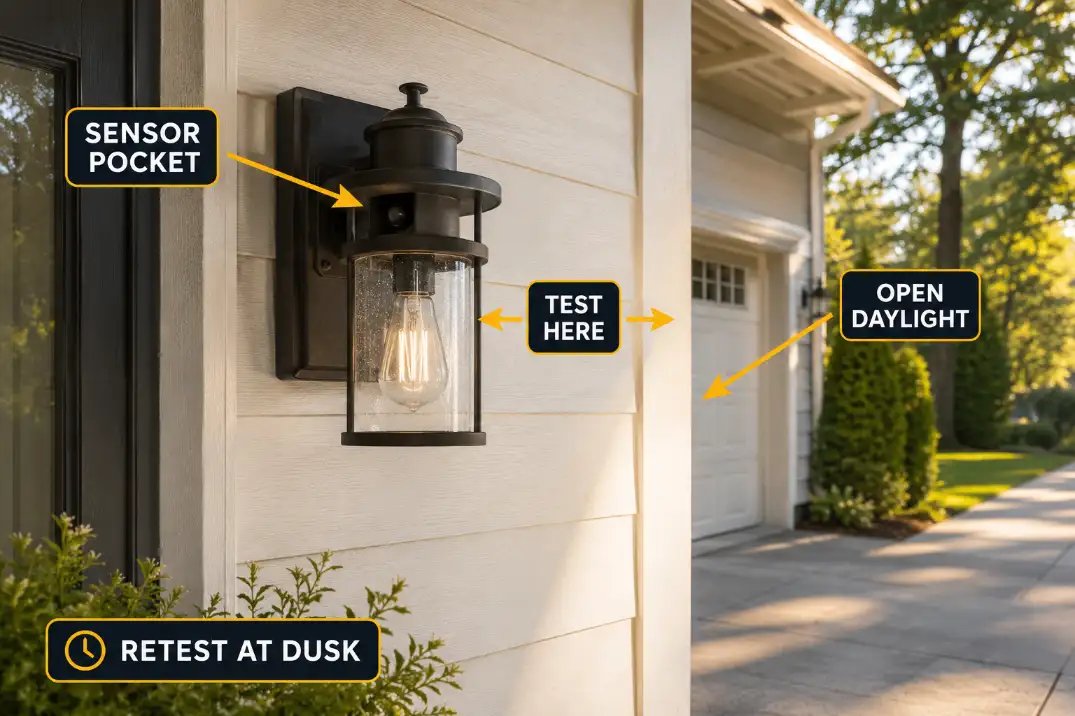
Check the photocell before dusk, while the yard is still visibly bright. Do not judge from the sidewalk only. Look at the sensor lens itself. If the lens area is already in shade while nearby siding, driveway, or porch surfaces are brighter, placement is the leading suspect.
Step 2: Compare the Sensor Area With Open Daylight
Pick a nearby open reference point: the front edge of the porch, the garage trim facing the sky, or the driveway area just outside the roof shadow. The question is not whether the whole property is sunny. The question is whether the photocell sits in a darker area than the space it is supposed to represent.
Step 3: Shade or Unshade Only From a Safe Position
If the sensor is reachable from the ground and the fixture design allows it, briefly shade and unshade the photocell to confirm that the light responds. Do not remove covers, expose wiring, or work from an unsafe ladder for a simple timing test.
Step 4: Watch the Dusk Transition
Check again as dusk approaches. A placement issue usually becomes clearer during the transition from late afternoon to evening. If the light turns on while the driveway, steps, or entry still have usable natural light, the sensor is probably reading a darker local condition.
Step 5: Clean, Clear, Then Retest
Clean the sensor lens if it is dirty, remove plant growth if it is blocking the sensor, and retest on another evening. If nothing changes, the issue may be fixture orientation, control settings, wiring condition, or the photocell itself.
Mini Decision Matrix
- Light turns on while the yard is still bright → check for local shade around the sensor.
- Light turns on early mainly under a covered entry → check porch roof shadow and soffit depth.
- Light cycles after it turns on → check for fixture feedback or reflected glare.
- Timing changes when nearby lights switch on → check streetlight or neighbor-light interference.
- Sensor area stays dim most afternoons → check wall orientation and side-yard enclosure.
Common mistake
Testing the photocell in your hand is not the same as testing it in its mounted position.
- The mounted sensor may sit under shade that your hand test does not reproduce.
- The fixture’s own light may reflect back only after everything is assembled.
- A porch roof or wall corner may affect the sensor only during the real dusk transition.
When Placement Is Not the Problem
Placement should be checked first because it is visible and often fixable. But it is not the only reason an outdoor light turns on at the wrong time.
A dirty, yellowed, or aged photocell lens can reduce the daylight reaching the sensor. Some fixtures also have timer overrides, smart switch schedules, or mode settings that make the light behave like a timer problem rather than a placement problem.
If a photocell-controlled light changed behavior after a switch, timer, or fixture update, the control chain deserves attention.
Hardware condition matters too. Water intrusion, corrosion, loose connections, or a damaged sensor can create symptoms that look like bad timing. If the fixture is hardwired, damaged, wet inside, or behaving unpredictably after rain, stop treating it as a simple placement issue.
This is where the broader guide on outdoor wall lights not working may fit better than another placement adjustment.
When to Stop Adjusting
Stop moving, shading, or testing the sensor if you see exposed wiring, cracked fixture parts, water inside the housing, a burning smell, repeated breaker trips, or behavior that changes after rain. Those are not normal photocell placement clues. They are repair-boundary clues.
For hardwired sensors, fixture replacement, or wiring changes, use a qualified electrician instead of treating the photocell as a casual DIY part.
The Best Fix Is Usually a Cleaner Reading, Not a Stronger Light
When a photocell triggers outdoor lights too early, the strongest fix is usually not a brighter bulb or a new fixture. It is a cleaner daylight reading.
The sensor should read open ambient daylight, not the darkest spot under a porch roof, not the shadow behind trim, not the glow from its own fixture, and not a changing signal from a streetlight across the road.
Once you know which condition is confusing the photocell, the next step becomes smaller and smarter: clear the lens, remove the obstruction, adjust the sensor’s exposure, reduce feedback, or investigate the control system only after placement has been ruled out.
For outdoor electrical safety around exterior lighting, ladders, wiring, and power sources, review the NFPA’s Outdoor Electrical Safety Tip Sheet.