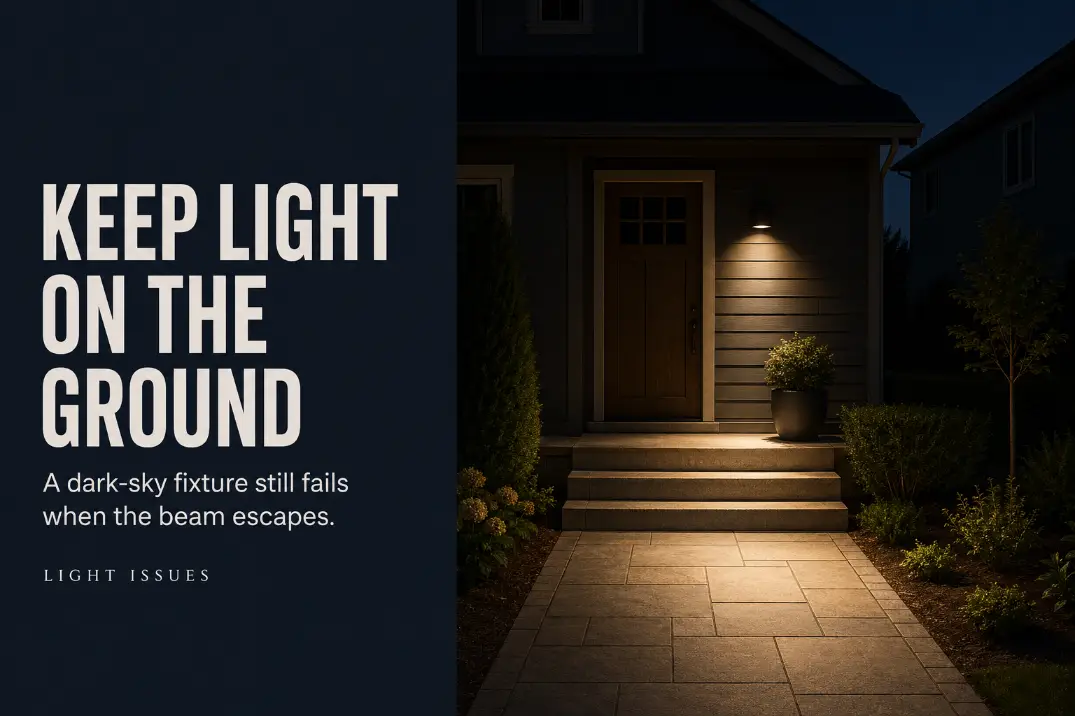
Dark-sky friendly is not a fixture style. It is a boundary test.
A wall light may look responsible during the day because it has a hooded shape, warm bulb, and downward-facing opening. After dark, its bright lens may still be visible from the sidewalk, its beam may catch the eaves, and the fence beside it may glow.
That fixture fails for a simple reason: the light does not stop when its job is finished. The useful test has two parts. Does the intended step, path, lock, or driveway edge become visible before the fixture dominates your vision? And does the light end before it reaches the sky, an unused surface, or a neighboring property?
Shielding, aim, output, color, and runtime all contribute, but they do not carry equal weight. Control the source and beam direction first. A warmer bulb or lower setting cannot rescue a fixture that sends light into the wrong space.
What Dark-Sky Means at Home
Start with the task, not the fixture. A residential light should answer a specific need: reveal a step edge, identify a visitor, illuminate a gate latch, or support the route from the driveway to the door.
The useful area is usually smaller than homeowners assume. A porch light may need to cover the steps, handle, and package area—not the upper siding or entire front lawn. A side-yard light may need to follow the narrow walking route without illuminating the roofline, trees, or property beyond the gate.
Dark-sky-friendly lighting is therefore useful, targeted, no brighter than necessary, active only when needed, and warmer where practical. Focusing on one characteristic produces incomplete results. A warm fixture can spill across a fence, while a modest-output bulb can create sharp glare if its source remains exposed.
Timers and motion controls can reduce unnecessary runtime, but they cannot repair bad geometry. Every activation will repeat the same glare and spill if the fixture points outward.
A DarkSky Approved designation can provide useful evidence about a luminaire’s design. It cannot verify the mounting angle, reflective surfaces, output setting, or property boundaries at a particular home. Installed performance still has to be judged after dark.
Full Cutoff vs Bare Bulb
The first fixture-level decision is whether the bright source can be seen from normal viewing angles. If the bulb, LED chips, or concentrated lens remains visible, glare control is already compromised.
In practical residential use, a full-cutoff or fully shielded design recesses or covers the source and keeps direct output beneath its intended upper boundary. The technical terms have formal definitions, but the homeowner-facing question is straightforward: can direct light escape upward or strike the eye from the sidewalk, driveway, or neighboring side?
A bare bulb or exposed LED panel can become the brightest object in view even at modest output. The eye reacts to that concentrated brightness while the surface the fixture is supposed to reveal remains comparatively difficult to read. This source visibility is central to understanding how exposed outdoor light sources create glare.
Frosted glass is not equivalent to shielding. It can soften the visible shape of a bulb while spreading brightness in several directions. Some decorative downlights create the same problem when their housings look controlled from the front but leave the lamp visible through the sides or lower opening.
FULL CUTOFF VS BARE BULB
Source visibility — A shielded fixture conceals the bright source; a bare-bulb fixture leaves it visible from common approach angles.
Upward light — Full-cutoff form controls direct upward output; an exposed source can emit light above and beside the fixture.
Glare risk — Recessing the source reduces direct glare; frosting an exposed bulb may only spread the brightness.
Field limit — Shielding improves control, but poor mounting or aim can still send direct or reflected light beyond the task area.
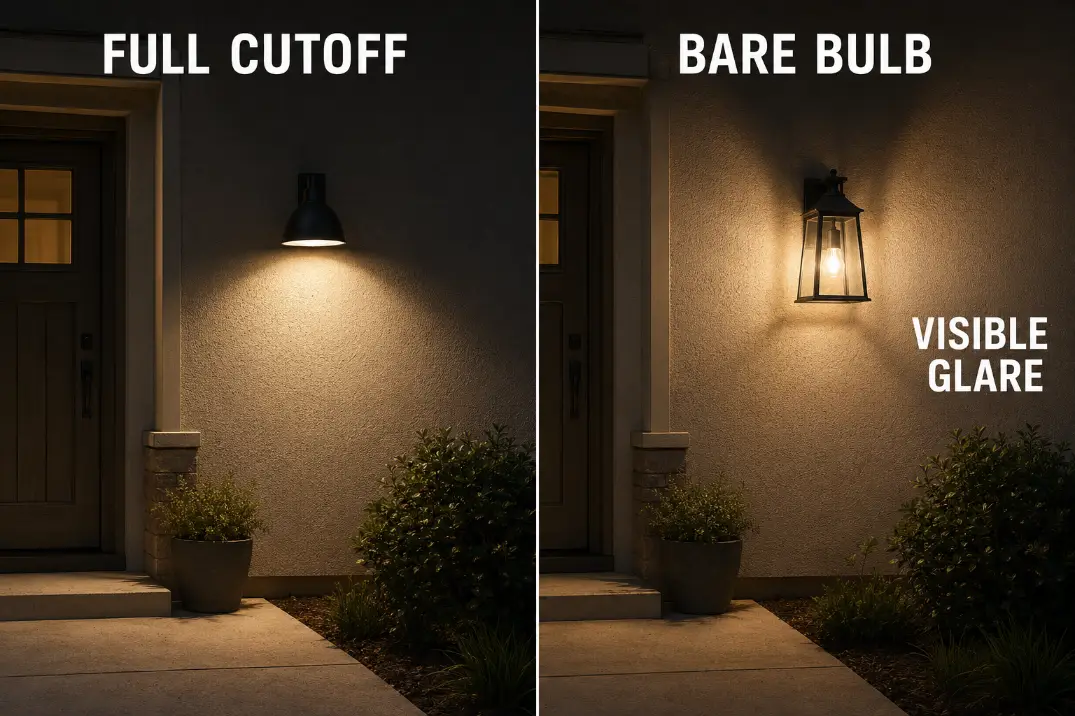
Fixture form is the first filter, not the final guarantee. If the lamp remains visible from the main approach or property-facing side, changing color or reducing output will not fully control the source.
Downward Aim
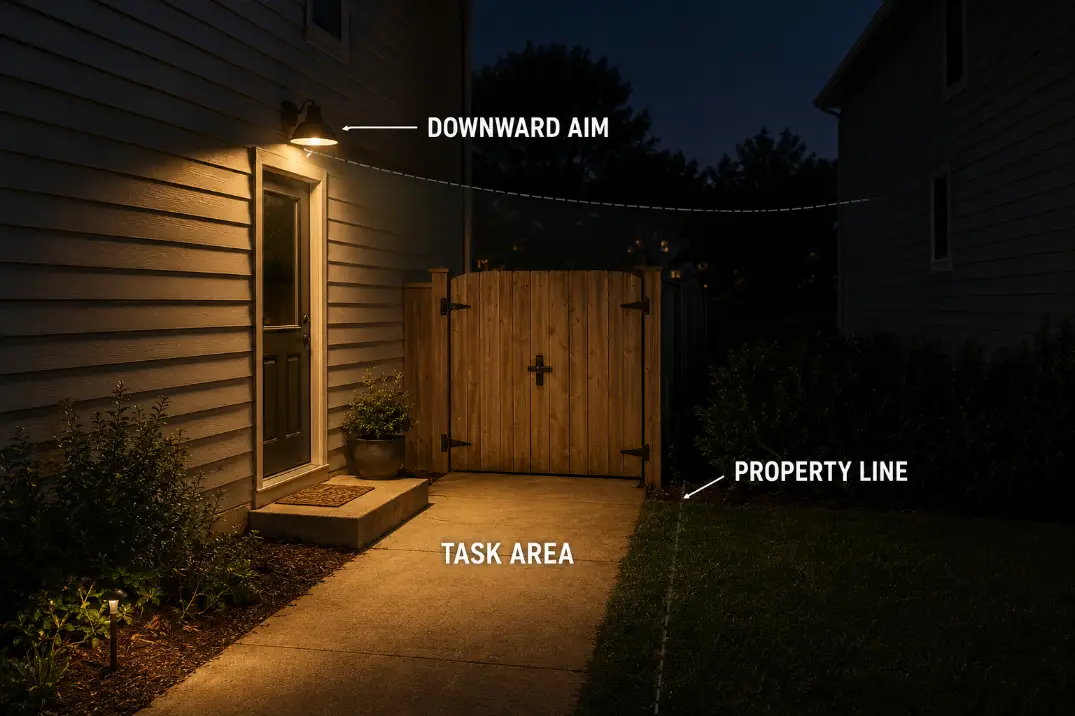
Aim succeeds only when the brightest part of the beam lands on the task and its upper edge ends before reaching unnecessary surfaces. The direction of the housing alone does not prove that result.
For an entry, the useful zone may include the steps, threshold, handle, and a short section of the approach. A driveway fixture may need to reveal pavement edges and the route to a side door. Extending the beam farther across the yard rarely improves those closer tasks.
Adjustable heads create a common field problem. Tilting them outward may extend coverage, but it can also expose the lens and lift the upper beam toward windows or siding. Detailed guidance on how to aim outdoor security lights around the actual approach zone becomes useful when one fixture is being asked to cover several directions.
Evaluate the result from ground level rather than from the ladder. Walk toward the fixture along the route people actually use. If the lens becomes obvious before the step, gate, or pavement edge does, the aim is too high or the source is insufficiently shielded.
Reflected light belongs in the same judgment. Pale siding, white fences, glossy garage doors, and light-colored pavement can redirect illumination upward. Lowering the beam onto the task surface usually improves the result more than chasing additional distance.
Warm Color Choice
Color is a supporting filter, not the first repair. Confirm source control and beam direction before treating a warmer bulb as the solution.
For most residential entries, paths, and patios, approximately 2700K to 3000K produces a calmer warm-white appearance than cooler blue-white output. Warmer sources also generally contain less short-wavelength blue light, and DarkSky guidance favors 3000K or lower where practical.
The kelvin number does not describe glare, brightness, direction, or beam spread. A poorly aimed 2700K fixture can still reach a bedroom window, and an exposed warm bulb can remain uncomfortable to look toward.
Changing color may improve the atmosphere of a space. It does not conceal an exposed LED surface or prevent a wide beam from leaving the property. When fixture geometry is wrong, color is a secondary adjustment to a primary control failure.
Light Trespass Risk
Light trespass is best judged from the receiving side, not from beneath the fixture. A beam that feels restrained near the wall can look intrusive from a sidewalk, shared fence, or neighboring window angle.
The brightest center is not always the part that crosses the boundary. Wide side spill and the softer upper edge may reach neighboring siding or glass first. Direct source visibility can also be more disruptive than a faint amount of reflected illumination.
Broader patterns of outdoor light spill and glare that affect neighbors often begin with an exposed lens, a beam aimed across rather than along a boundary, or a pale fence acting as a second light source.
Reducing output helps only after direction is controlled. A dim exposed bulb can remain irritating, while a somewhat brighter shielded fixture may keep all useful illumination on the homeowner’s path.
The immediate field standard is whether direct or reflected light serves space beyond the intended task. Legal limits can vary by municipality, so an apparently controlled installation should not automatically be described as code-compliant.
Homeowner Night Test
Judge the fixture from three positions: the normal approach, a side angle, and the property-facing edge. Checking only from the porch hides the angles most likely to reveal glare and spill.
Wait for full darkness and switch off unrelated outdoor lights where practical. Walk toward the fixture without staring directly at it. The step, surface, latch, or door hardware should become readable before the light source takes over your vision.
Then move to both sides and look back from the outer edge of the useful area. Check whether the lens becomes visible, the upper beam catches siding, or a fence glows more brightly than the route.
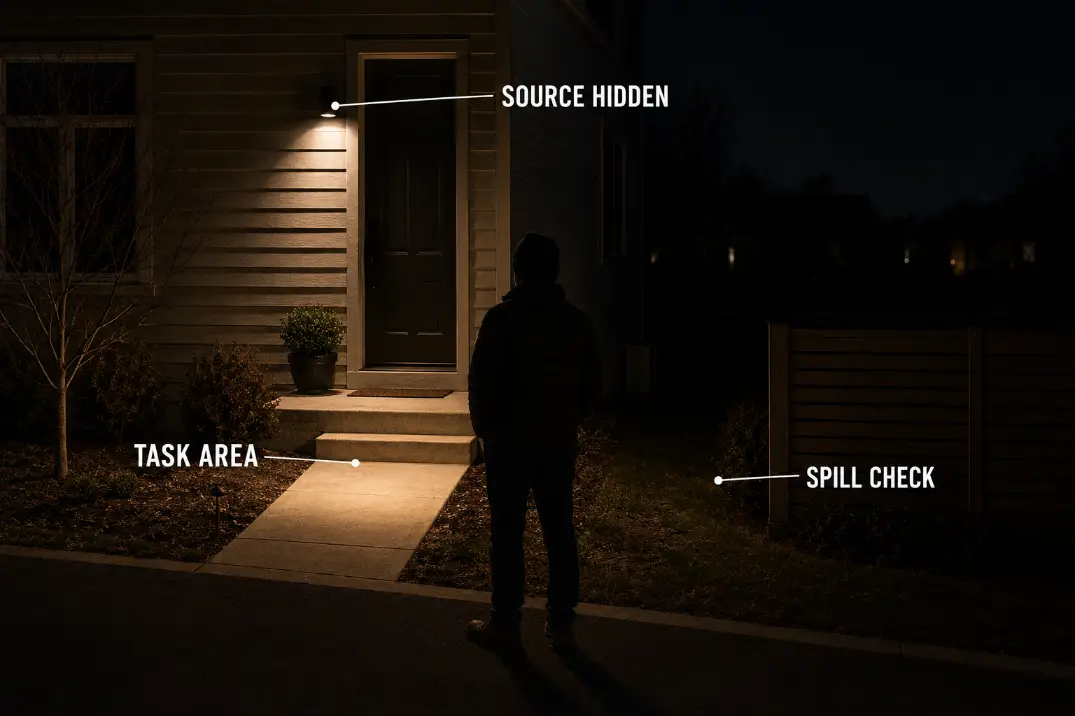
Make one small change at a time, then repeat the same route. Lower the aim, add an appropriate shield, or reduce excessive output only after the source and beam direction have been evaluated.
Adjustment remains worthwhile when the source can be hidden and useful coverage can stay on the intended surface. Replacement becomes the cleaner decision when every useful angle exposes the bulb or LED face, lowering the aim leaves the task area dark, or the housing cannot stop side spill. At that boundary, neighbor-friendly lighting options for tighter residential spaces are more relevant than another bulb change.
Use these six checks:
- Is the bulb, LED surface, or bright lens visible from the normal approach?
- Does useful light land on the intended step, path, door, driveway, or latch?
- Does the upper beam edge illuminate siding, fencing, trees, or open sky unnecessarily?
- Does direct or reflected light cross the property edge or reach a neighboring window?
- Does a pale wall, fence, or pavement surface become brighter than the task area?
- Can the fixture be adjusted without exposing the source or losing useful coverage?
A passing light reveals the intended surface before it reveals itself, then stops before the illumination reaches space that does not need it. Adjust first when shielding and aim can still meet that standard. Replace the fixture when its form makes controlled coverage impossible.
For the wider technical framework, see DarkSky International’s Five Principles for Responsible Outdoor Lighting.