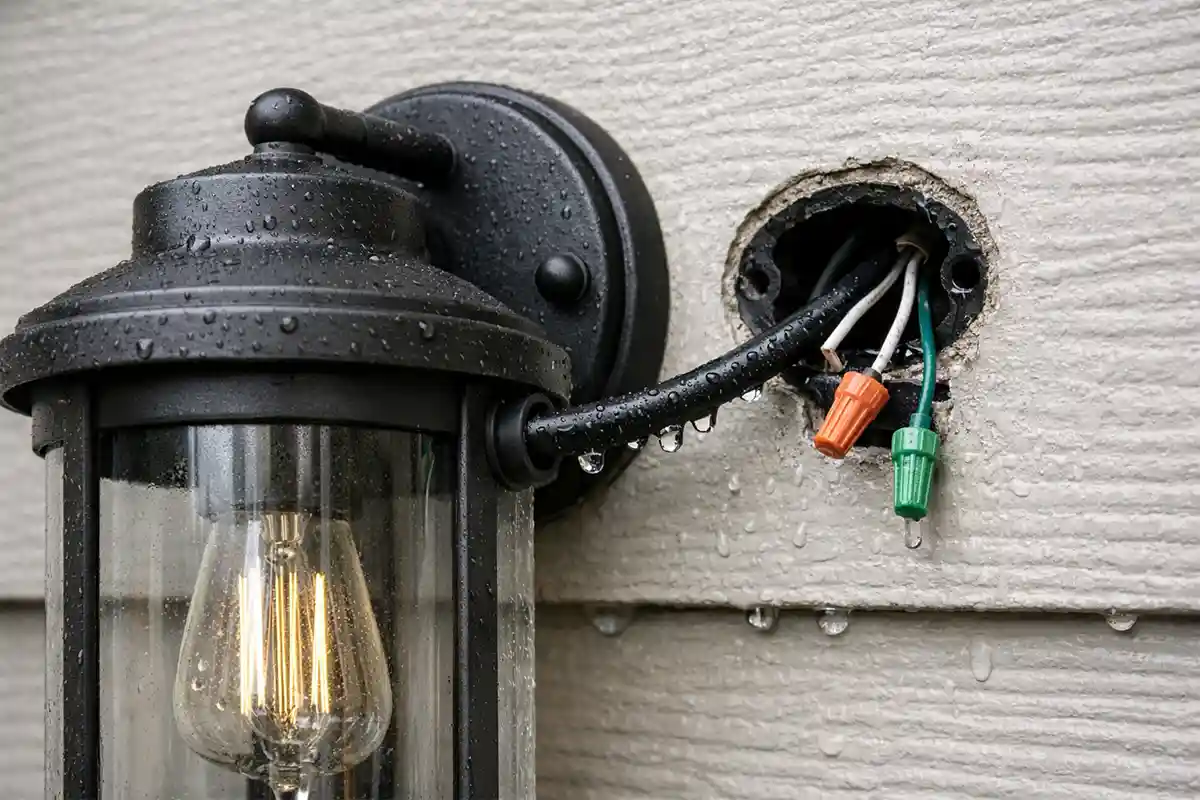
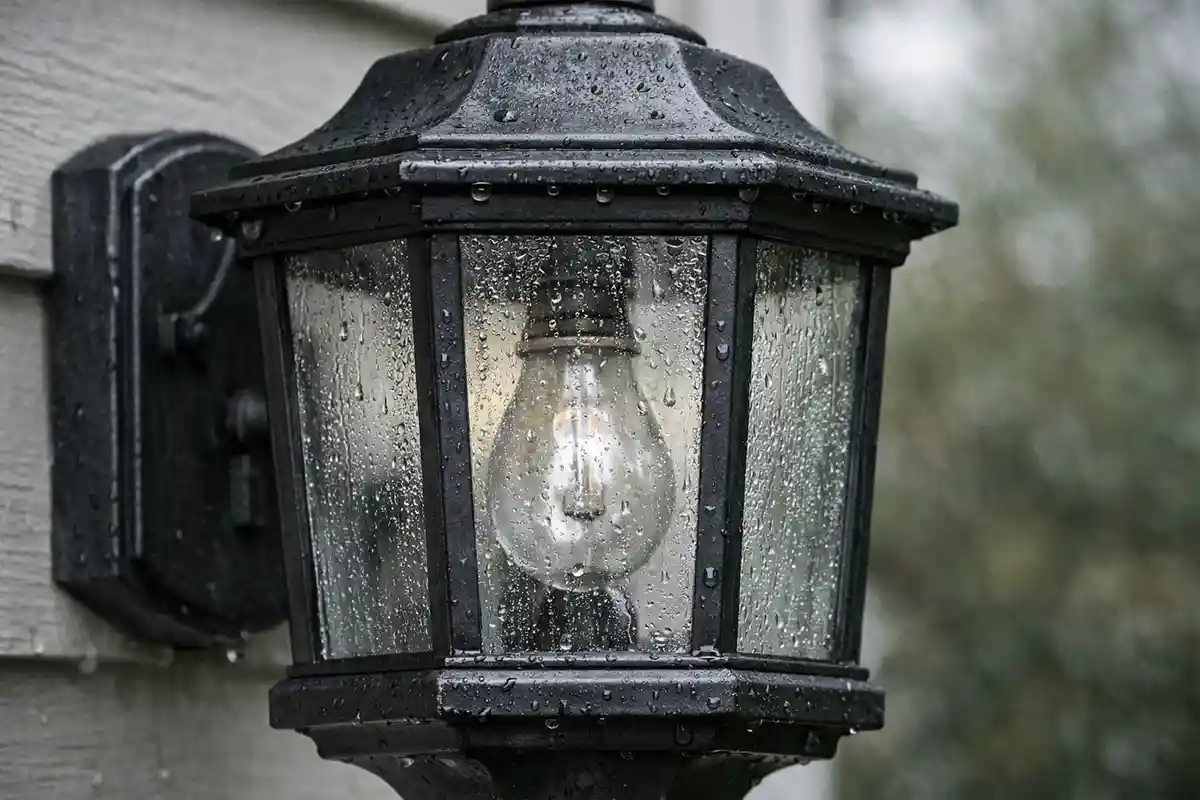
Most outdoor wall lights sit about 5 to 7 feet above the ground, usually centered beside a door and a few inches below a window line. The wiring comes straight through the wall behind the fixture, passing through a small round hole often less than half an inch wide. That hidden opening, not the glass lens, is where water often begins its path inside.
When rain hits siding at a slight angle, especially during wind, it does not fall straight down. It follows vertical seams, trim edges, and anything that sticks out even slightly. The first contact usually happens where the cable exits the wall surface. From there, water can cling to the cable jacket and move toward the entry hole without ever dripping visibly.
A single storm may not cause noticeable damage. The siding dries, the fixture looks straight, and nothing seems wrong from 10 feet away near the walkway. The difference begins when that same 6- to 10-inch section of cable carries water again and again. Repetition, not volume, is what changes behavior.
Many homeowners believe that if no water drips from the bottom edge, the fixture must be sealed. That belief sounds logical but is often incorrect. Water can enter in thin films along the cable and evaporate later, leaving no obvious trace in the early stage.
From a structural perspective, the real issue is how the cable entry aligns with rain direction and siding slope.
How Water Travels Along Electrical Cables
When a cable runs vertically down the siding for even 8 inches before entering the housing, it becomes a guide. Rain striking the upper wall follows gravity and can hug the rounded insulation surface.
At the point where the cable passes through the backplate, even a gap smaller than a pencil’s width can allow moisture to move inside. Surface tension helps water stay attached to the cable instead of dripping off immediately. Over time, that repeated slide creates a predictable path from the wall plane into the fixture.
This pattern explains why lights can function perfectly during dry weeks but act unpredictably during storms. The directional nature of water flow is described clearly in Why Your Outdoor Light Works Fine—Until It Rains. The key factor is not intensity alone but alignment between rain direction and cable placement.
In the beginning, the inside air may only feel slightly humid after a storm. No rust appears on screws 2 inches below the entry. The shift is subtle, but repetition starts shaping the opening.
Why Rear Entry Points Are the Most Vulnerable
Rear-entry wiring keeps the installation clean and centered on the siding. The fixture often sits flush against vinyl panels or brick, usually a few inches below a trim board. But siding is rarely perfectly flat.
Vinyl has gentle curves. Brick has mortar joints that create uneven contact. When the backplate presses against these surfaces, tiny voids remain around the wiring hole. During wind-driven rain hitting at a 20- to 30-degree angle, water striking the upper half of the fixture can be pushed toward that opening.
The first contact usually occurs along the top third of the backplate. Water runs downward and reaches the penetration area repeatedly. Over time, that small zone becomes predictably damp, even if the rest of the wall dries quickly.
Moist air can also move through these openings when temperatures shift between afternoon heat and cooler evening air. That dynamic contributes to interior fogging patterns described in Why Is There Condensation Inside My Outdoor Light Fixture?. The cable opening allows both liquid water and humid air exchange.
Tight mounting does not always mean watertight sealing. A gap thinner than a credit card can begin the repetition cycle.
Vertical Cable Runs That Funnel Water Downward
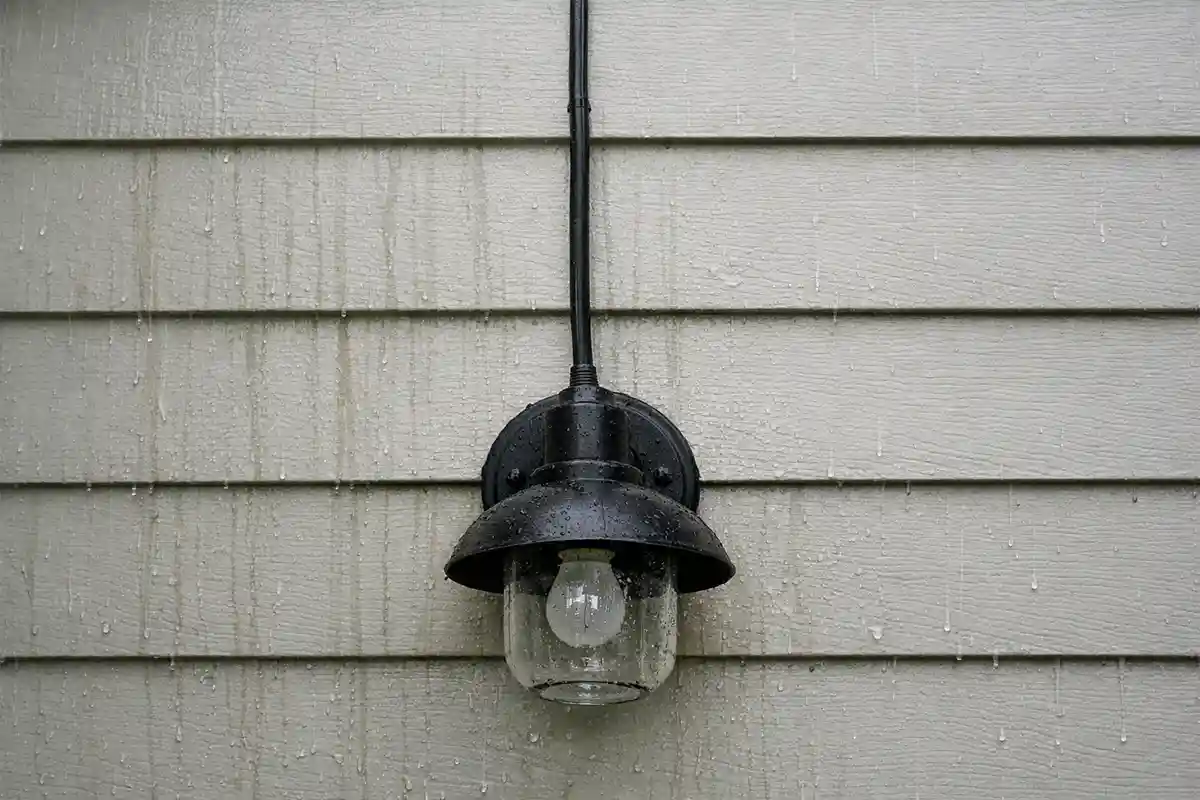
When the cable runs straight down from a junction box above and enters the rear of the fixture, it acts like a small gutter. Rain striking the siding 12 inches above can follow the cable all the way to the entry point.
Without a drip loop or downward curve, gravity pulls water directly toward the opening. Even a slight downward slope toward the fixture increases flow during steady rain. In the early stage, this may only cause brief internal dampness that dries within a day.
However, once that path repeats across multiple storms, the behavior changes. The cable’s vertical alignment conditions the entry plane to receive water consistently. That marks the shift from isolated contact to a repeating moisture pattern.
Homeowners often notice moisture buildup in exterior lights, which is why understanding why there is condensation inside my outdoor light fixture can be so useful.
The Role of Poor Sealing and Aged Gaskets
Gaskets are designed to compress evenly against flat surfaces. On older siding or slightly bowed sheathing, compression becomes uneven by fractions of an inch.
As the wall heats during the afternoon and cools at night, expansion and contraction stiffen rubber seals over time. The gasket loses flexibility and no longer conforms tightly around the cable penetration. A micro-gap forms directly along the same vertical water path.
At this stage, the glass may still look clear and the fixture may appear perfectly aligned with the window frame above. Yet the behavior has shifted. The cable entry is no longer neutral; it is beginning to respond predictably to rain direction and surface slope.
That subtle shift sets up the next phase, where repetition strengthens and internal effects become easier to see.
Early Electrical Effects Inside the Fixture
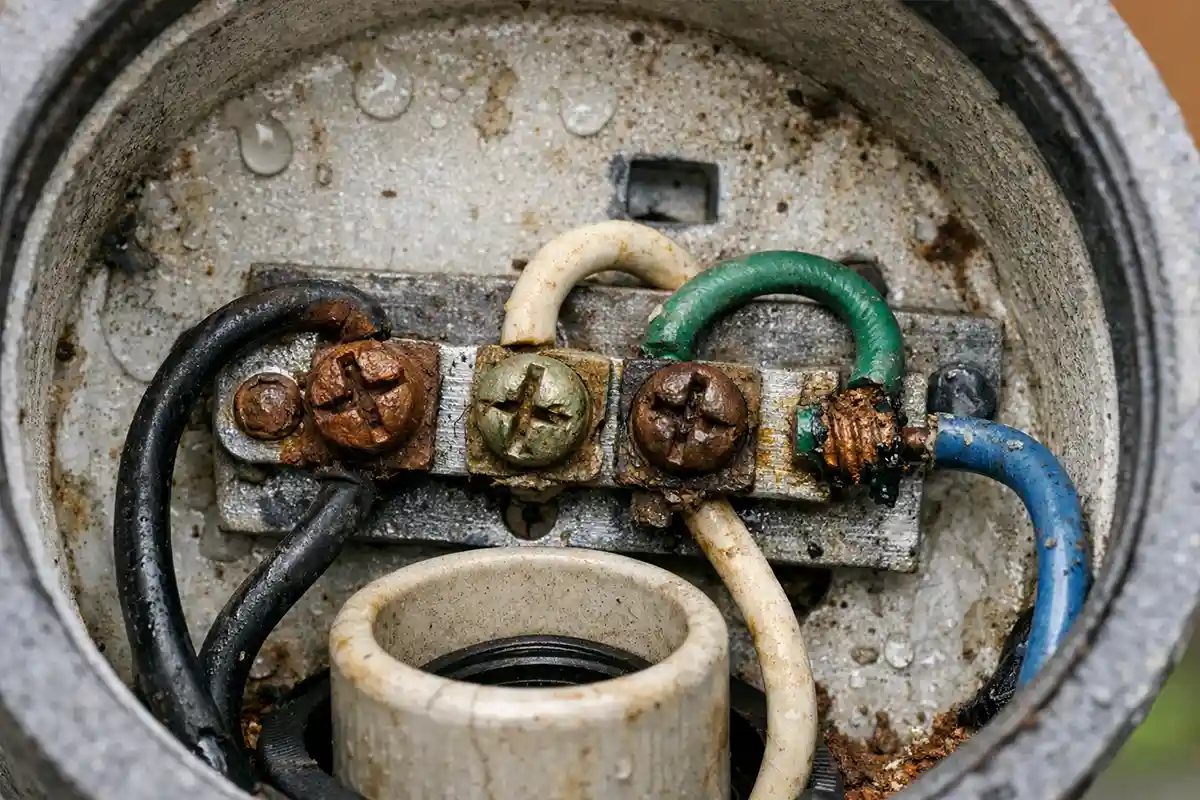
Once water repeatedly reaches the cable entry opening, the problem moves from the outside wall to the small metal components inside the fixture. This shift usually happens 2 to 4 inches below the entry hole, right where the upper terminal screws sit. That narrow zone becomes the first place where behavior changes.
The center of the solution is not the bulb, not the switch inside the house, and not the glass lens. It is the physical relationship between the cable slope, the backplate surface, and the rain direction hitting the siding. When the cable angle changes or the entry point is properly sealed, water stops reaching the upper screw area. The most visible result is simple: after a storm, that top interior edge remains dry instead of slightly damp.
Below is a short clarification block focused on how the correction actually works in physical terms.
If the light still turns on, is moisture really a problem?
Yes. Early moisture may not stop operation, but it begins changing metal surfaces inside the top third of the housing.
Does adding more caulk around the outer rim fix the issue?
Usually no. Water often enters behind the backplate, not from the front edge.
Is replacing the fixture always necessary?
No. If corrosion is limited to the top 1 to 2 inches near the entry, correcting the pathway can stabilize the system.
Why does the upper screw rust before the lower one?
Because water travels downward from the cable opening and contacts the highest internal metal first.
Can this happen even if the fixture looks perfectly level?
Yes. Visual alignment with the door trim does not guarantee proper sealing at the entry plane.
A common but incorrect belief is that corrosion means the fixture was cheaply made. In many cases, the materials are fine. The real issue is repeated moisture reaching the same small area behind the wall plane.
The correction chain looks like this:
Entry realigned and sealed → Water path interrupted → Internal humidity stabilizes → Metal contact remains dry after rainfall.
That sequence becomes observable within one or two storms. You can inspect the top interior area 24 hours after heavy rain and find no damp film near the cable penetration.
Corrosion Patterns That Start at the Entry Point
Corrosion rarely spreads randomly. It usually begins within 1 to 3 inches below the cable entry hole. If you remove the fixture and hold it at chest height, you often see rust on the upper screw while the lower mounting hardware remains clean.
The structural shift required here focuses on redirecting the water before it reaches the opening. A drip loop that hangs 1 to 2 inches below the entry point changes the gravitational path. Instead of sliding directly inward, water drops off at the lowest curve in the cable.
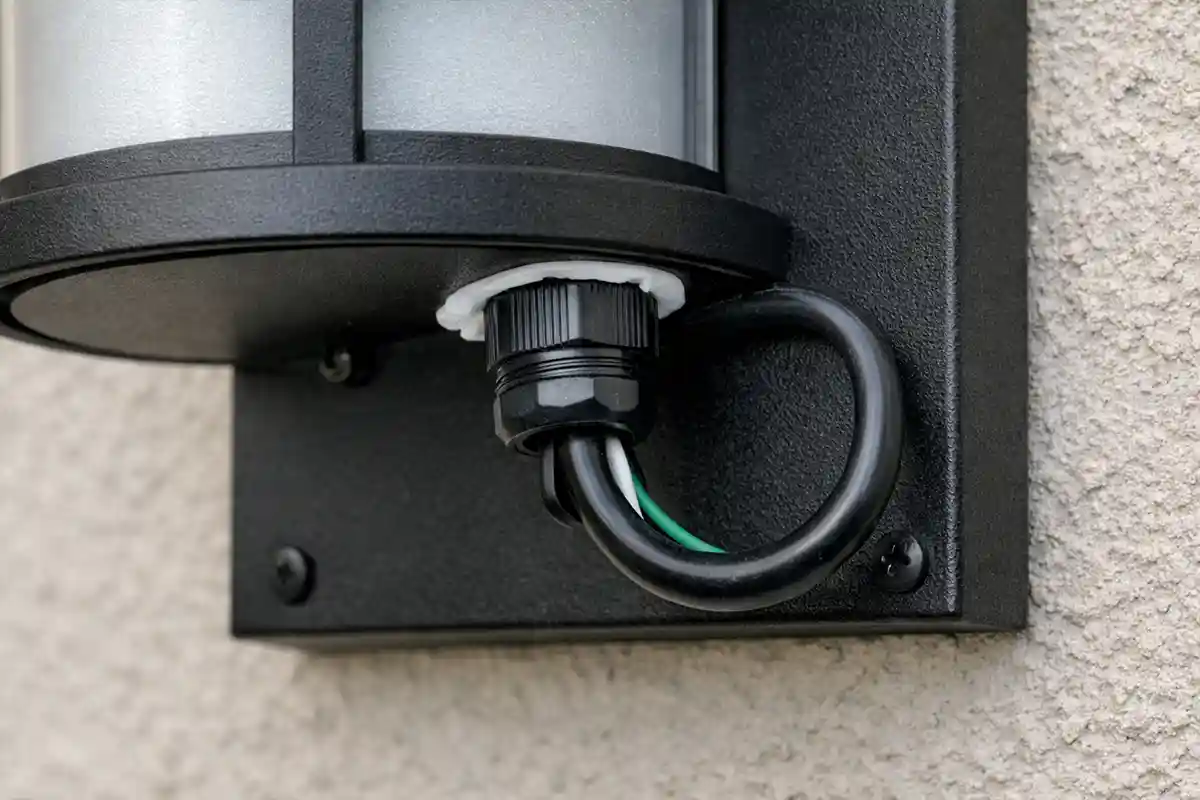
When a compression-style cable gland is installed, it grips the insulation tightly and closes the micro-gap around the entry. This changes how the opening behaves under wind-driven rain. Water striking the upper siding at a 25-degree angle can no longer follow the cable straight into the housing.
The broader corrosion behavior linked to repeated moisture exposure is explained in detail in Corrosion in Outdoor Light Connections. The key is not polishing rust after it forms, but preventing repeated contact at the same upper interior zone.
In regions like Florida, where sudden afternoon storms hit west-facing walls with strong wind, cable alignment becomes even more critical. The direction of rainfall relative to siding seams determines how often the cable jacket becomes saturated.
When Moisture Stops Evaporating Efficiently
When water repeatedly enters from the upper rear area, the air space 3 to 5 inches behind the lens remains humid longer than intended. On shaded north-facing walls that receive limited sunlight, evaporation slows even further.
The first structural adjustment involves interrupting the water path at the cable. The second involves ensuring the backplate sits flush against a flat mounting block instead of uneven siding ridges. When the mounting surface becomes even across its full width, air exchange becomes controlled rather than random.
The physical behavior shift is noticeable. After heavy rain, condensation no longer lingers on the inner glass surface the next morning. The reflector plate remains clear instead of developing faint mineral streaks along its lower curve.
Some homeowners believe drilling small ventilation holes into the bottom of the fixture will solve trapped moisture. In most cases, that makes the problem worse by creating new entry points below the original penetration.
The long-term internal moisture cycle connected to entry sealing and enclosure design is also discussed in Moisture Damage in Outdoor Lighting Explained. Stabilization begins where water enters, not where it collects.
Structural Expansion and Micro-Gap Enlargement
Over several seasons, even a 1/16-inch gap around the cable hole can expand due to temperature changes. In climates with freeze–thaw cycles, siding and mounting hardware shift slightly relative to one another.
This movement can widen the space around the penetration just enough to increase water intake during storms. The structural correction here focuses on stabilizing the mounting plane with a flat block or replacing hardened gaskets to restore uniform compression.
When compression becomes even across the full backplate surface, micro-gaps close consistently. Water striking the upper siding no longer finds a recessed void near the cable entry. Instead, it continues downward along the wall toward the driveway edge.
The observable outcome is straightforward. After repeated storms, no new rust appears on the top screws. The internal upper edge remains dry even when visible rain streaks run down the siding above.