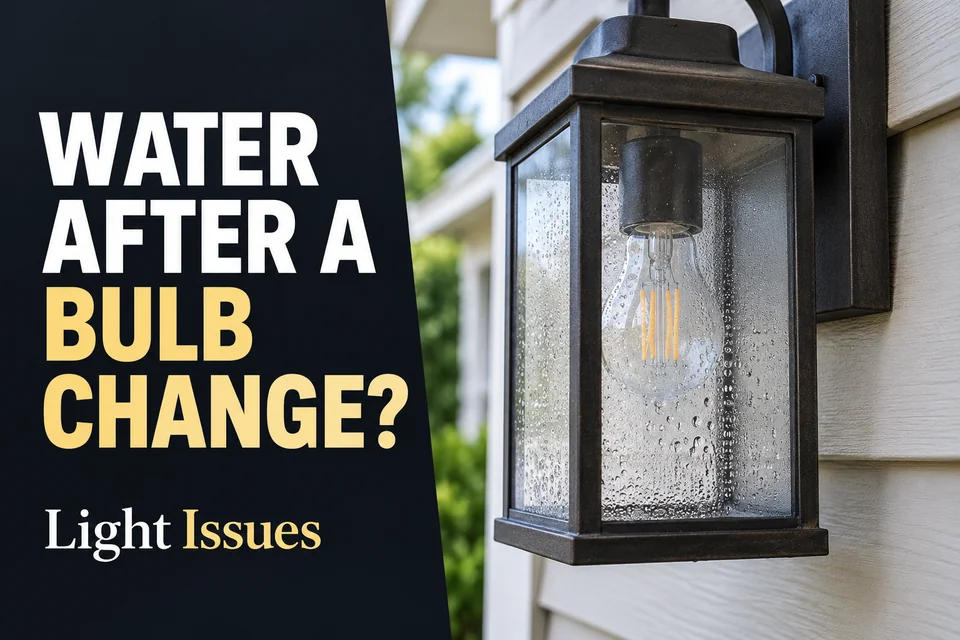
Water behind the glass after a bulb change makes the recently opened cover the first place to investigate. Opening that joint can shift a gasket, introduce debris, or leave the cover unevenly seated. The new bulb may illuminate normally even though the enclosure no longer keeps rain out.
The repair decision depends on what changed at that joint: intact parts may need cleaning and correct seating; damaged parts need replacement. Before choosing either path, establish whether the interior was dry when you opened it. Timing narrows the inspection, but it does not prove the service caused the leak.
Fix Boundary: Before opening, isolate the supply and let the lamp cool. Use the breaker for hardwired fixtures; disconnect the transformer supply for plug-in low-voltage systems. A wall switch or timer alone is insufficient. If you cannot verify isolation, or water has reached electrical components, leave the fixture off and obtain qualified help.
What Changed During the Bulb Service
A dry interior during bulb replacement followed by water after the next rain is the strongest reason to inspect the serviced joint first. The comparison becomes more useful if the fixture previously stayed dry in similar weather. Recall whether the gasket lifted with the cover, a clip resisted closing, or one screw felt different during reassembly.
If water was already present when you removed the old bulb, the service did not establish the beginning of the problem. In that case, the broader moisture diagnosis can help determine whether this narrow inspection fits the symptoms.
Also separate water appearing after rain from haze appearing immediately after closing. Moisture introduced while the fixture was open can remain inside. A damp cover or humid air trapped during servicing may fog the glass without proving that rain crossed the reassembled joint.
Use the interior condition before service, the parts disturbed, and the exposure afterward together. If you did not inspect the inside during the bulb change, treat its earlier condition as unknown. Finding a displaced seal or misaligned cover provides firmer evidence than the date you first noticed droplets.
Gasket Position and Cover Alignment
Check the gasket’s position before using the cover to compress it. With the supply isolated, identify the sealing arrangement in the fixture instructions. Some covers use a gasket retained in a groove; others seal against a shaped rim. Photograph the visible arrangement before lifting a removable seal, then confirm its intended position against the instructions.
Follow the gasket around its accessible perimeter. Look for a rolled section, a corner pulled out of position, or material caught outside the intended contact area. If a gasket will not stay seated, resolve that fit problem before trying to clamp the cover over it.
Then check how the cover engages. A threaded cover can start crooked. A tabbed cover may catch on only one side. A screw-retained lens can be drawn down unevenly. Use the mechanism your fixture actually has; these are alternative designs, not a universal list of parts.
The replacement bulb also needs adequate clearance. A bulb that fits the socket may still be too large for the enclosure. If it touches the lens or prevents normal closure, confirm the permitted bulb shape and size rather than using the cover fasteners to overcome the interference.
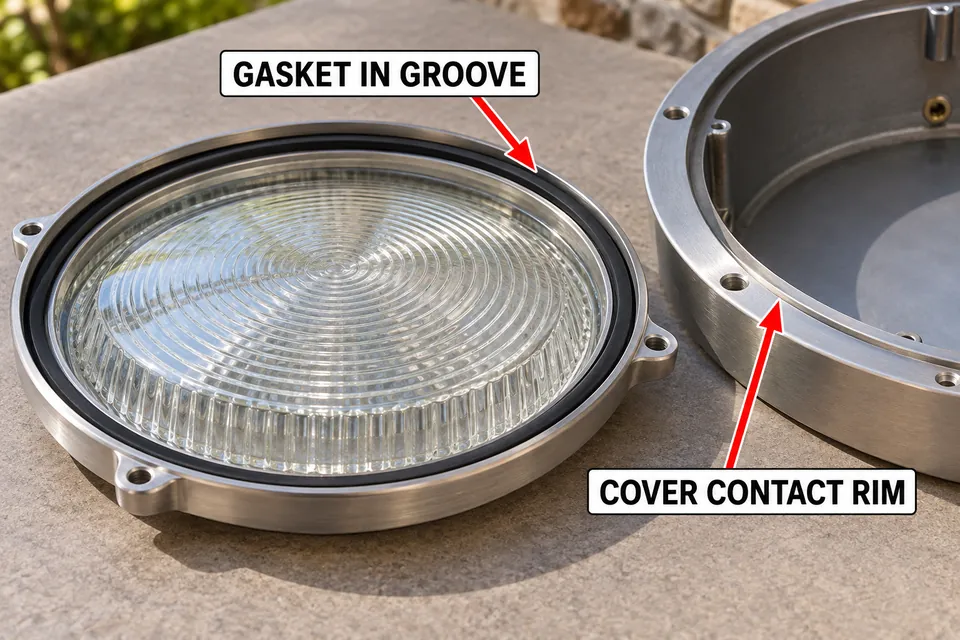
Follow the model’s closing and tightening instructions. A cover that becomes tight while sitting crooked needs its engagement checked. Even a neat-looking exterior seam cannot confirm that the concealed gasket is seated correctly.
Hair, Dirt, and Pinched Seals
Inspect both sides of the sealing contact before judging the gasket. A hair, cloth fiber, grain of grit, or small piece of debris caught across that contact can interrupt the seal. Cleaning the rubber alone leaves anything attached to the cover rim in place.
Use the manufacturer-permitted cleaning method on accessible sealing surfaces. Avoid leaving lint behind or pushing loosened dirt into the fixture. Do not assume solvents, oil, grease, or rubber-conditioning products are suitable. Any required lubricant must be specified for that seal and fixture.
Once the surfaces are clean, examine the area that was trapped or folded. An intact reusable gasket displaced from its groove may be repositioned. A cut, split, hardened section or permanent deformation changes the decision because cleaning cannot restore its shape or contact.
Judge the seal after removing contamination, but before tightening the cover again. If it cannot return to its intended position and shape, move to the replacement-part decision.
Drying Before Reassembly
Drying is a prerequisite for inspecting and reclosing the serviced joint; it does not establish that wet electrical components are safe. Keep the supply isolated while accessible cover and sealing surfaces dry in a protected setting. A removed cover can dry separately where its design allows removal. An installed fixture should not be left open to incoming rain.
Do not use the powered bulb to heat the compartment dry. Avoid heat guns, ovens, or other forced heating that could damage the lens, gasket, or insulation. There is no universal number of drying hours that makes every fixture ready to close.
The important boundary is where the water reached. A clear, dry-looking lens does not establish that the socket or a concealed wiring compartment is dry and undamaged. If water reached electrical parts, or you see corrosion, heat damage, or a tripped breaker or GFCI, that is when the problem needs an electrician.
Before routine cover reassembly, check that:
- Accessible lens, gasket, and mating surfaces are dry.
- The seal is clean, intact, and positioned as specified.
- The cover engages normally without interference or force.
- No unresolved electrical wetting or damage remains; otherwise, stop.
These checks concern the accessible service joint. They do not authorize opening wiring compartments, cleaning socket contacts, or restoring power to see whether a wet fixture still works.
When the Seal or Lens Must Be Replaced
When Reseating Is Reasonable
Reseating is reasonable when the gasket is designed for reuse, remains intact, and fits its intended location after permitted cleaning. The lens, housing rim, and retaining parts must also be sound. Finding one slipped section does not remove the need to inspect the rest of the joint.
The cover should close using its normal engagement and the manufacturer’s tightening instructions. If it requires unusual pressure or the gasket moves out again, stop. A screw that can still turn does not establish that the cover is drawing down correctly.
When a Matching Replacement Is Needed
Replace a missing, torn, hardened, or permanently distorted seal with the specified part. Inspect the adjoining components too: a cracked lens, chipped sealing edge, warped cover, or damaged retaining feature can prevent a new gasket from sealing properly.
Use the fixture’s model identification to locate the correct gasket, lens, or cover assembly. Similar appearance or diameter is not enough to establish compatibility. The seal’s profile and the way it is retained also matter, and some fixtures require an assembly replacement rather than a separate gasket.
If the specified part is unavailable, ask the manufacturer or a qualified service provider about the repair path. Household sealant, improvised gasket material, and extra tightening do not establish an equivalent repair.
After proper reassembly, do not deliberately hose-test the fixture. Water returning during normal exposure means the repair has not resolved the entry path; it does not automatically mean the cover needs more pressure. Reseat only when the original parts can regain their intended fit. Replace damaged sealing parts with the correct components, and resolve electrical wetting before returning the fixture to service.
FX Luminaire’s servicing precautions reinforce the need to keep O-rings and sealing surfaces clean during servicing.