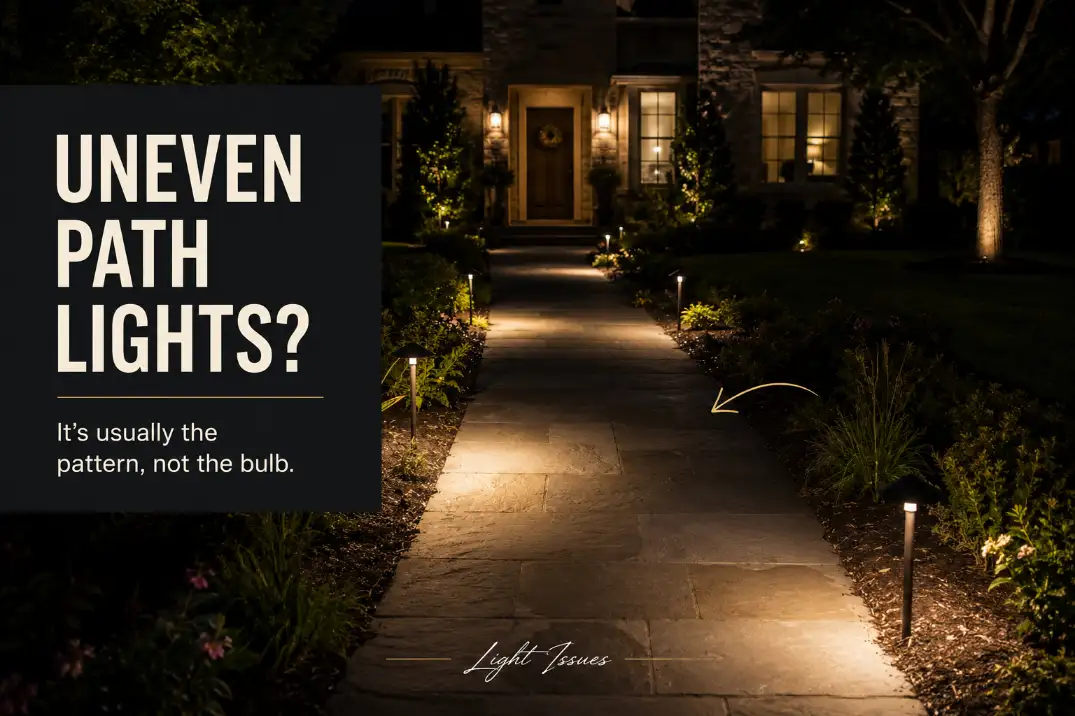
Pathway lights usually look uneven at night because the light pattern is uneven, not because every fixture is failing. The fastest clue is the shape of the problem. Alternating bright and dark patches usually point to spacing, aim, or blocked light.
A path that gradually gets dimmer toward the far end points more toward voltage drop. One odd-looking fixture often means tilt, a dirty lens, a weak splice, or a mismatched replacement.
A healthy path does not need wall-to-wall brightness. It needs steady visual rhythm. If the walking surface has repeated 2–4 ft dark gaps, or the last 2–3 lights look 20–30% dimmer than the first lights, the issue is no longer just cosmetic.
And if a 12-volt low-voltage system measures below about 10.8 volts at the far fixture under load, the cable layout deserves attention before you buy brighter bulbs.
Read the Night Pattern Before You Change Anything
Do this 5-minute night test first
Wait until full darkness, not dusk. Turn the lights on and give them 10–15 minutes to settle into their normal nighttime look. Then view the path from three places: the porch, the driveway or street approach, and the walking direction you use most.
Look for the dominant pattern, not every small imperfection. A few soft shadows are normal. Repeated dark gaps on the walking surface are not. A single tilted light is a different problem from a whole far-end section fading out.
Mark the worst gap with a small flag or piece of painter’s tape while you test. If the dark break is more than about 3 ft on the actual walking surface, especially near a curve, step, or driveway crossing, that gap deserves correction.
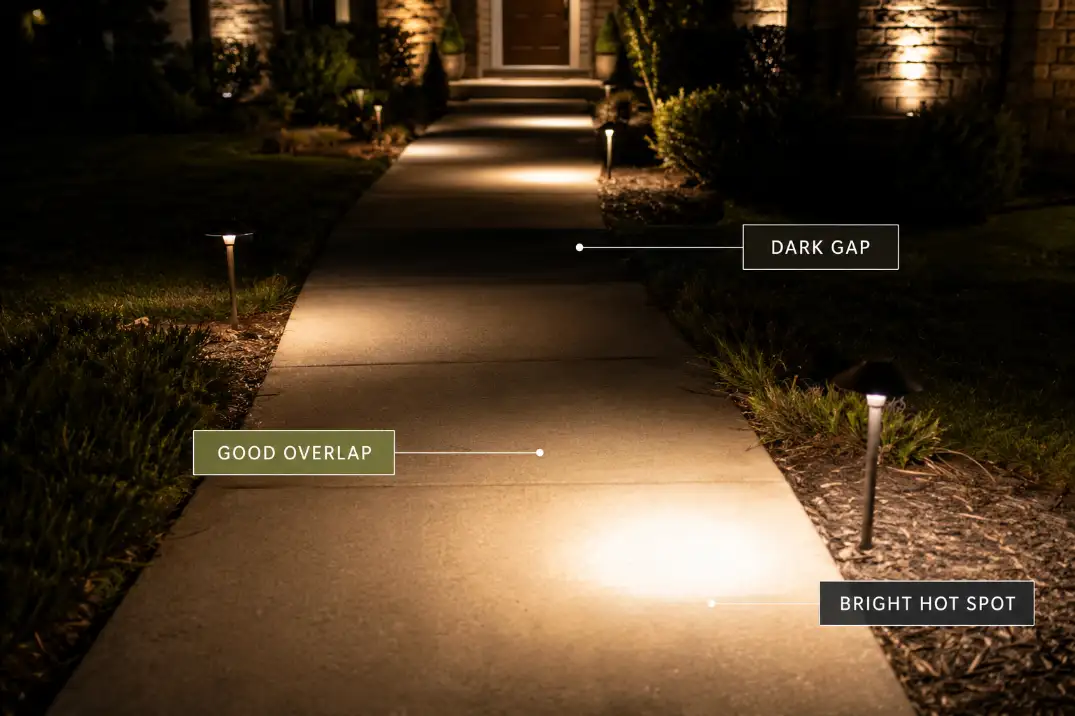
Bright-dot-dark-gap means spacing or beam spread
The most common uneven pathway pattern is simple: one light creates a bright circle, then the next usable light pool starts too far away. The fixtures may be working perfectly, but the walkway still feels broken.
For many residential paths, 6–8 ft spacing works as a starting point when the fixtures are low, shielded, and fairly wide-beam. Stretch that to 10–12 ft with narrow-beam fixtures, and the path can turn into bright-dot-dark-gap-bright-dot.
That pattern is closer to Outdoor Lights With Bright Spots and Dark Gaps than a general fixture failure.
Same spacing can still look uneven
Equal fixture spacing does not guarantee equal light. Fixture height, beam spread, lens design, surface color, and planting all change how the light lands.
A taller exposed fixture may throw glare into your eyes instead of giving the walkway a calm edge. A short fixture with a narrow beam may create a small intense pool that never reaches the next light.
Dark pavers and black mulch absorb more light than pale concrete, while wet stone can glare in one area and still leave the next few feet looking dim.
This is why a layout can look measured and still fail at night. The problem is not the tape-measure distance alone. It is the relationship between spacing, beam width, fixture height, and the surface receiving the light.
What People Usually Misread First
They blame the bulb before the layout
The obvious fix is to use brighter bulbs. That often disappoints. More output can make the hot spots harsher without filling the gaps between them.
Brightness is not the same as continuity. If the fixture is too far from the walkway edge, aimed into mulch, or using a narrow beam, extra lumens may only make the wrong area brighter.
That is why uneven path lighting often overlaps with Poor Outdoor Light Placement With Dark Spots and Glare, even when every light technically works.
They overestimate how bright a path should be
A pathway does not need to look like an indoor hallway. It needs readable edges, visible surface changes, and enough contrast near steps or turns. Many homeowners overestimate total brightness and underestimate smooth transition.
A path with gentle 1–2 ft overlap between light pools usually feels safer than a path with stronger fixtures separated by black gaps. The failing condition is not “not bright enough everywhere.” The failing condition is the eye constantly adjusting between bright spots and dark breaks.
They underestimate plants, mulch, and water
Plants can change the lighting pattern faster than people expect. In humid Florida yards or Midwest landscapes after summer rain, ornamental grasses and low shrubs can block a path light within a few weeks.
In dry Arizona yards, plant growth may matter less, but gravel color, fixture tilt, and dust on lenses can still change the pattern.
Hardscape matters too. Pale concrete reflects more usable light than dark flagstone. Wet pavers may create glare in one spot while the next section still looks underlit. The fixture output did not change, but the surface response did.
Quick Diagnostic Guide
| Night pattern | Most likely cause | First useful check | What not to do first |
|---|---|---|---|
| Bright circles with dark gaps | Spacing, beam spread, aim | Measure gap on walking surface | Buy brighter bulbs |
| One odd-shaped light pool | Tilted fixture or loose stem | Level head and check lens | Rework the whole run |
| Last lights fade gradually | Voltage drop or overloaded run | Test voltage under load | Replace random fixtures |
| Whole path feels harsh | Glare or overlighting | View from 20–30 ft away | Add more fixtures |
| New section looks different | Fixture mismatch | Check color temperature and lens type | Adjust every old light |
When Uneven Path Lights Are Actually a Power Problem
Fading down the line points to voltage drop
Spacing problems usually look random or alternating. Voltage drop usually has direction. The first fixtures look normal, the middle looks acceptable, and the far end looks tired.
In a 12-volt landscape lighting system, long cable runs, undersized wire, too many fixtures, and weak connections can all reduce the voltage available at the farthest lights.
If the last fixture reads below about 10.8 volts while the system is on, and the end lights look visibly dimmer, the cable layout is more likely than the bulb.
This is the point where Voltage Drop in Outdoor Lighting Systems becomes more useful than another round of lamp swapping.
Do not over-test the wrong problem
If only one fixture looks weak, check the simple things first: lens dirt, fixture tilt, socket condition, and the splice near that light. If the last 2–3 fixtures are weak together, voltage testing makes more sense.
If the entire path is weak, look at the transformer load, timer, photocell, or main connection.
That distinction saves time. Electrical testing is useful when the pattern points to power. It is wasted effort when the real issue is a fixture head leaning 5 degrees into mulch.
Daisy chains become less forgiving on longer paths
A straight daisy chain is not automatically wrong. For a short path with a few low-watt LED fixtures, it can work fine. The problem appears when the run gets long, the fixture count rises, or the far end keeps looking dull even after cleaning and leveling.
At that point, splitting the run, using heavier-gauge cable, or changing the wiring layout may help more than adding more lights.
If the path is long or the end fixtures always look weaker, compare the layout logic in Daisy Chain vs Hub Landscape Lighting before assuming the fixtures are poor quality.

Fix the Cause Without Overcorrecting
Adjust spacing differently on straight paths, curves, and steps
Straight paths can usually tolerate wider spacing than curves. On a curve, the inside edge often falls dark first because the light pools no longer overlap cleanly along the walking line.
Tightening spacing by 1–2 ft on curves can look more natural than using the same rigid distance everywhere.
Steps and transitions deserve less tolerance. A 2–3 ft dark gap near a step can feel worse than a 3 ft gap on a flat path. Driveway crossings also need clearer edge definition because the walking surface visually blends into a wider paved area.
Wide walkways may need staggered placement rather than one perfect row. The goal is not symmetry. The goal is a readable walking route.
Clean, level, and compare before replacing
Clean the lenses, remove mulch or leaves around the light head, and level each fixture before judging output. Recheck the next night. If one fixture suddenly matches the others after cleaning, replacement was never the answer.
If one fixture still looks weak, swap it with a known-good fixture or lamp if the system allows it. If the weakness follows the fixture, suspect the fixture. If the weakness stays in the same location, suspect the splice, cable, or voltage at that point.
Add light only where continuity breaks
Adding one fixture in the right place is often better than upgrading every fixture. If the walking surface has a dark break over about 3 ft, fill that gap or adjust the nearest fixture so its pool overlaps more naturally.
But do not keep adding fixtures to a run that is already overloaded. When the cable is long, the fixture count is high, or the far end fades, the better repair may be splitting the run rather than adding another load to it.
That is where How Many Landscape Lights Can You Put on One Cable Run becomes the more practical question.
Pro Tip: Fix the worst 20% of the pattern first. One corrected dark gap or one re-aimed glare point can make the entire path feel calmer.
When the Standard Fix Stops Working
Too close can look uneven too
Uneven does not always mean too dark. Lights placed too close together in a rigid line can create a runway effect. The eye jumps from point to point instead of reading the walkway as one calm route.
This is especially noticeable when fixtures are tall, bright, or lined up perfectly on both sides of a straight path. The fix is not more brightness. It is usually softer output, better shielding, staggered placement, or fewer visible points.
Re-spacing will not fix mismatched fixtures
If fixtures have different beam spreads, lens ages, color temperatures, or lumen outputs, spacing alone cannot make the path look even. A 2700K warm fixture beside a 4000K cooler replacement can look wrong even when both are equally bright.
Try to keep pathway fixtures consistent by model, lens style, color temperature, and mounting height. If older fixtures have cloudy lenses and newer ones look sharp, the layout may be acceptable but the set no longer matches visually.
More brightness will not fix glare
Glare makes nearby areas seem darker because your eye adapts to the brightest point. If one fixture catches your eye from 20–30 ft away, it may be too exposed, too tall, or aimed across the viewing line.
Shielding, lowering, or repositioning that fixture can improve the perceived balance more than increasing output elsewhere. This is why Outdoor Lights Too Bright or Too Dark is often about visual comfort, not just wattage.
Questions People Usually Ask
Should pathway lights be perfectly symmetrical?
No. Perfect symmetry can still create dark gaps or a runway effect. A slightly staggered layout often looks more natural, especially on curved paths or wider walkways.
Is one dim pathway light always a bad fixture?
No. If the dimness follows the fixture after swapping, the fixture is suspect. If the dimness stays in the same location, the splice, socket, cable, or voltage at that point is more likely.
Should I replace all my path lights if they look uneven?
Usually not. Start with cleaning, leveling, spacing, and voltage checks. Full replacement makes sense when fixtures are mismatched, badly corroded, poorly shielded, or no longer consistent as a set.
Bottom Line
Uneven pathway lights are usually a pattern problem before they are a product problem.
Read the night pattern first: bright circles and dark gaps point to spacing or beam spread, one strange fixture points to aim or condition, and fading at the far end points to voltage drop. Re-aim and clean before replacing.
Adjust spacing before increasing brightness. Test voltage only when the pattern points to power.
Once the visible symptom is separated from the underlying mechanism, the repair becomes much clearer.
For broader official guidance on outdoor lighting quality, safety, and nighttime impacts, see the U.S. Department of Energy.