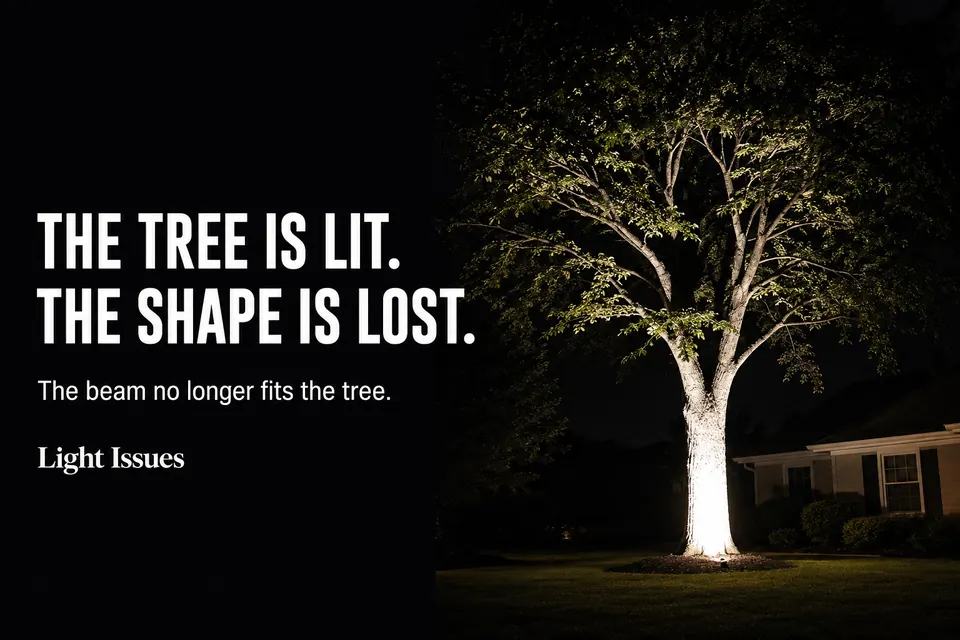
A tree can be brightly illuminated and still lose its shape. Instead of revealing bark, height, and branching structure, the uplight creates a white trunk patch, hard leaf shadows, or several disconnected bright areas.
The real problem is usually not total brightness. It is how the strongest part of the beam meets the tree. Dimming everything may weaken the scene without changing the harsh pattern. A poor beam-to-tree match stays visible even at a lower setting.
Treat the tree as the diagnostic surface. The trunk reveals concentration, the canopy exposes obstruction, and the surrounding ground shows excessive spread. Those clues tell you whether to change output, distance, aim, or beam control.
Make the first assessment from the normal viewing position rather than beside the fixture. A beam can appear controlled at the base while producing a glaring patch from the patio, sidewalk, or street. The viewer’s angle is part of the diagnosis.
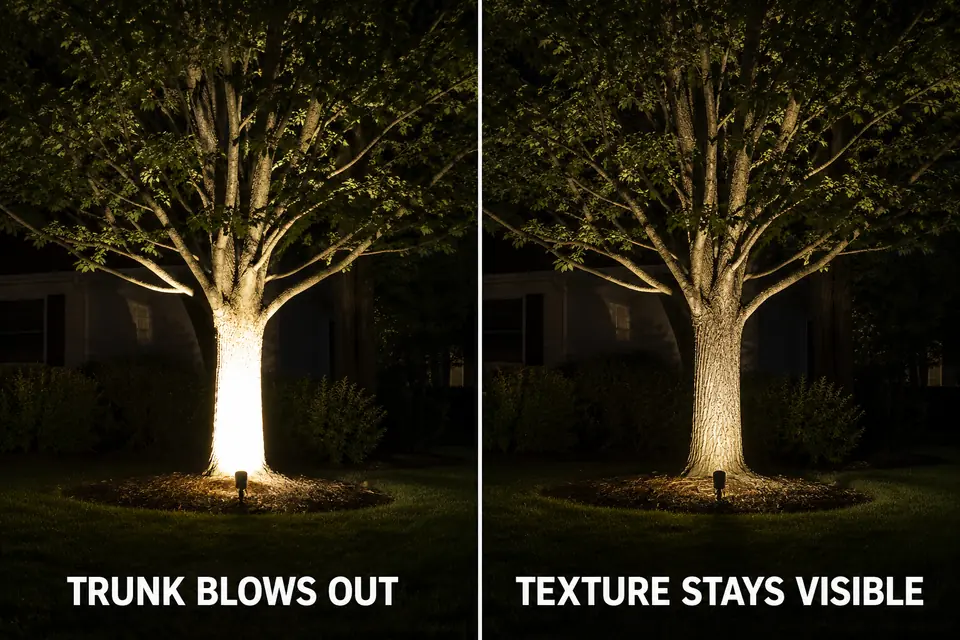
Blown-Out Trunk
A nearly white lower trunk with little visible bark texture points to local overexposure, not necessarily an uplight that is too powerful for the entire tree. The beam’s strongest area is landing too close and too narrowly.
This commonly occurs when a fixture sits close to the trunk and aims steeply upward. Its intense center reaches a small surface before the beam has room to spread. Pale or smooth bark can amplify the effect, but even deeply textured bark disappears when one area becomes disproportionately bright.
The distance between the fixture and trunk matters because it changes more than coverage. It also changes how quickly the brightness transitions upward. A fixture pressed close to the base tends to produce a hard, immediate concentration, while a little more setback can let the beam open before reaching the bark. More distance is not automatically better, however; too much can send useful light around the tree instead of through its structure.
Adding another light toward the canopy is the wrong first response. It can create a second bright zone without reconnecting the trunk and branches. Temporarily reduce the output or move the beam center away from the nearest trunk surface. If the bark returns but the tree still looks vertically disconnected, distance or aim is the more useful adjustment.
This is a localized version of harsh outdoor lighting: the brightest surface controls what the eye can perceive elsewhere. The corrected trunk should retain texture while the light transitions gradually into the branching structure.
Beam Too Wide
When the surrounding yard becomes part of the illuminated subject, the beam is too wide for the tree. Bright mulch, neighboring plants, fence panels, or empty space weaken the tree’s outline even if its trunk is not overexposed.
Check the complete beam footprint rather than concentrating on its center. From the main viewing position, look for bright ground beside the tree or illuminated foliage unrelated to its form. Those areas reveal coverage the tree does not need.
A wide beam often looks acceptable from close range because the trunk remains visible. From farther away, however, all the spill merges into one broad bright zone. The eye stops reading a tree and starts reading an illuminated section of the yard. This distance test separates useful canopy coverage from uncontrolled spread.
Reducing output will weaken the spill, but it may also leave the canopy underlit. The stronger correction is often to adjust distance or aim so the beam spread matches the part of the tree being revealed. Because moving the fixture changes both footprint size and center intensity, alter only one variable before reassessing the result.
Do not require every outer branch to receive the same amount of light. A restrained falloff at the canopy edges often looks more natural than a beam wide enough to cover the tree’s entire silhouette. The goal is structural continuity, not complete coverage.
If the beam also reaches the house, the failure has crossed into a separate uplight spill near windows problem. Treat that as a firm boundary rather than accepting window exposure as the price of lighting the tree.
Leaf Shadow
Shadow is useful until it breaks the tree into visual fragments. Low leaves or branches directly in the beam path can intercept the light and project hard-edged shapes across the trunk or upper canopy.
In still conditions, the result looks patchy. In a breeze, those sharp shadows move constantly and can create a distracting flicker. Lower output may reduce their contrast, but it cannot remove the obstruction causing them.
Look along the beam path from the fixture toward the canopy. A cluster of low foliage may be receiving the strongest light before it reaches the tree’s main structure. A small sideways adjustment can sometimes bypass that obstruction while retaining useful depth.
Fixture position relative to the trunk also changes the character of the shadows. A beam aimed straight through dense foreground leaves tends to stack their shadows over the same surface. A restrained offset can separate those layers, allowing some branches to remain dark while the primary trunk and canopy connection stays readable.
The goal is not a shadow-free canopy. Controlled shadows separate layers and suggest volume; harsh shadows sever the relationship between them. Keep this as a lighting diagnosis rather than turning it into a reason for unnecessary pruning.
Seasonal change matters here. An aim that works on a sparse spring canopy may become visually noisy once the tree fills out. Retest after major foliage growth before assuming that the fixture or its output has failed.
Hot Spots
Several isolated bright patches usually indicate beam-center or overlap problems rather than excessive overall output. One patch may land on a trunk bend, another on a pale branch, and a third where two beams cross. The dark intervals between them make the tree appear assembled from separate pieces.
If the tree has multiple uplights, switch off one at a time. When a patch disappears, note whether that fixture created it alone or whether the concentration existed only where two beams overlapped. This reveals more than dimming every fixture together.
Two beams do not need to contribute equally. One can establish the primary trunk-to-canopy route while a second adds limited depth from another angle. When both fixtures compete for the brightest area, the result usually becomes flatter and harsher rather than more dimensional.
With a single fixture, trace the beam center upward. A curved trunk can move into and out of its most intense zone, while pale bark or a smooth branch surface may reflect more light toward the viewer. A slight change in aim can restore continuity without weakening the entire tree.
The same mechanism appears across landscapes as bright spots and dark gaps. On a tree, the decisive question is whether the bright areas follow its structure or interrupt it.

Softer Uplight
The softer result is not the dimmest one. It is the result in which the eye can move from trunk to branches without being stopped by a white patch, hard beam edge, or unrelated illuminated ground.
Match the correction to the diagnosed failure. Reduce output when the whole target is too intense. Change distance when the beam concentrates too close to the trunk or cannot cover the intended structure. Shift aim when its center strikes reflective bark, crosses foreground foliage, or misses the canopy. Control overlap when multiple fixtures create competing centers.
Make those adjustments in that diagnostic order rather than changing everything together. Start with where the beam lands, then assess its spread, and reduce output only after the distribution makes sense. Otherwise, a lower setting can conceal the evidence without resolving the mismatch.
A corrected tree retains bark texture and a visible transition upward. It may remain brighter than its immediate background, but it should not dominate the entire yard. Every edge does not need illumination; selective darkness helps retain depth.
Color cannot rescue poor distribution either. A warmer light may feel less clinical, but a blown-out trunk remains blown out. Beam placement and contrast control must work before color character becomes the finishing decision.
If repeated aim changes merely move the harsh patch, reconsider whether the fixture is missing its intended target area. Dimming cannot make a fundamentally mismatched beam fit the tree.
Tree Test
The useful test begins from where the tree is normally seen, not beside the fixture. View it first from the primary patio, window, sidewalk, or street position. Then move closer to confirm that the bark still carries texture rather than becoming a blank bright surface.
Follow the light visually from the base into the main branches. The transition need not be perfectly even, but it should feel connected. Then look beyond the tree for bright ground, neighboring plants, or structures that expose an oversized beam.
Observe the canopy briefly during a light breeze. Gentle movement should add depth without producing sharp, distracting flashes. If it does, the beam may still be passing through too much foreground foliage.
Also look away for a moment and return your attention to the tree. The first area that captures your eye reveals the remaining hierarchy. If that area is a white patch on the trunk or bright mulch beside it, the beam is still controlling the scene more than the tree.
Change one variable and repeat the same viewing route. The correction is finished when the bark remains defined, the canopy reads continuously, and the beam no longer announces its boundaries. At that point, the tree—not the uplight—has become the subject.
For broader guidance, DarkSky International recommends careful aiming, low necessary light levels, and keeping illumination within its intended target in its Five Principles for Responsible Outdoor Lighting.