Quick Solution Summary
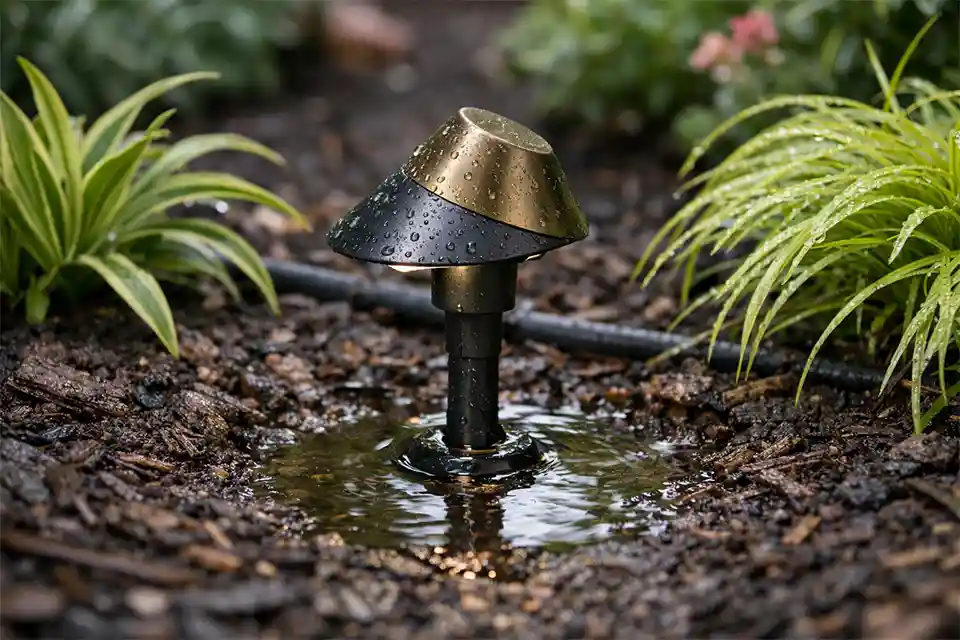
Water accumulation around landscape lighting installed in garden beds usually happens because the fixture sits too low, the soil drains poorly, or irrigation repeatedly saturates the same small area. In most systems, the real problem is not the rain itself. It is standing moisture that remains at the base of the fixture long enough to enter through cable entry points, damaged seals, loose fittings, or unprotected wire splices.
The fastest fix is to lift the fixture so it sits about 1–2 inches above the surrounding grade, create a gravel drainage pocket beneath it, and keep mulch from touching the housing. Waterproof underground connectors should also be checked, especially in low-voltage systems fed by a transformer where repeated moisture can create voltage instability across the line.
This issue shows up often in humid Florida beds, clay-heavy Midwest landscapes, and irrigated California properties where water is applied frequently. If water still surrounds the fixture 30–60 minutes after irrigation or rainfall, drainage is not adequate. Fixing that early can prevent corrosion, erratic performance, premature lamp failure, and repeated service calls.
Why Garden Beds Cause More Water Problems Than Other Areas
Landscape lighting fixtures installed in garden beds are exposed to a different moisture pattern than fixtures placed in gravel borders, hardscape edges, or open turf. Garden beds often contain mulch, compost-rich soil, and dense root zones that hold water longer. When the fixture is installed in a slight depression, even a low spot of 0.5–1 inch can become a collection point.
That is why the fixture may appear properly installed but still stay wet for hours after watering. In many cases, the water is not visibly deep. The real issue is persistent saturation around the stem, base plate, and wire entry area. Over time, that trapped moisture can damage connections and insulation, especially when connectors were buried directly in wet soil. Outdoor systems exposed to long-term dampness often develop progressive electrical deterioration, which is explained further in Moisture Damage in Outdoor Lighting Explained.
Another factor is surface runoff. A bed sloped toward the fixture, a downspout nearby, or overspray from a rotor head can keep the same area wet day after day. In Arizona, deep irrigation cycles may compensate for evaporation but still flood planting pockets. In northern states, frozen winter soil can also slow spring drainage and keep the lower part of the fixture wet longer than expected.
Small water droplets inside the lens may seem harmless, but moisture inside an outdoor light fixture can sometimes point to a sealing or ventilation issue.
Quick Diagnostic Checklist
Use this checklist before replacing fixtures or digging up the whole run:
-
Water remains around the fixture longer than 30 minutes after irrigation
-
The fixture base sits level with or below the soil line
-
Mulch or wet soil is touching the housing
-
Wire splices are buried directly in the bed without waterproof protection
-
The lens is clear, but the base or stem shows rust, scale, or green corrosion
-
The fixture works intermittently after rain or heavy watering
-
Drainage holes on the fixture are blocked by soil, mulch, or compacted debris
If at least two or three of these signs are present, the issue is usually drainage and moisture exposure rather than a bad bulb alone.
Common Causes of Water Accumulation Around Landscape Lights
| Cause | What You’ll Notice | Recommended Fix |
|---|---|---|
| Fixture installed too low | Water rings or shallow pooling around the base | Raise fixture 1–2 inches above grade |
| Compacted or clay-heavy soil | Bed stays wet for hours after watering | Add drainage pocket with coarse gravel |
| Mulch piled against the fixture | Base remains damp even on dry days | Pull mulch back 1–2 inches |
| Irrigation overspray | Fixture gets soaked on every cycle | Adjust spray pattern or switch nearby area to drip |
| Blocked drainage holes | Water sits inside or at the bottom of the housing | Clear debris and keep base exposed |
| Buried non-waterproof splices | Flickering, dimming, or dead fixtures | Replace with gel-filled underground connectors |
Most of these conditions do not fail the light instantly. They create a cycle of exposure, drying, and re-wetting. That cycle is especially hard on brass fittings, aluminum housings, lamp sockets, and low-voltage cable insulation.
How Water Actually Gets Into the Fixture
Water does not always enter through the front lens. In many outdoor fixtures, the more vulnerable areas are lower and less visible. Moisture often travels through the cable opening, along the wire jacket, around a loose stem connection, or through a cracked gasket. If the fixture includes small drainage holes, they help release incidental moisture, but only when they remain open. Once those holes are packed with mulch or soil, water has nowhere to escape.
Common entry points include:
-
Cable entry points at the bottom of the housing
-
Damaged or compressed rubber gaskets
-
Loose threaded joints between stem and head
-
Hairline cracks from impact or freeze-thaw stress
-
Socket areas exposed after repeated overheating
-
Drainage holes blocked by soil fines or mulch particles
In cold northern climates, freeze-thaw cycling can widen tiny cracks over a season. In coastal parts of California, salt-laden moisture may increase corrosion at exposed hardware. In hot, humid areas where relative humidity often ranges from 70–90%, the fixture may never fully dry between watering cycles.
When water starts reaching terminals or splices, corrosion becomes much more likely. That process often begins subtly, then spreads until the circuit becomes unreliable. Corroded terminals and splice points are a common next-stage problem, as outlined in Corrosion in Outdoor Light Connections.

What the Transformer and Wiring Have to Do With It
A low-voltage transformer does not usually cause water accumulation, but it can make the effects more noticeable. When moisture damages one splice or fixture lead, resistance in that section can increase. On a longer run, that may create dimming, intermittent operation, or uneven brightness at the end of the line.
That is why a water problem in one fixture sometimes looks like a broader wiring issue. The transformer may still be functioning normally at 12 volts or 15 volts, yet the affected fixture receives unstable power because moisture has degraded the connection. If the problem is ignored, it can eventually affect neighboring lights on the same branch.
Poor moisture protection at splices is one of the most common reasons outdoor lighting becomes inconsistent over time. When connectors loosen or degrade in wet soil, the whole system may begin acting unpredictably. That failure pattern is closely related to the issues covered in Loose Outdoor Wiring Connections: How to Fix Them Safely and Permanently.
Step-by-Step Fix for Water Around Landscape Lighting in Garden Beds
Raise the fixture above surrounding grade
Remove the fixture and reinstall it so the base or lower stem sits about 1–2 inches above the surrounding soil or mulch. That small change often prevents pooling from collecting directly around the housing.
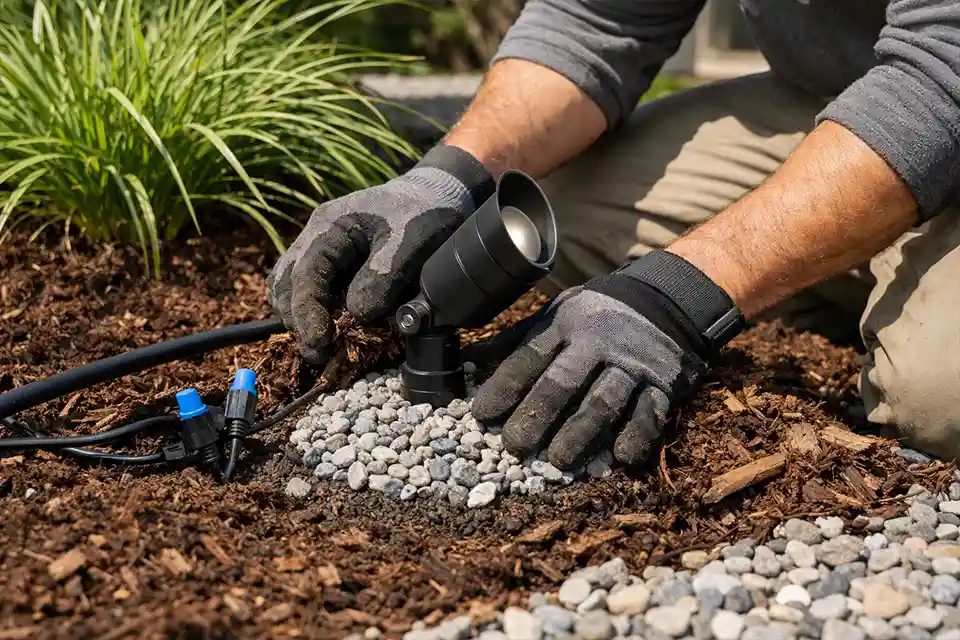
Build a drainage pocket under the fixture
Dig an opening roughly 6–8 inches wide and 4–6 inches deep beneath the fixture location. Add coarse gravel or small crushed stone to create a drainage reservoir. In very dense clay soil, going slightly deeper may help, depending on the site.
Keep mulch away from the housing
Pull mulch back so there is at least a 1-inch gap around the fixture base. Thick mulch layers, especially those 2–4 inches deep, can hold moisture against the metal or composite body for long periods.
Check and clear drainage holes
If the fixture was designed with small weep or drainage openings, clear them carefully and make sure they remain above packed mulch or soil. These openings are not defects. They are part of the moisture management design. When they become blocked, trapped water has no easy exit path.
Replace vulnerable splices
Any splice found in wet soil should be remade with waterproof, underground-rated connectors. Gel-filled connectors are common for this purpose. Standard indoor wire nuts are not enough in a saturated bed.
Reduce irrigation exposure
Run the irrigation zone and watch the spray pattern. If the fixture receives direct spray for 10–15 seconds or more each cycle, move the head, reduce arc, or convert that nearby area to drip irrigation where practical.
Regrade the bed if runoff collects there
When the fixture sits in the lowest part of the planting area, a small grading correction can matter. Even a modest slope change can redirect runoff away from the light instead of into it.
Environmental Conditions That Make the Problem Worse
| Condition | Signal | Action |
|---|---|---|
| Florida-style humidity and frequent rain | Soil remains damp day and night | Raise fixtures and improve airflow around the base |
| Midwest clay and seasonal rainfall | Water drains very slowly after storms | Add gravel below fixtures and improve grading |
| Freezing northern winters | Cracks or loosened fittings by spring | Inspect housings and seals each season |
| California coastal moisture | Corrosion on exposed metal parts | Clean fittings and monitor salt-related oxidation |
| Desert irrigation cycles in Arizona | Localized flooding in beds despite dry air | Reduce overspray and avoid planting-pocket depressions |
These patterns explain why two identical fixtures may perform very differently in different regions. The fixture itself is only one part of the equation. Soil structure, watering method, seasonal weather, and installation height all matter.
Some systems continue to operate during the day or between storms, then begin failing after repeated moisture exposure. In those cases, the behavior may look electrical even though the root cause is still water intrusion. Intermittent shutdown symptoms can overlap with the type of problem described in Outdoor Lights Turning Off After a Few Minutes.
Preventing the Same Problem in New Installations
The best installations anticipate moisture before the first watering cycle. A fixture placed directly into a low mulch pocket may work for weeks or months, but long-term reliability is much better when drainage is part of the original layout.
A more durable installation usually includes:
-
Fixture height slightly above finished grade
-
Gravel or crushed stone below the base
-
Waterproof underground splices placed carefully
-
Open drainage holes that are not buried in debris
-
Irrigation heads adjusted away from direct spray
-
Transformer sizing and cable routing that keep voltage stable across the run
This is especially important on longer cable runs or systems with several fixtures branching from one transformer. Once moisture enters at a cable opening, connector, or poorly sealed housing joint, the damage rarely stays isolated forever. Water migration through cable entry areas is one of the most common hidden failure points in outdoor lighting, which is why it helps to understand Why Water Gets in Through Cable Entry Points.
Practical Signs the Fixture Needs More Than Drainage Work
Sometimes drainage correction is enough. Other times, the fixture has already been damaged and should be rebuilt or replaced. Signs that usually point to fixture deterioration include visible rust flakes, white oxidation on aluminum, cracked sockets, swollen gaskets, brittle wire insulation, or repeated failure after every rain event.
If the fixture holds water inside the housing, replacement may be more practical than repeated drying attempts, especially if the internal metal surfaces are already corroded. In those cases, comparing the symptoms with Water Inside Outdoor Light Fixtures can help determine whether the housing itself is now compromised.
Key Insights
Water accumulation around landscape lighting in garden beds is usually caused by poor drainage, low installation height, mulch contact, blocked drainage holes, or repeated irrigation exposure. The fixture may not be defective at all. It may simply be sitting in the wettest part of the bed.
The most effective fix is usually a combination of raising the fixture, adding a gravel drainage base, protecting splices with waterproof connectors, and preventing mulch or soil from blocking weep paths. Low-voltage transformers should also be considered as part of the bigger system, because moisture-damaged connections can create dimming or erratic performance even when the transformer itself is fine.
When the surrounding soil drains properly and water is no longer trapped against the fixture, most systems become much more reliable across wet seasons, high humidity, and repeated irrigation cycles.
Common Questions
Can a landscape light be installed directly in soil?
It can, but that is rarely the best long-term approach in a garden bed. Soil contact increases the chance of constant moisture exposure, especially when mulch and irrigation are involved.
Should landscape lights be installed in gravel?
In many garden beds, yes. A small gravel base improves drainage, reduces standing moisture, and helps keep the lower part of the fixture from sitting in saturated soil.
How long should water remain around a landscape fixture after watering?
Typically no more than 10–20 minutes. If water still surrounds the base after 30 minutes, the area likely needs drainage improvement or regrading.
Are drainage holes in landscape lights supposed to be there?
Often yes. Small weep or drainage holes are commonly included to let incidental moisture escape. They should not be sealed shut, but they should be kept clear of mulch and soil.
Can water around one fixture affect the rest of the system?
Yes. In a low-voltage system, one wet splice or corroded connection can increase resistance and contribute to dimming or unstable performance elsewhere on the same run.
For broader guidance on soil management, drainage behavior, and how water moves through landscaped areas, the University of Minnesota Extension provides research-based resources for homeowners and landscapers through its landscape and soil management resources.