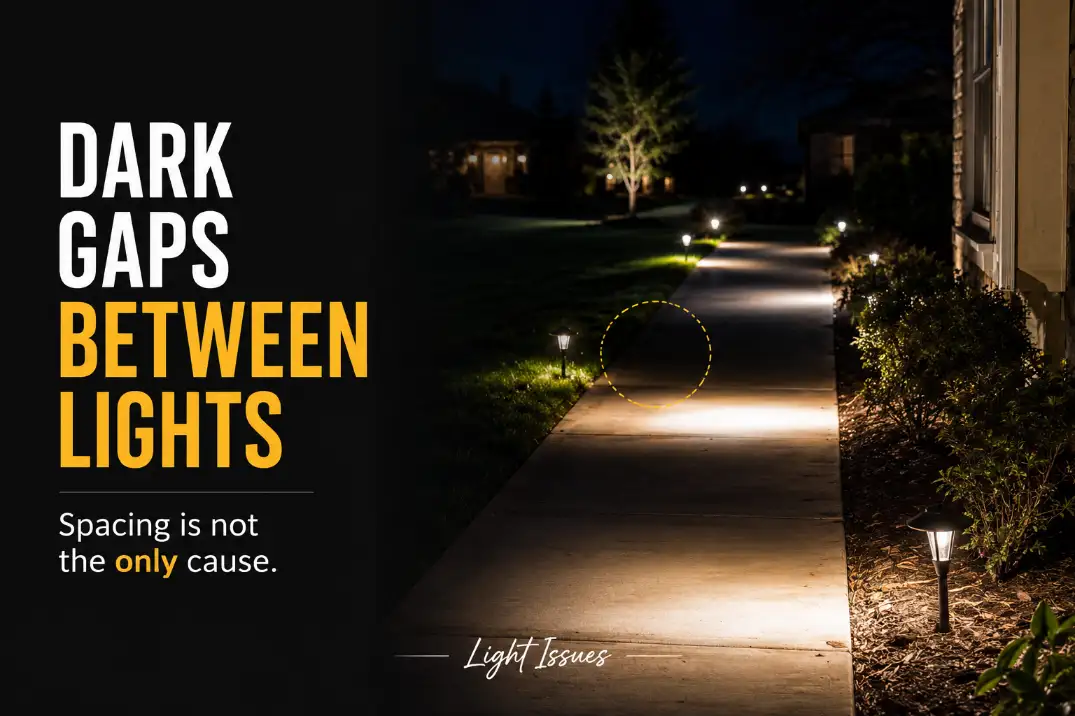
Dark gaps between pathway lights usually come from poor beam overlap, not simply from having too few fixtures. A path can have plenty of lights and still look broken if each fixture creates a small bright pool that fades before the next one begins.
The first checks are spacing, beam spread, mounting height, and whether the last fixtures on the run are dimmer than the first ones.
As a practical field starting point, many path lights work best around 6–8 feet apart. Wider 10–12 foot spacing only works when the fixture throws a broad, soft pattern. If every gap is similar, suspect spacing or beam spread.
If the last 2–3 fixtures look weaker, suspect voltage drop. If only certain spots go dark, plants, edging, curves, or surface color may be stealing the light.
Why Pathway Lights Leave Dark Gaps
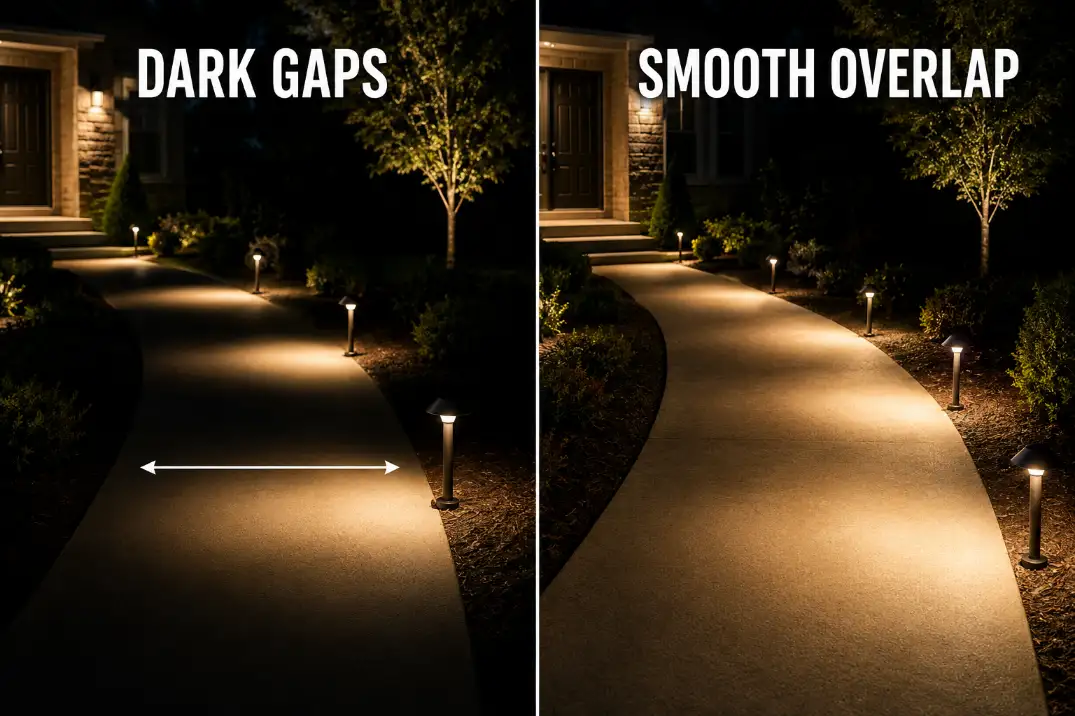
The light pools do not meet
A pathway light does not light the whole walkway evenly. It creates a usable pool of light around the fixture. If that pool reaches only 3–4 feet in each direction but the next fixture sits 10 feet away, the dark gap is built into the layout.
That is why a brighter bulb often disappoints. More brightness may make each pool harsher without extending the useful edge far enough to meet the next fixture. The symptom is a dark space. The mechanism is failed overlap.
If your walkway already has a pattern of bright spots followed by dark spaces, the same contrast problem is explained more broadly in outdoor lights creating bright spots and dark gaps.
Identical spacing can still produce different gaps
Two path lights can sit 8 feet apart and behave completely differently. A wide mushroom-style cap may spread light smoothly across the path.
A small decorative lantern may glow visibly but put less usable light on the walking surface. A narrow directional head may create a neat circle and then drop off quickly.
This is why spacing recommendations should not be treated like a guarantee. Use them only after checking the fixture’s actual beam pattern. Two lights with the same lumen rating can cover very different ground widths.
The better question is not only “how far apart are the fixtures?” It is “does the usable light on the ground actually reach the next pool?”
Pro Tip: Judge the light on the walking surface, not the brightness of the fixture itself. If the path looks fine from the porch but your feet disappear while walking, trust the walking view.
Quick Diagnostic Checklist
| Check | What it usually means | First move |
|---|---|---|
| Gaps are even between every fixture | Spacing or beam spread problem | Reposition before buying more |
| Last fixtures are dimmer than first fixtures | Voltage drop or long cable run | Test voltage near the end |
| Gaps appear near shrubs or edging | Blocked beam | Trim or move the fixture |
| Bright circles are harsh but gaps remain | Narrow beam, not low output | Change distribution, not just lumens |
| Steps, curves, or slopes go dark | Safety-critical placement gap | Add coverage at the transition |
What People Usually Misread First
“The lights just need to be brighter”
Brightness is the most overestimated fix. If the light pool diameter does not grow, brighter output only increases contrast. The bright zones become more obvious, while the dark spaces still remain.
A healthier path has a soft transition from one pool to the next. A failing path has a visible drop where the walking surface goes dark for 3 feet or more. That difference matters more than the stated lumen number on the package.
“The spacing is definitely wrong”
Spacing matters, but it is not the whole diagnosis. A path with 6-foot spacing can still have gaps if the fixtures are too low, too narrow, blocked by plants, or pointed away from the walking line. A path with 10-foot spacing may work if the fixture has a broad spread and the surface reflects light well.
Manufacturer spacing guidance can help, but it should be treated as a starting range, not a final layout. The final test happens after dark, on the actual surface, with the fixture installed at its real height.
For a wider placement diagnosis, why pathway lights look uneven at night helps separate spacing problems from aim, terrain, fixture rhythm, and visual imbalance.
“Both sides of the path need lights”
Sometimes they do. Often they do not. Alternating fixtures on one side can guide a walkway well when the beam reaches across the path. Doubling fixtures on both sides can create clutter, glare, or a runway effect if every light is lined up too evenly.
The better question is not “one side or two sides?” It is whether the walking surface stays readable from one fixture to the next.
The Surface Can Make the Same Light Look Weaker
Dark mulch and wet stone absorb more light
The same fixture can look stronger on pale concrete than on dark pavers, black mulch, wet stone, or deep planting beds. Light-colored concrete reflects enough glow to soften the edges between fixtures.
Dark or wet surfaces absorb more of that spill, so the pools look smaller and the gaps look deeper.
This matters after rain. A walkway that looks acceptable on a dry evening may show stronger dark gaps when the pavers are wet. In humid Florida yards, shaded paths can stay visually darker longer after rain.
In dry Arizona conditions, pale gravel or concrete may reflect more light and hide minor spacing flaws.
Curves and steps need tighter judgment
Straight, flat paths are forgiving. Curves, steps, grade changes, and uneven pavers are not. A 3-foot dark gap on a flat walkway may be mostly cosmetic. The same gap at a step, bend, or slope change is a real usability problem.
As a practical threshold, treat any dark zone over about 3 feet as a problem when it appears near steps, turns, edges, or elevation changes.
In those spots, spacing closer to 4–6 feet or a wider beam pattern may be more appropriate than the usual 6–8 foot starting range.
When the Problem Is Actually Power
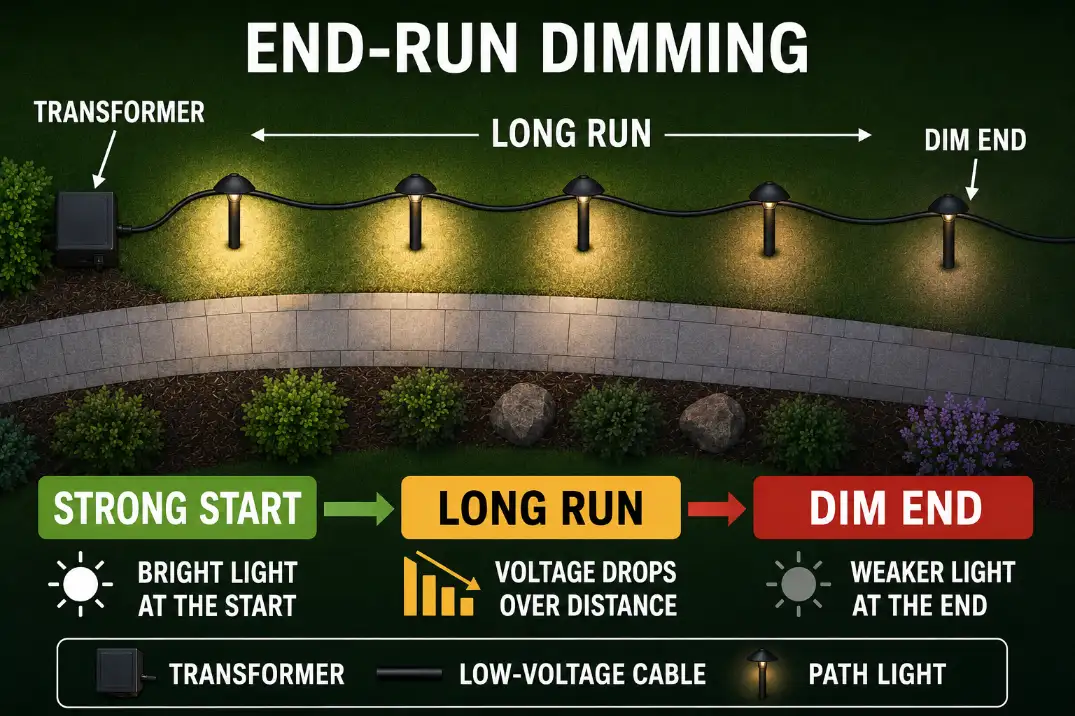
Voltage drop can make the far end darker
In low-voltage landscape lighting, fixtures near the transformer can look normal while the far end of the run looks weak. A 12-volt system that drops near 10.5 volts at the last fixtures may still work, but the light output can look noticeably softer, especially after more fixtures were added.
This pattern is different from a spacing problem. If every dark gap looks about the same, spacing and beam spread are more likely. If the first half of the path looks fine and the last 2–3 fixtures fade, power delivery deserves priority.
The guide on landscape lights getting dimmer after adding more fixtures fits this pattern especially well when the gaps appeared after expanding the system.
Cable layout can matter more than adding another fixture
A long daisy-chain run often favors the first fixtures and weakens the last fixtures. A better-balanced cable layout can reduce that difference. The routine fix stops making sense when you keep adding fixtures to the end of a run that is already underperforming.
For systems with uneven end-of-line performance, daisy chain vs hub landscape lighting explains why the wiring pattern can change the nighttime result.
How to Fix Dark Gaps Without Making the Path Harsh
Reposition at night, not in daylight
Do not adjust pathway lights in daylight and assume the result will work. Test after full dark, ideally at least 30 minutes after sunset. Move fixtures in small increments and watch the ground, not the fixture head.
Start with the simplest changes:
- Bring wide-spaced fixtures closer to 6–8 feet apart.
- Use 4–6 feet near steps, curves, or slope changes.
- Move fixtures 12–18 inches closer to the walking surface if the beam misses the path.
- Offset fixtures slightly instead of forming a perfect row.
- Trim plants that block the lower beam.
Choose wider distribution before higher output
A wider, softer fixture usually fixes dark gaps better than a brighter narrow one. For walking guidance, the goal is not to flood the path. It is to reduce sudden contrast changes.
A bulb upgrade stops making sense when the bright spots become more obvious but the spaces between fixtures stay dark. At that point, the problem is beam shape, spacing, surface absorption, or voltage—not raw brightness.
If the whole installation also feels visually awkward, pathway lighting problems and uneven walkway lights covers the broader pattern of poor rhythm, awkward spacing, and fixture placement conflicts.
Check wire gauge before expanding a weak run
If the path uses a long low-voltage run, wire size can decide whether the end fixtures perform properly. Longer runs and heavier fixture loads usually need thicker cable.
A 12-gauge cable often performs better over distance than 16-gauge cable, but the right choice depends on total wattage, run length, and transformer capacity.
When the far end of a path is visibly weaker, the guide on low-voltage landscape lighting wire gauge is worth checking before adding another fixture to an already struggling run.
When More Fixtures Are Actually the Right Fix
More fixtures make sense when the existing lights are evenly powered, correctly aimed, and still cannot overlap. That usually means the fixture spacing is too wide for the beam pattern or the path has too many transitions for the current layout.
Add fixtures when:
- gaps remain larger than about 3 feet after repositioning;
- each light performs evenly from start to end;
- plants and edging are not blocking the beam;
- the path has curves, steps, or grade changes;
- the current fixtures are already soft, not harsh.
Do not add fixtures just because the path “feels dark” from the porch or street. Walk the path at normal speed. If your feet disappear into shadow between fixtures, the gap is real.
If the path is visible but the lights look dotted, the problem may be rhythm and contrast more than safety.
Final Takeaway
Dark gaps between pathway lights are usually a beam overlap problem first, a brightness problem second, and a power problem when the gaps worsen toward the end of the run. More fixtures are not the first answer. Better overlap is.
Start with nighttime spacing, check whether the beam reaches the path, account for dark or wet surfaces, and test for voltage drop if the last fixtures are weaker than the first ones.
Add fixtures only when the existing lights are already aimed, powered, and distributed correctly.
For broader responsible outdoor lighting guidance, see DarkSky International.