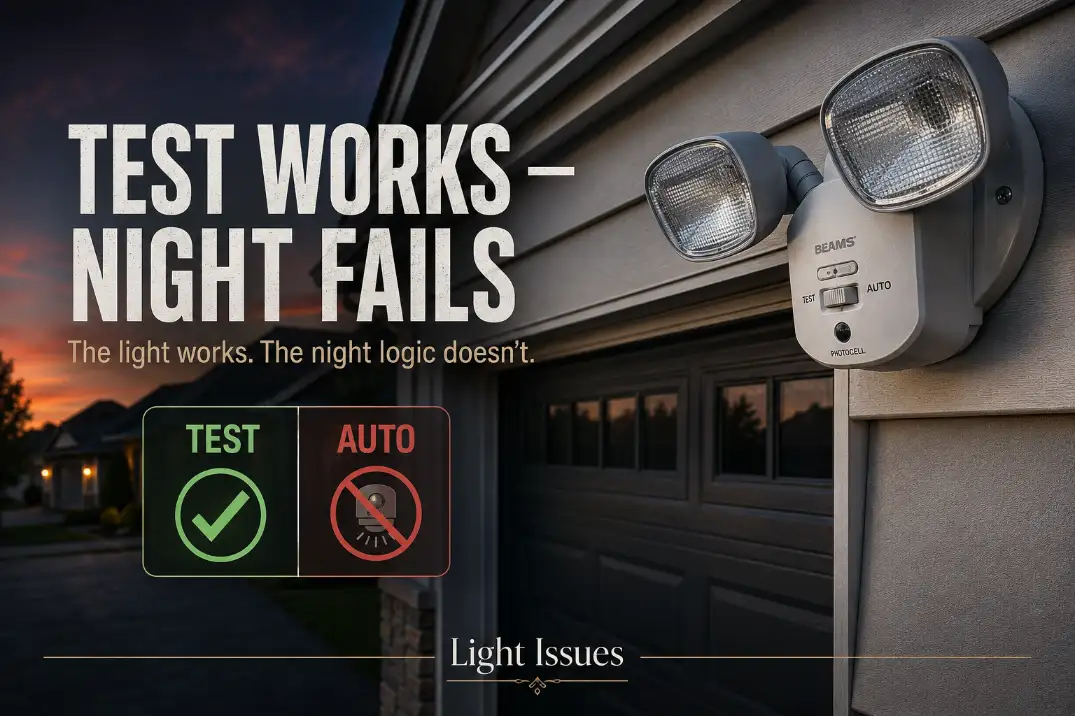
If an outdoor security light works in test mode but not at night, the light probably has power and the LEDs or bulbs are usually not the first thing to blame.
Test mode proves the fixture can turn on. It does not prove the photocell is allowing nighttime operation, the control is in AUTO, or the motion sensor is aimed correctly for real movement.
Start with the checks that actually separate a setup problem from a failing sensor: set the control to AUTO, cover the photocell for 60–90 seconds, and walk across the detection zone at about 10–15 ft from the fixture.
Do not walk straight toward it. If the light works only in TEST, the problem is usually daylight lockout, manual override confusion, sensor aim, or a failing control module.
That makes this different from a dead outdoor light. A dead fixture will not light in any mode. This one can light, but its normal night-control path is not completing.
What Test Mode Actually Proves
It proves the lamp circuit can work
Test mode is mainly an aiming and setup feature. On many motion security lights, it shortens the delay, allows daytime testing, and makes the fixture respond faster than it would in normal operation.
That is why bulb replacement often wastes time here. If the floodlights come on repeatedly in TEST, the fixture has already shown that the lamp circuit, LED board, or bulb sockets can still energize.
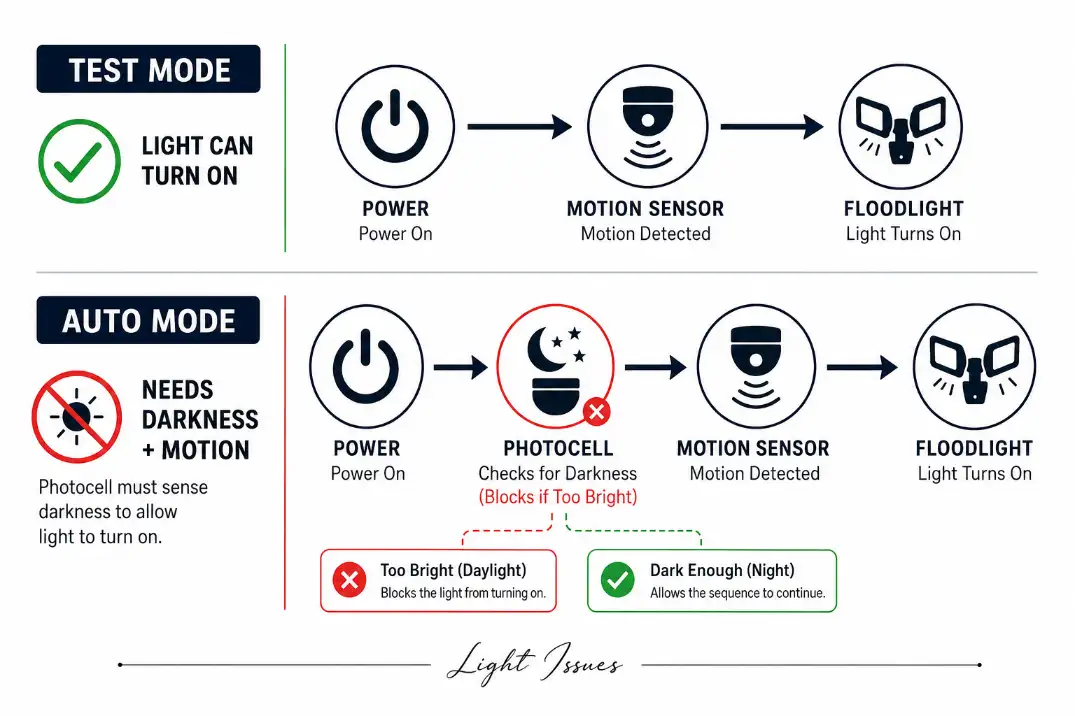
It does not prove the photocell is allowing night operation
Normal night mode depends on the photocell, sometimes called the dusk sensor or light sensor. If that small sensor window still sees enough light, the fixture may stay locked out even though the driveway looks dark.
A healthy fixture usually reacts after the photocell sees darkness for about 30 seconds to 2 minutes. If you fully cover the photocell for 3 minutes and AUTO mode still will not respond, simple light interference becomes less likely and a control or sensor fault moves up the list.
It does not prove AUTO mode is selected correctly
Many fixtures have confusing controls: TEST, AUTO, ON-TIME, RANGE, SENS, LUX, DUSK, DualBrite, Full-Brite, or manual override. A quick wall-switch flip can also change modes on some models.
That matters because a slow reset and a quick toggle are not the same action. Turning the switch off for 30–60 seconds is a reset attempt. Flipping it off and back on quickly may intentionally place some fixtures into manual behavior.
If the fixture behaves normally during setup but refuses to operate after sunset, the closest related failure pattern is Motion Sensor Light Won’t Turn On at Night, because the issue is usually night-control logic rather than total fixture failure.
Quick Diagnostic Checklist
Use this sequence before replacing parts:
- Set the mode to AUTO, not TEST or manual override.
- Set ON-TIME to 1 minute while diagnosing.
- Set SENS or RANGE to the middle position.
- Cover the photocell completely for 60–90 seconds.
- Walk across the detection zone at 10–25 ft from the light.
- Reset power by turning the wall switch off for 30–60 seconds, then back on once.
- Check whether porch lights, streetlights, windows, or reflective siding shine into the photocell.
Do not start by repeatedly flipping the switch. That often creates more confusion, especially on fixtures that use the wall switch to toggle manual override.
The Control Labels That Usually Cause Trouble
This is where many homeowners lose time. The label on the fixture may not say “photocell problem,” but the setting can still block normal night operation.
| Control label | What it usually controls | Best diagnostic setting | Mistake it can cause |
|---|---|---|---|
| TEST | Setup mode for aiming | Use briefly, then leave TEST | Fixture never enters normal AUTO behavior |
| AUTO | Normal motion-at-night operation | Select after testing | Light works in TEST but not at night |
| ON-TIME | How long the light stays on | 1 minute | Long delay makes testing confusing |
| LUX / DUSK | Darkness threshold | Adjust darker/lower if needed | Sensor thinks it is still daytime |
| SENS / RANGE | Detection distance | Middle setting first | Too low misses motion; too high creates false triggers |
| DualBrite / Full-Brite | Low-level dusk lighting | Turn off while diagnosing | Makes symptoms harder to read |
The most important setting is not always the one people touch first. Sensitivity matters, but if the photocell is locked out by nearby light, increasing sensitivity will not help.
Most Likely Causes, in the Right Order
1. The photocell is being fooled by local light
This is the most common cause when TEST works but AUTO does not. The yard may look dark, but the photocell may be seeing a porch lamp, garage coach light, streetlight, window reflection, or light bouncing off white siding.
Cover the photocell with opaque tape, cardboard, or your thumb. Wait 90 seconds, then walk across the sensor zone. If the light now works, the fixture is not dead. It is being told that night has not arrived.
This is especially easy to miss on light-colored stucco, snowy northern driveways, or homes with bright soffit lighting. The sensor does not judge the whole yard. It only reacts to brightness at its small window.
If your fixture works during the day or setup but changes behavior after dark, compare it with Outdoor Lights Working During the Day but Shutting Off After Dark, because that pattern often points to control conflict instead of a bad bulb.
2. The fixture is stuck in the wrong mode
A fixture left in TEST may not behave the way you expect after dark. A fixture in manual override may ignore motion logic. A dusk-to-dawn mode may behave differently from motion-only AUTO mode.
The clean reset is simple: turn the wall switch off for 30–60 seconds, turn it back on once, set the fixture to AUTO, and wait 1–2 minutes before testing. Do not flick the switch several times. On some lights, that is a command, not a reset.
3. The motion sensor is aimed for the wrong movement
Motion sensors usually detect sideways movement better than movement coming straight at the fixture. In TEST, people often stand close, wave a hand, and assume the sensor is fine. At night, the real walking path may be outside the strongest detection zones.
For most driveway and entry fixtures, aim for reliable detection at 10–30 ft from the wall. Walk left to right across the sensor view. If the light catches crossing movement but not direct approach, the sensor is working; it just needs better aim.
Hot Arizona evenings can reduce the temperature difference between a person and the background, making passive infrared detection less crisp. In cold northern winters, detection may be stronger, but old gaskets and stiff sensor housings can expose separate moisture or age problems.
4. The timer and sensitivity settings are masking the result
A timer set to 10 or 20 minutes can make testing feel random. Put ON-TIME near 1 minute until the light behaves predictably.
Sensitivity should start in the middle, not at maximum. Too much range can catch cars, branches, or warm air movement, then leave the fixture inside a delay period before your real test. Too little range can miss someone walking at the edge of the driveway.
Pro Tip: Make one adjustment at a time, then retest for at least 60 seconds. Changing LUX, SENS, and ON-TIME together makes it hard to know what actually fixed the light.
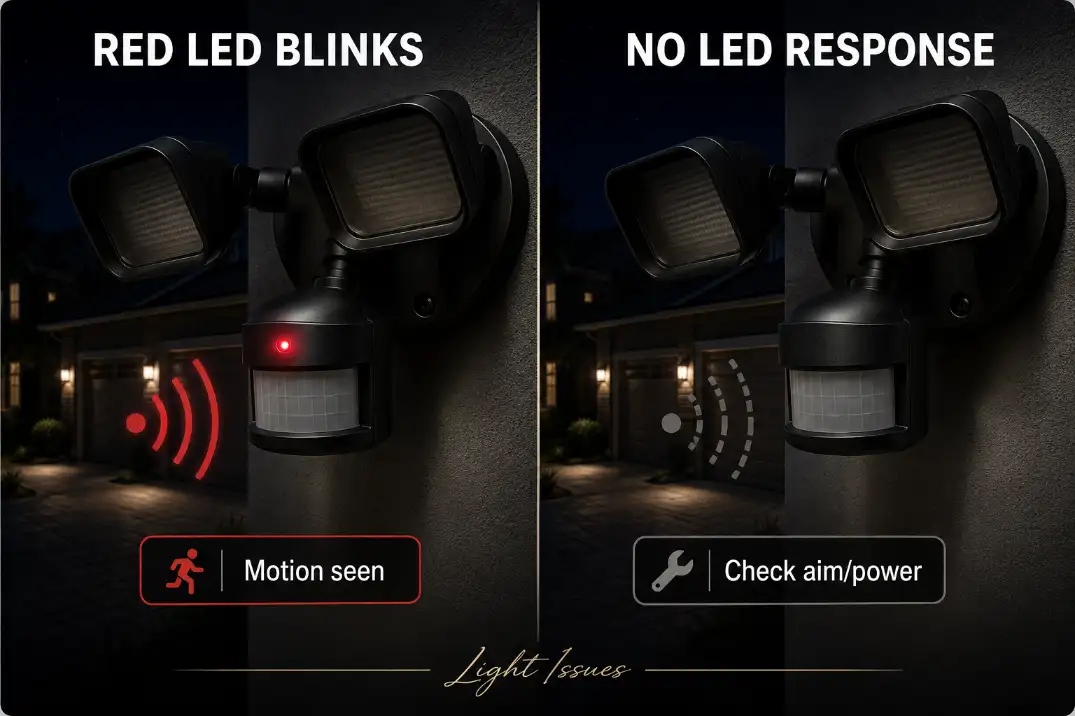
If the Red Sensor Light Blinks but the Floodlights Stay Off
This symptom is useful because it separates motion detection from light output. If the small red LED blinks when you move, the sensor is probably seeing motion. In that case, poor aim is less likely than a lockout or output problem.
Red LED blinks, but lamps stay off
The motion side is responding. Look next at the photocell, AUTO setting, manual override, relay, or control board. Cover the photocell for 2–3 minutes and test again.
No red LED response at all
The sensor may not be seeing movement, may be aimed too high, may have very low sensitivity, or may not be powered correctly. Recheck reset, mode, and sensor aim before assuming the fixture is bad.
Light works in TEST only
This is the classic pattern: the fixture can light, but normal night operation is being blocked. Photocell interference and wrong mode deserve attention before wiring or replacement.
If the fixture turns on and off repeatedly instead of staying inactive, that is a different behavior. Outdoor Motion Light Turning On and Off is a better match for cycling, false triggers, and feedback from reflected light.
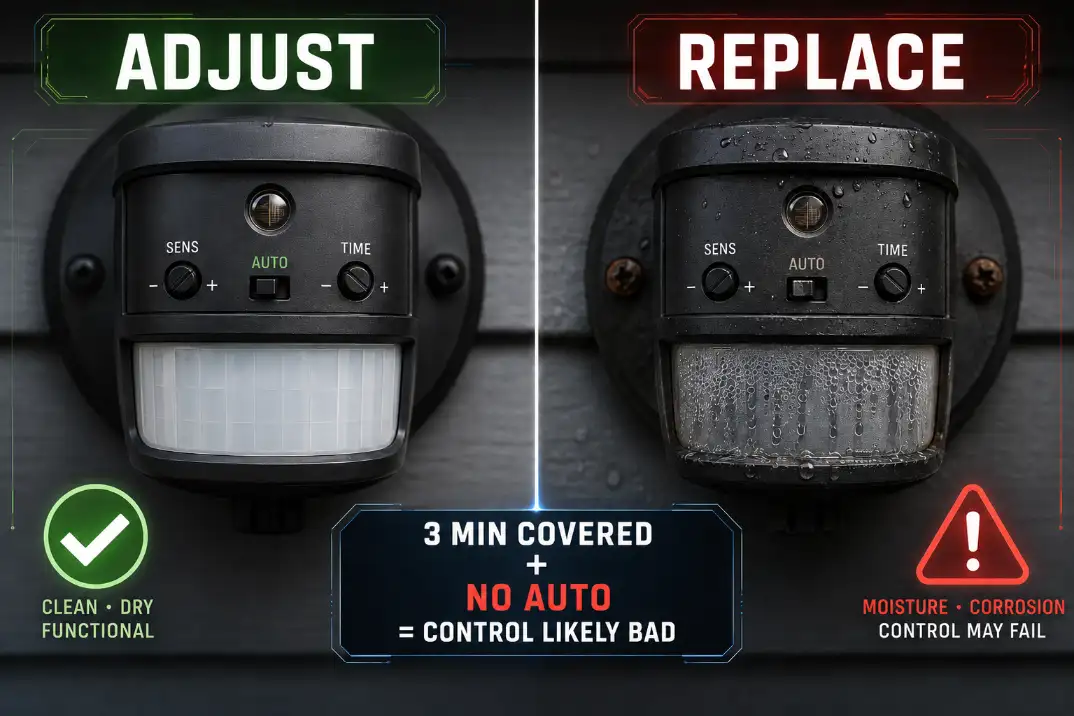
When Adjustment Stops Making Sense
At some point, more tweaking is not diagnosis anymore. Replace the sensor head or fixture when all four are true:
- TEST mode turns the light on reliably.
- AUTO mode does not work at night.
- The photocell has been fully covered for 3 minutes.
- A proper 30–60 second reset and cross-zone walk test both fail.
For fixtures with replaceable bulbs, this does not automatically mean the bulbs are bad. If they light in TEST, they can light. For integrated LED security lights, the same logic applies: if the LED board works in TEST but not AUTO, the control electronics are the stronger suspect.
On many sealed LED fixtures, replacing the whole fixture is more practical than chasing a separate sensor board. That is especially true when the housing shows moisture, corrosion, or brittle gaskets.
When Moisture or Wiring Moves Up the List
Wiring is not the first suspect when TEST mode works cleanly. But it becomes more likely if the problem changes after rain, cold nights, irrigation spray, or high humidity.
Look for condensation behind the sensor lens, rust near screws, swollen gaskets, or water trails below the fixture base. In humid Florida conditions or wet Midwest spring weather, moisture can affect the low-voltage control board before the lamp circuit fails completely.
If the fixture becomes unreliable after wet weather, Moisture Damage in Outdoor Lighting Explained is the more useful next step because the failure has moved beyond simple mode setup.
Do not open the fixture, junction box, or sensor housing while power is on. If diagnosis requires exposing wiring, checking voltage, or replacing a hardwired unit, stop and use a qualified electrician.
The Practical Bottom Line
A security light that works in TEST but not at night is usually not dead. It is usually being blocked by the normal night-control path: photocell darkness, AUTO mode, manual override state, or motion detection geometry.
The best order is simple: reset the fixture once, select AUTO, set ON-TIME to 1 minute, cover the photocell for 60–90 seconds, and walk across the detection zone at 10–25 ft. That sequence solves or identifies most cases in under 10 minutes.
The fix that wastes the most time is replacing bulbs or repeatedly flipping the wall switch when TEST mode already proves the light can turn on.
The condition people underestimate is light hitting the photocell. The condition people overestimate is how much the darkness of the whole yard matters. What matters is what the sensor sees at its own window.
If AUTO still fails after the photocell is fully blocked for 3 minutes, the reset is done correctly, and crossing motion is tested properly, replacement of the sensor or fixture is usually the next sensible move.
For broader official electrical safety guidance, see the Consumer Product Safety Commission.